Category Archives: Life of a Sherman crewman

Post # 68 The Chieftain’s Hatch does the M4A1, we review it.

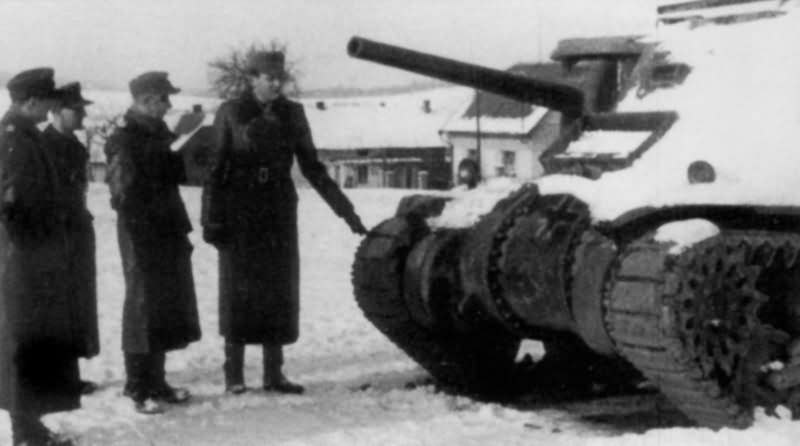
Post # 68 The Chieftain’s Hatch does the M4A1, we review it: A great Hatch!

The video comes in two parts.

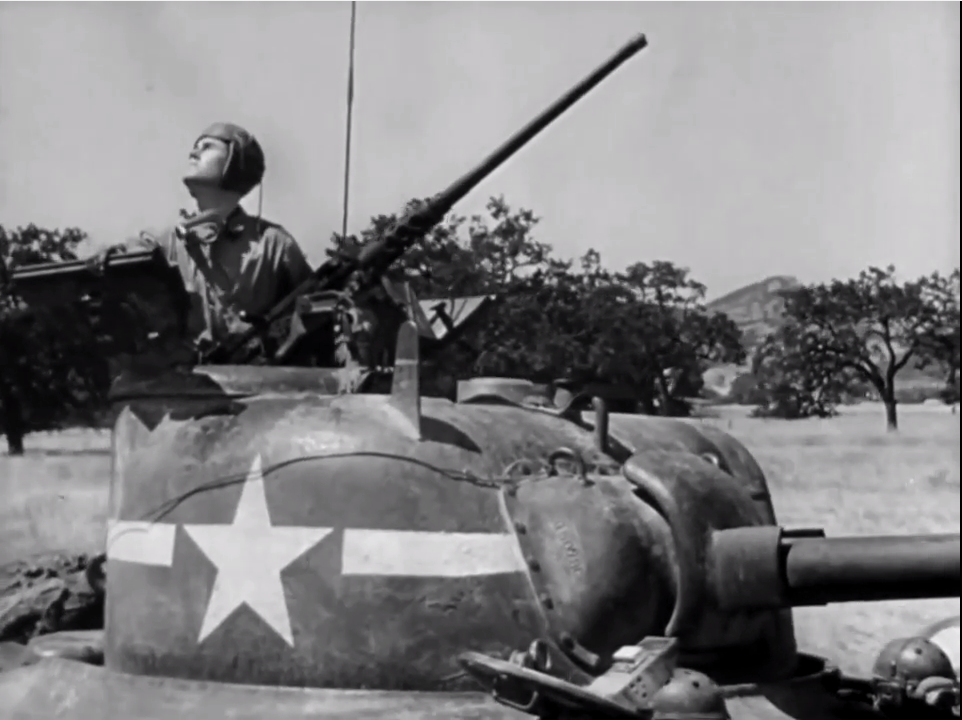
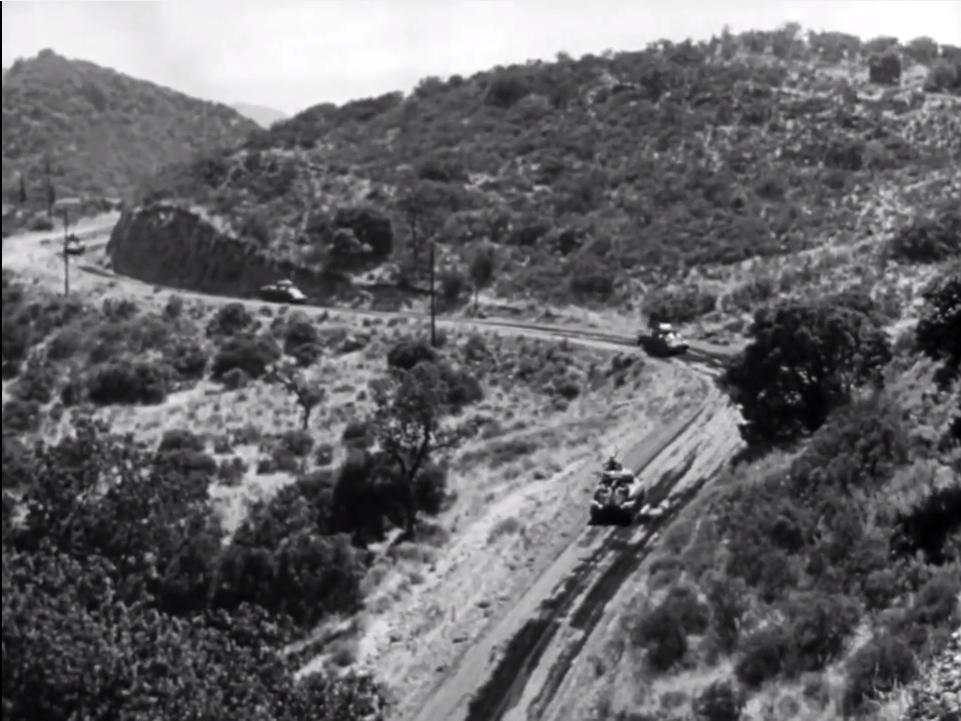
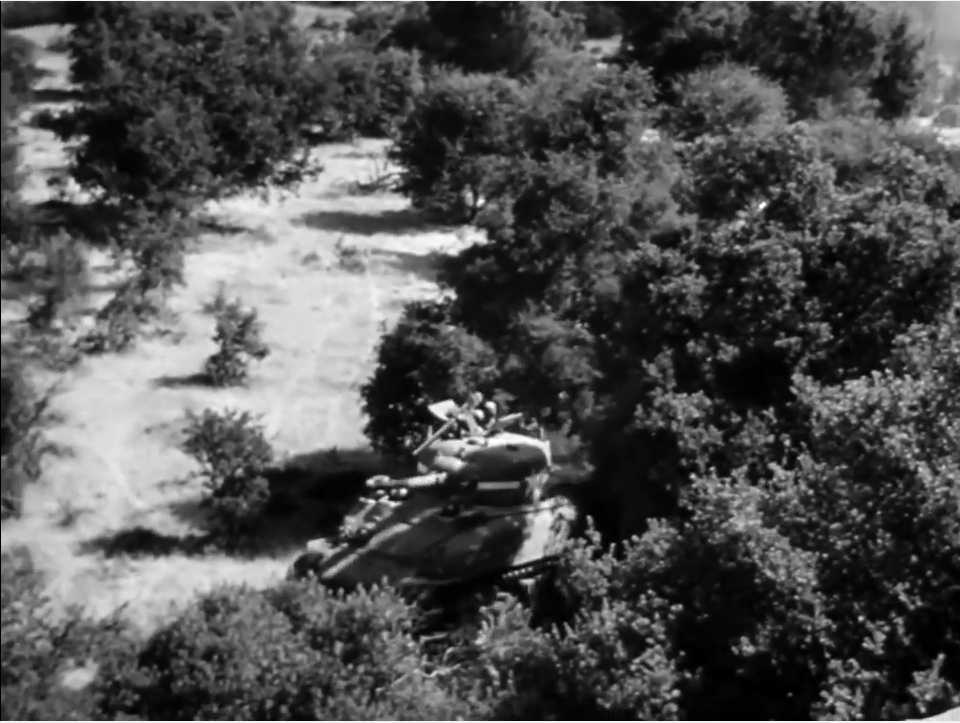
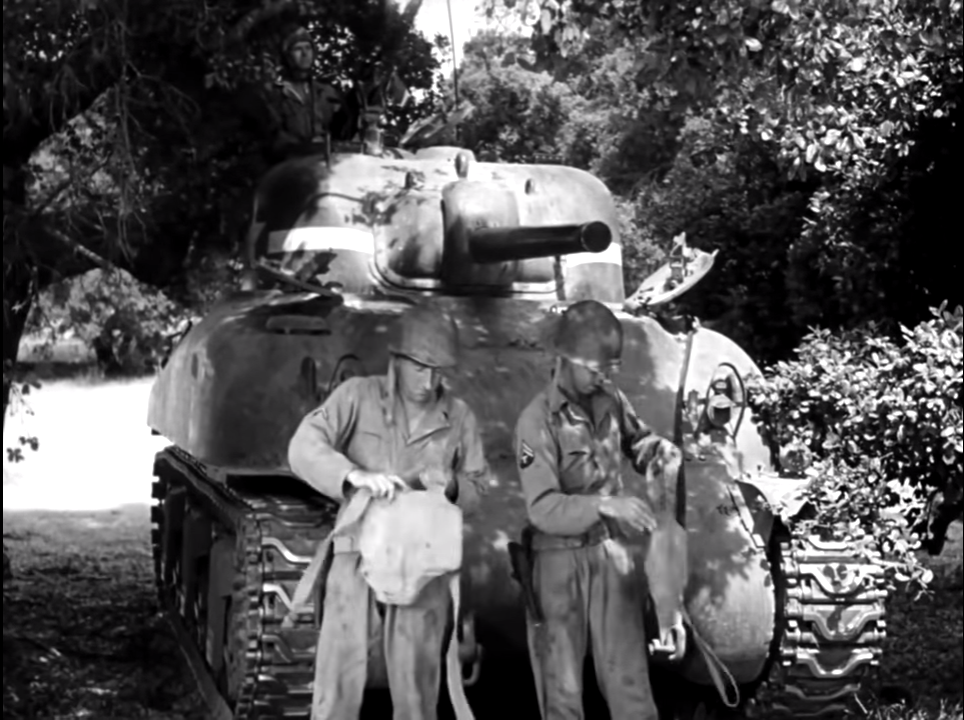
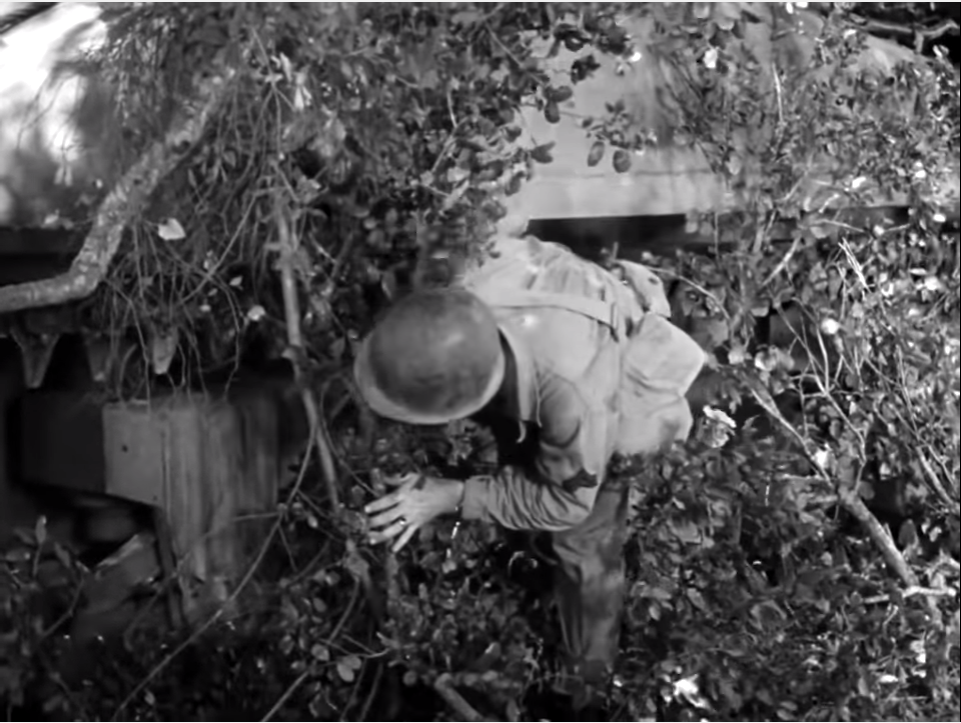
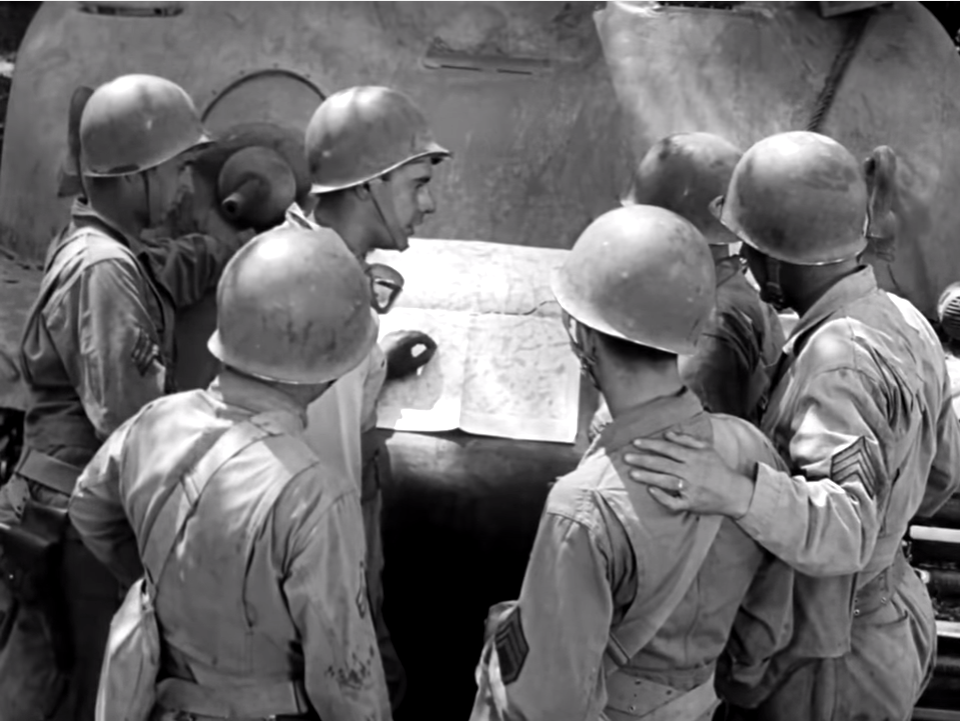
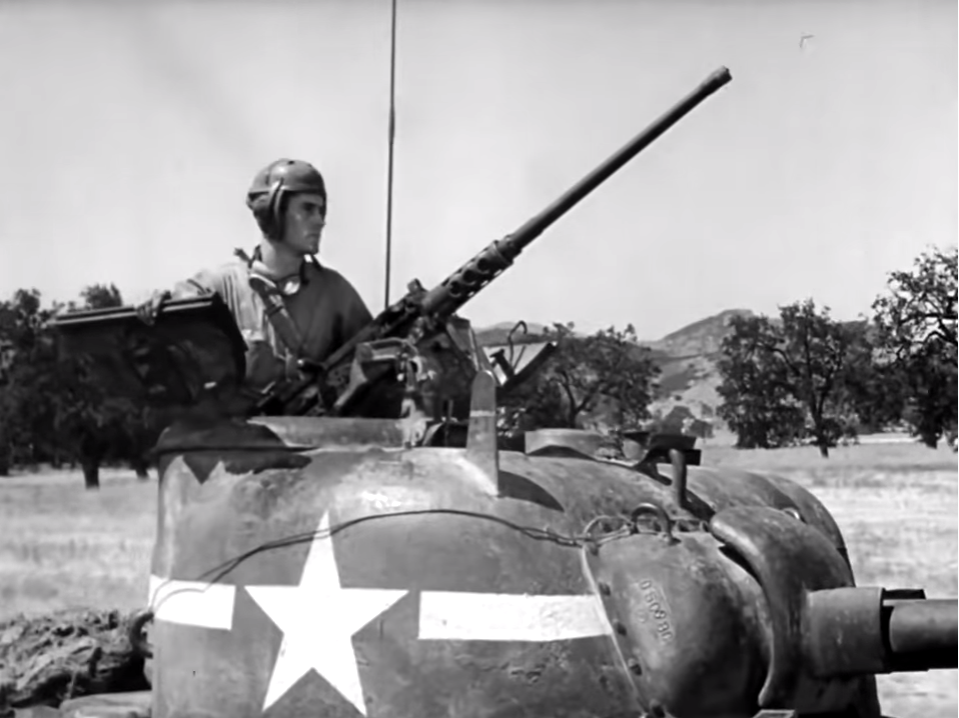
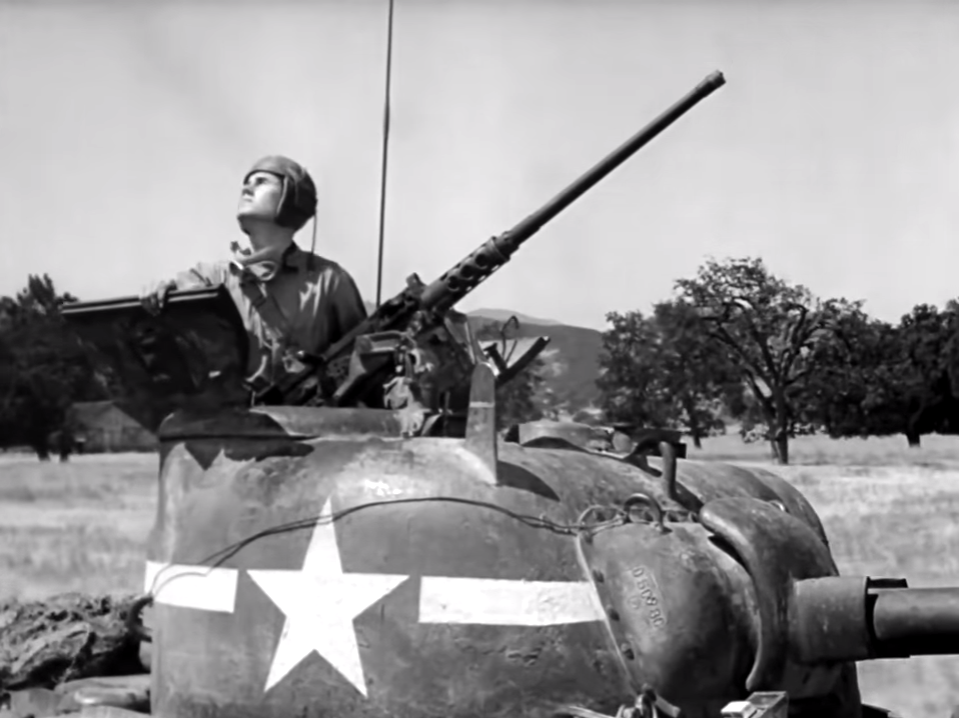
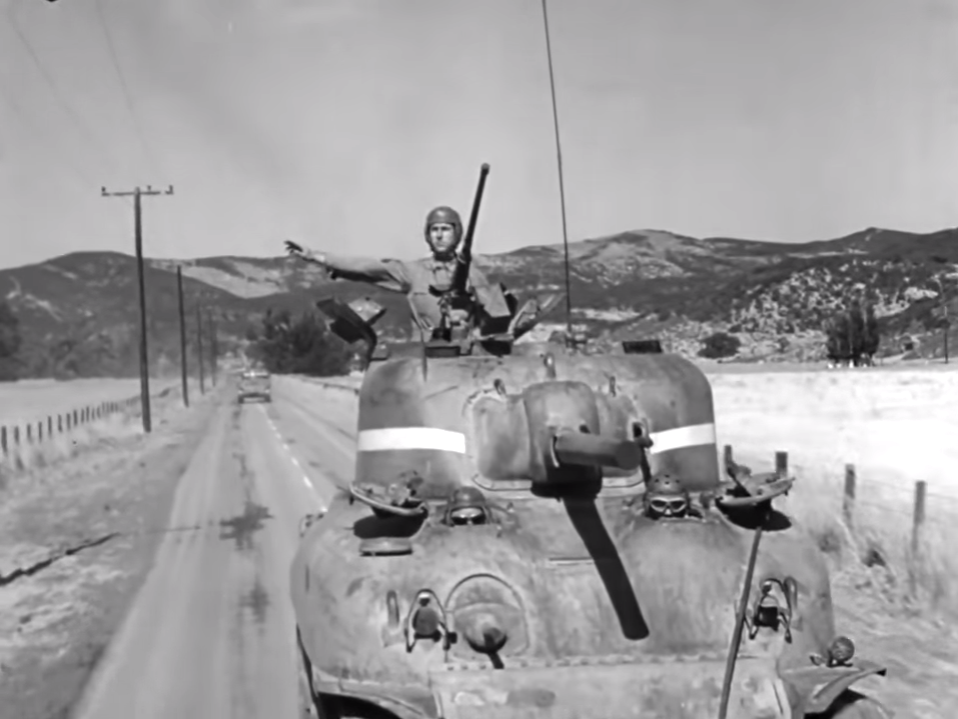
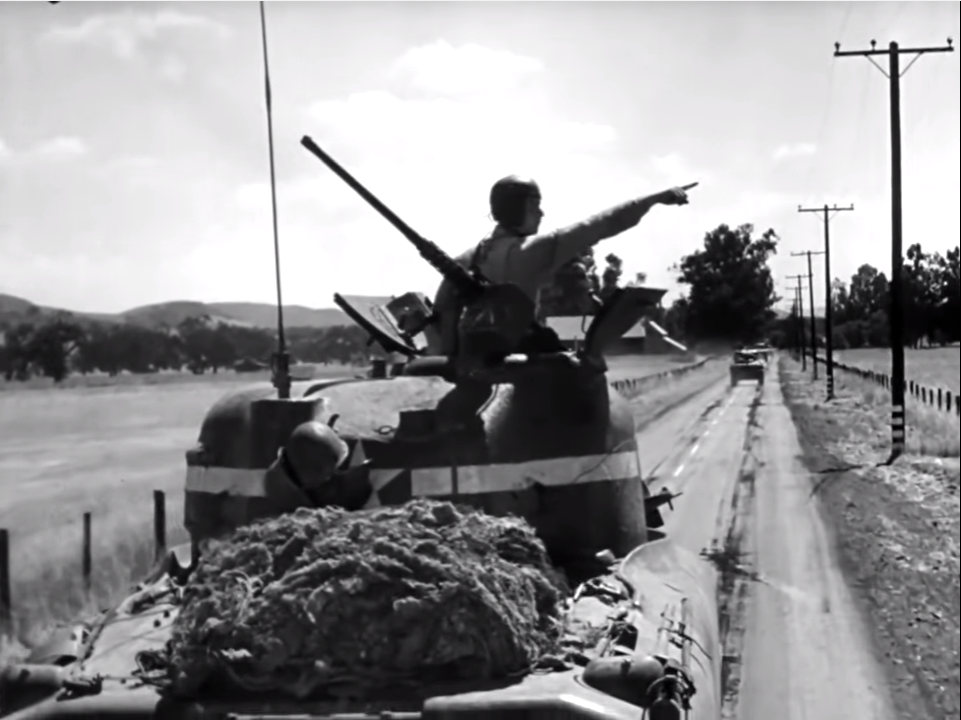
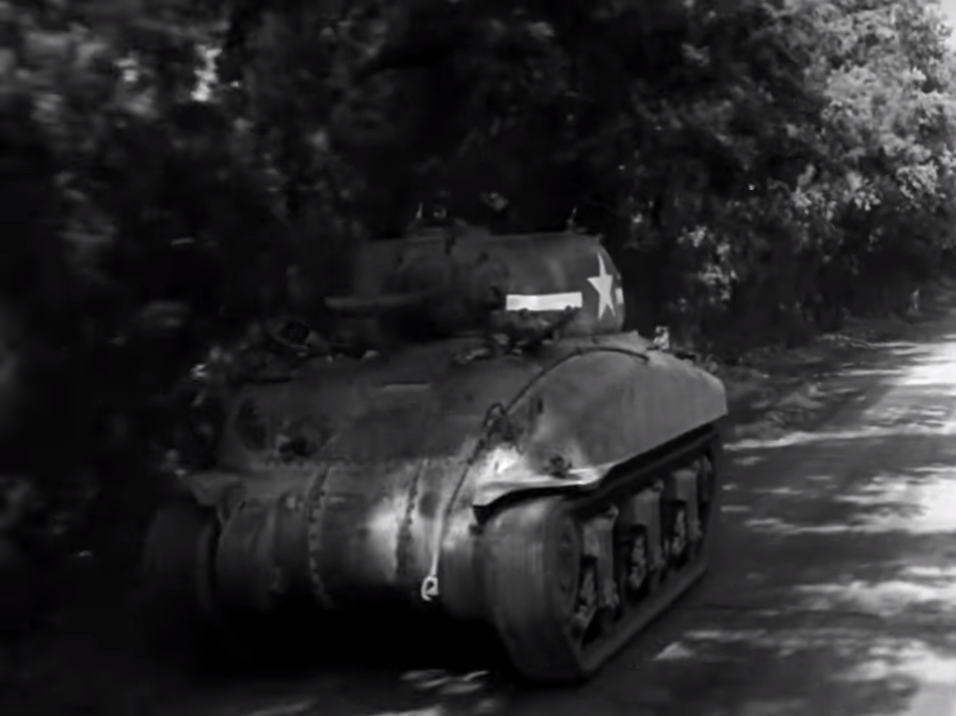
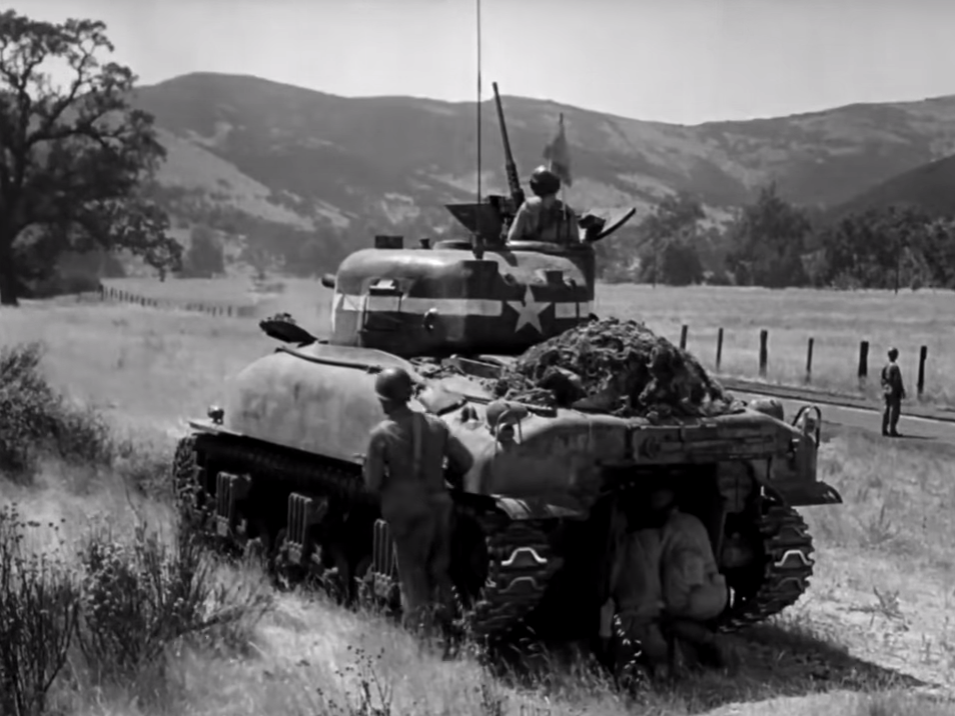
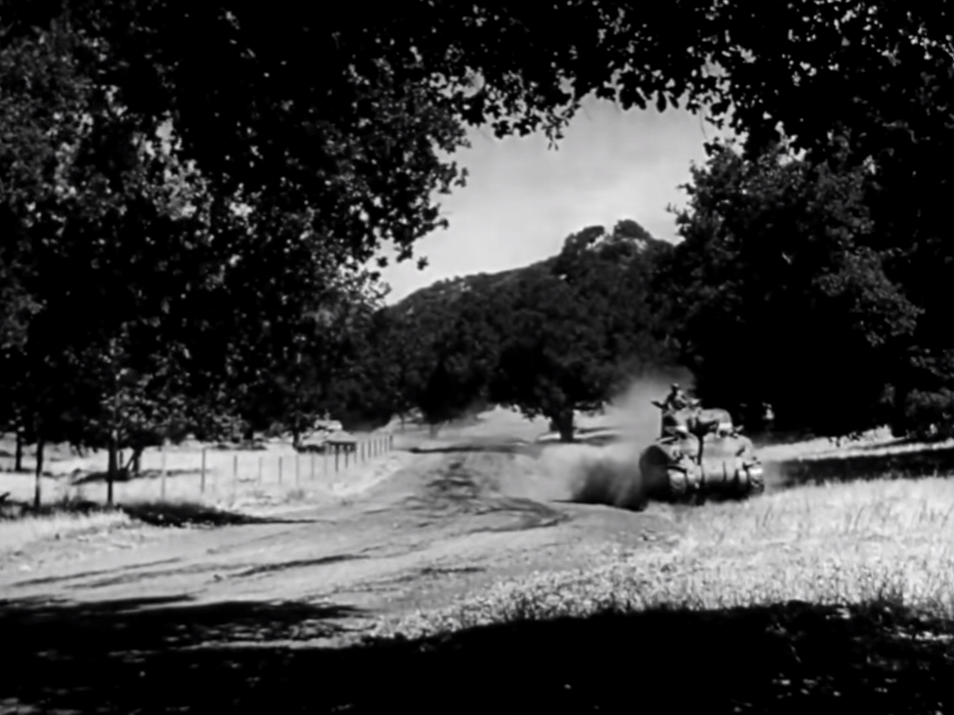
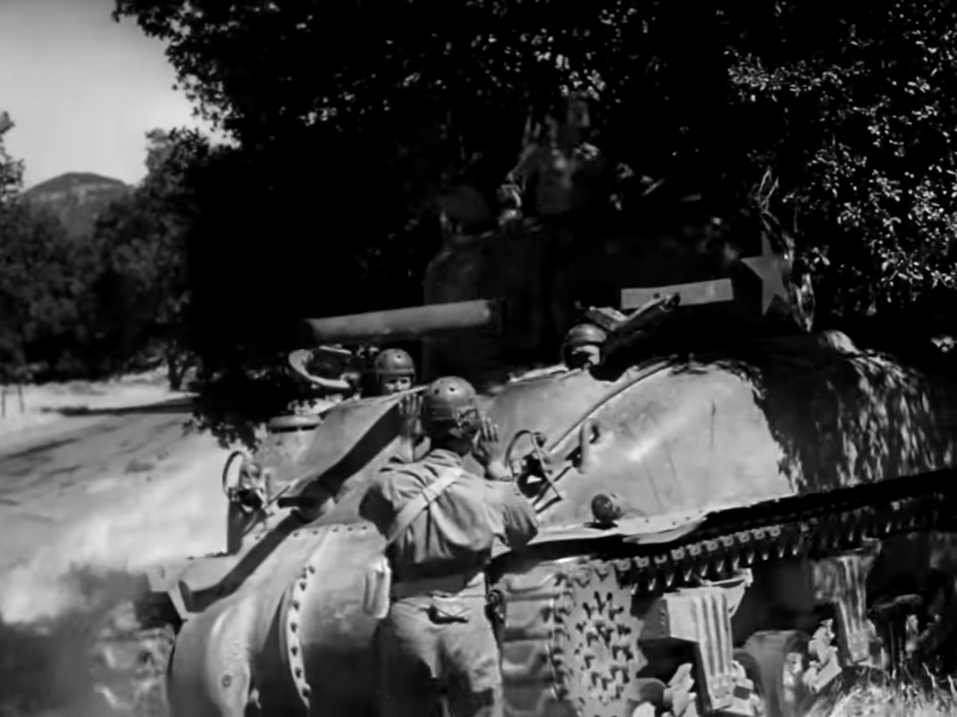
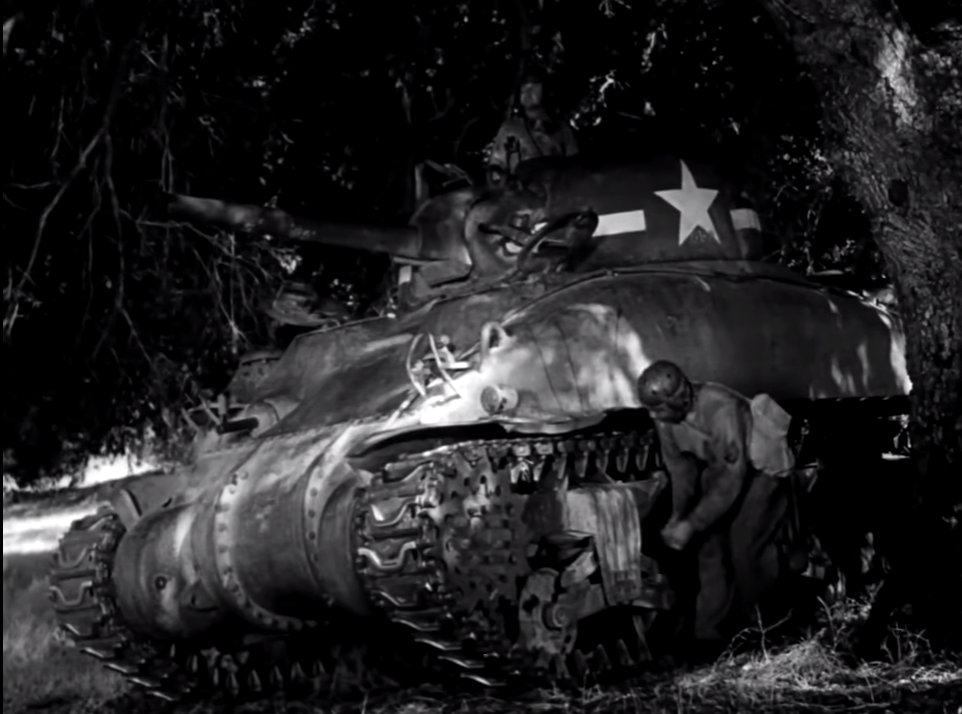
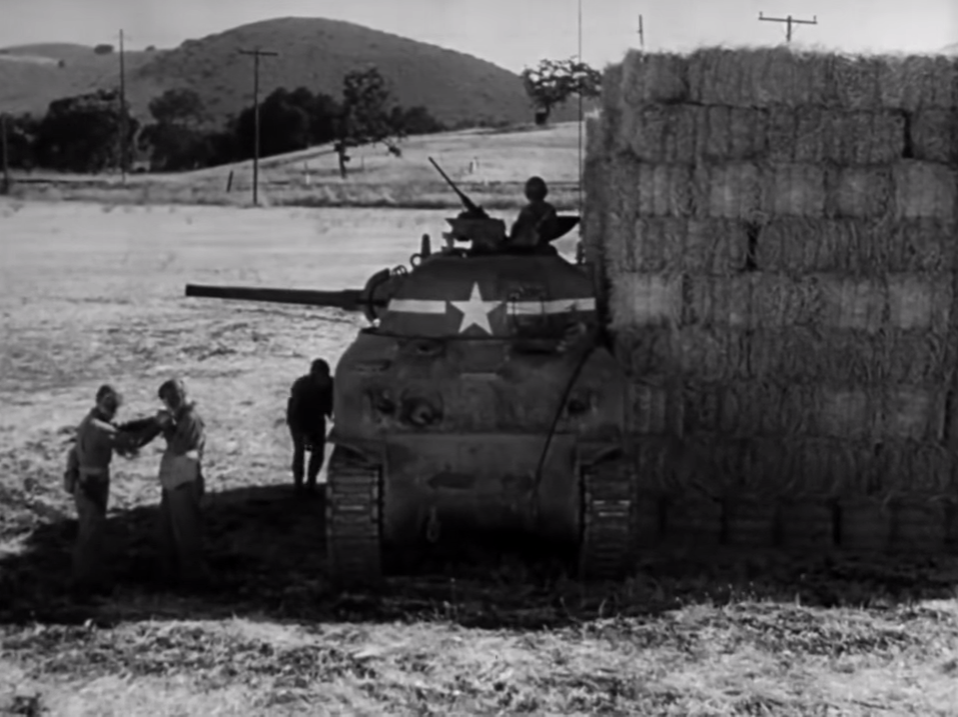
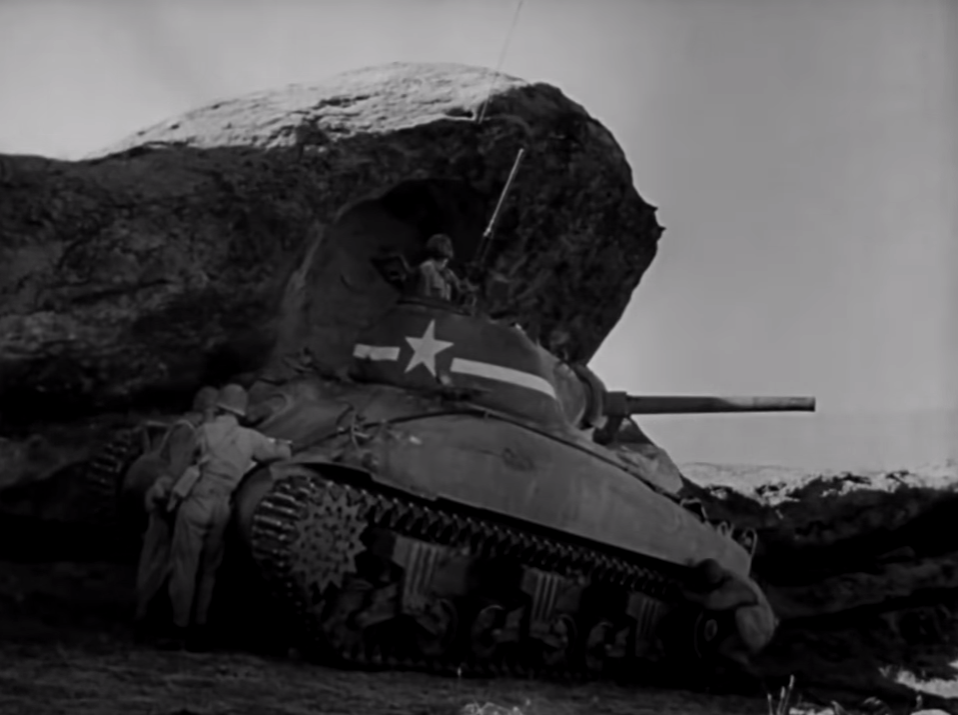
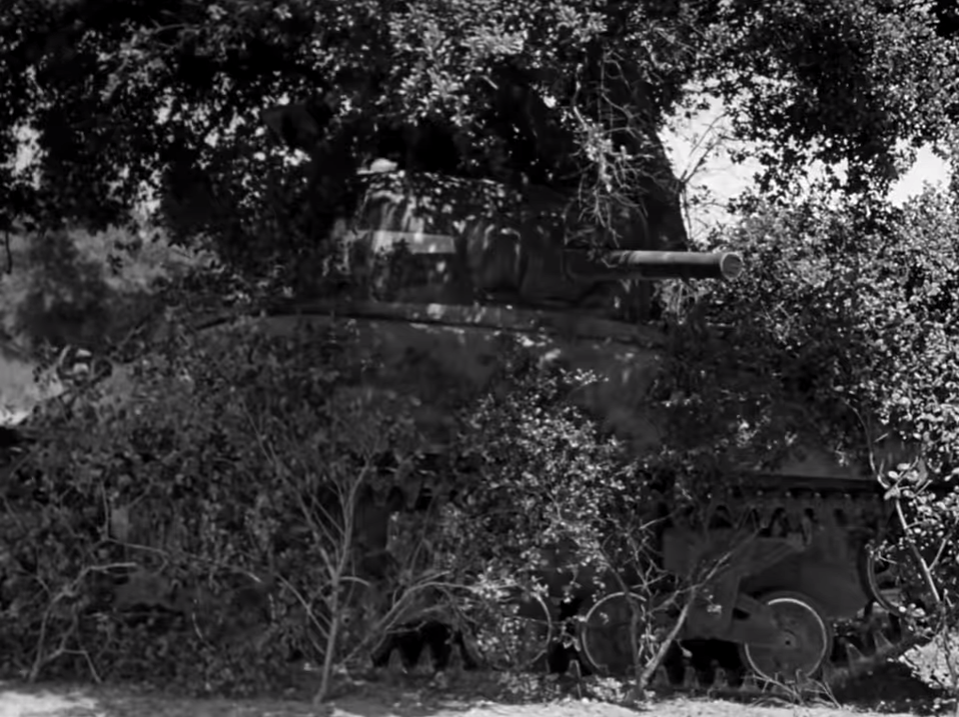
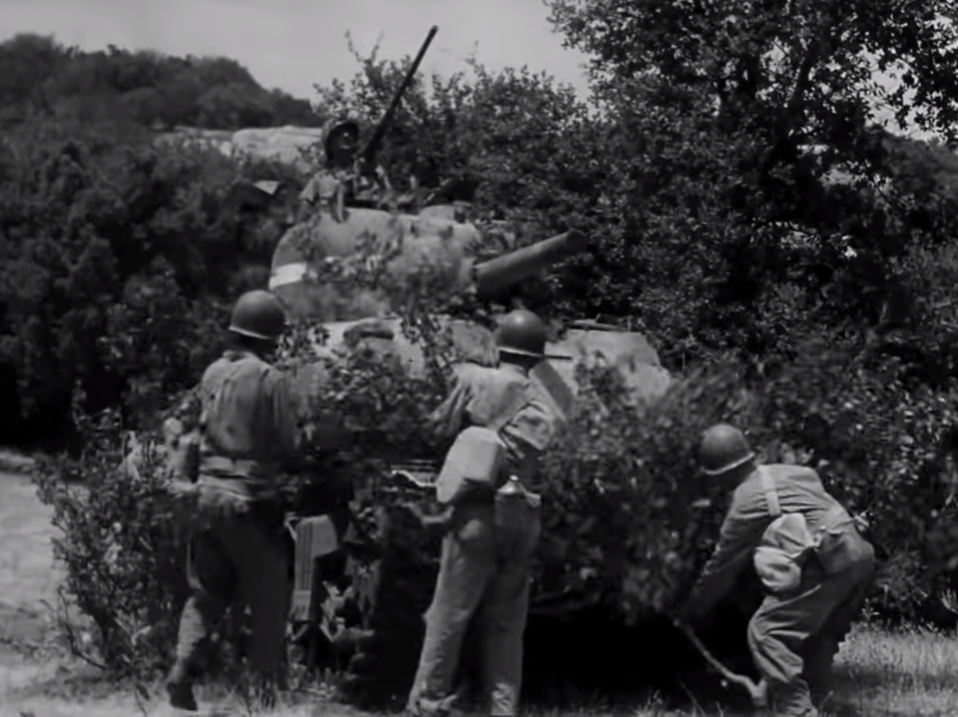
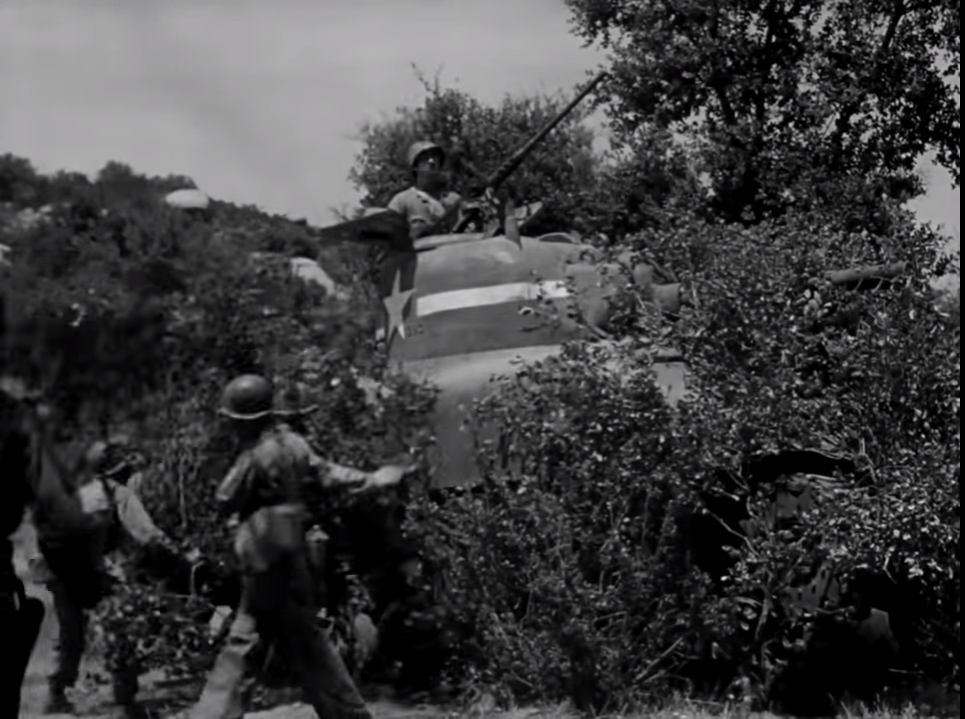
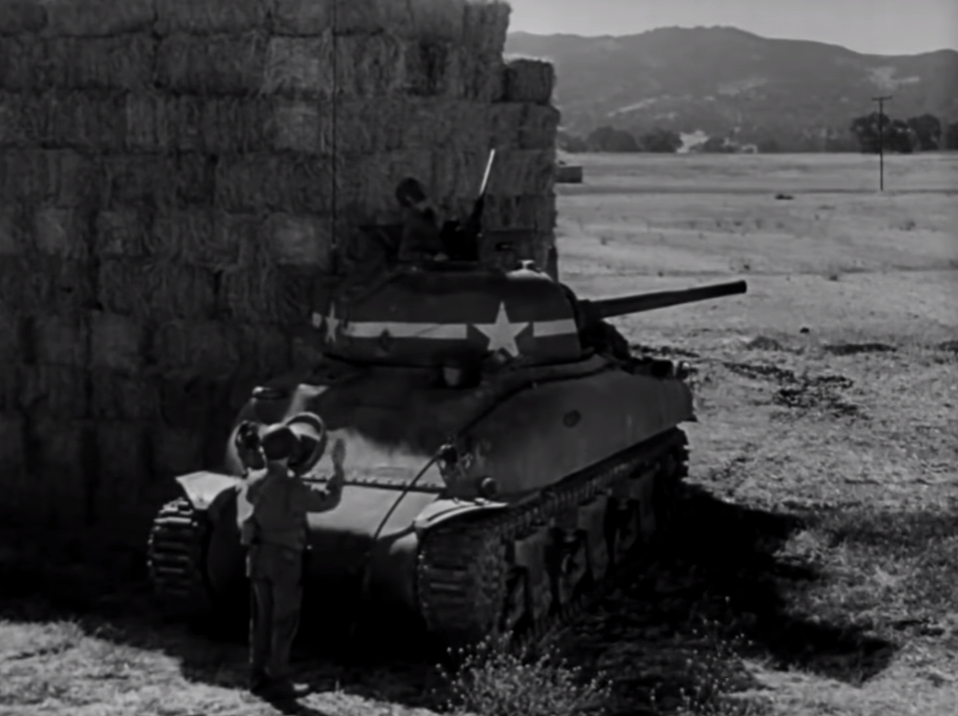
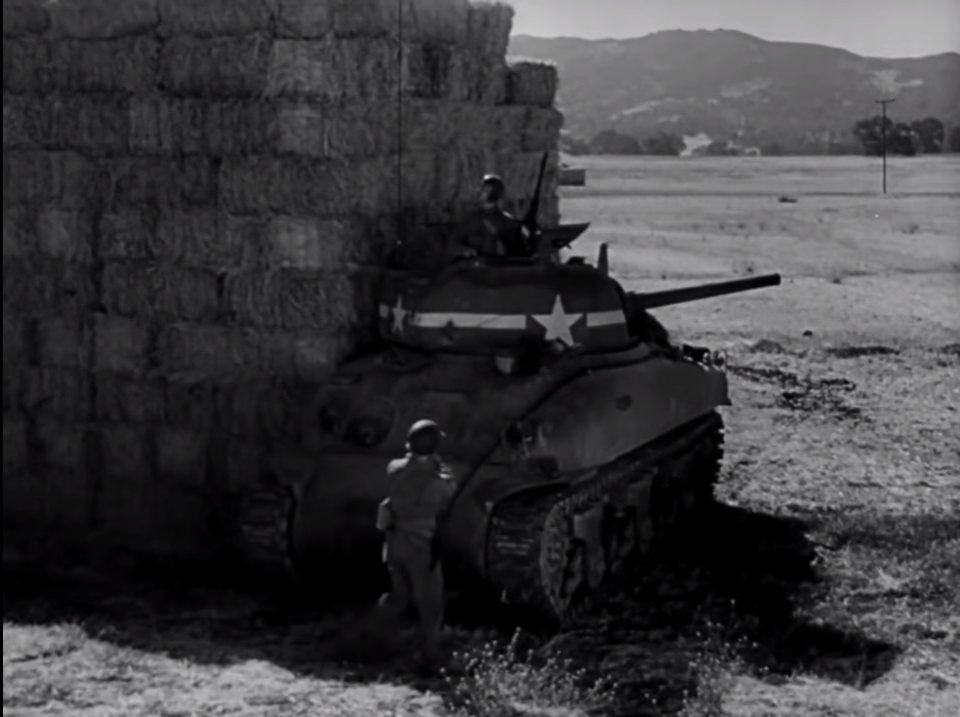
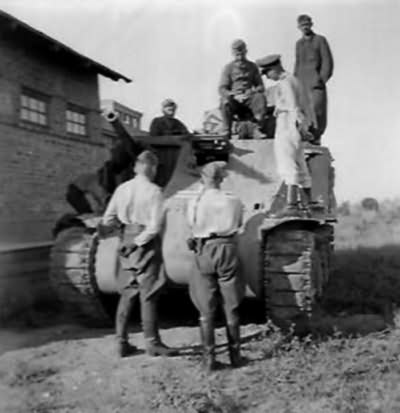
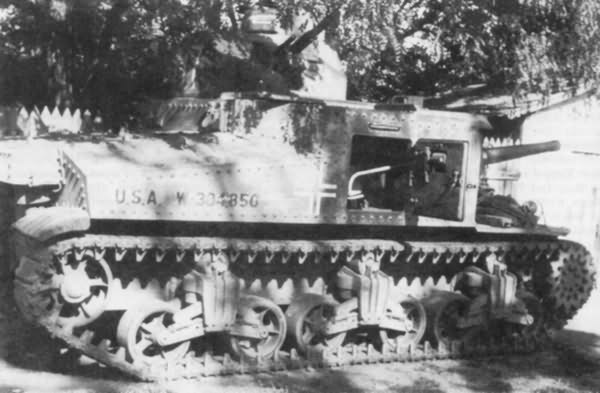
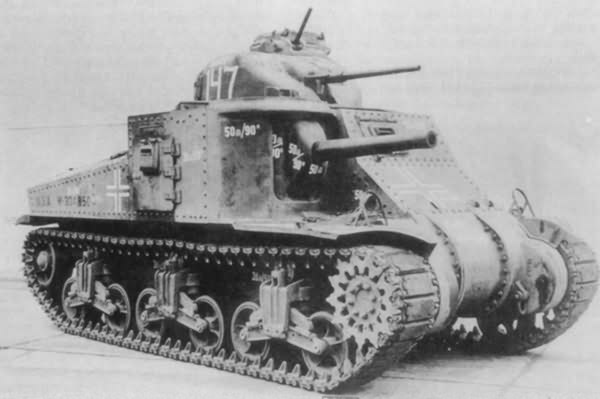
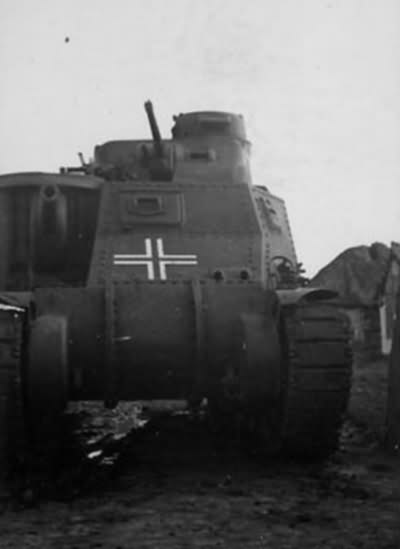
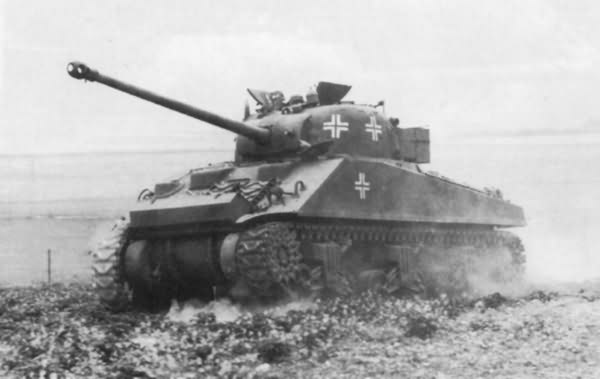
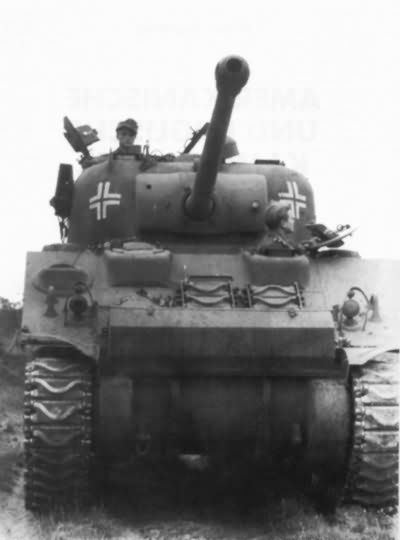
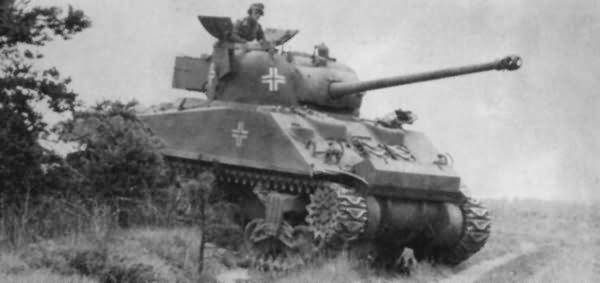
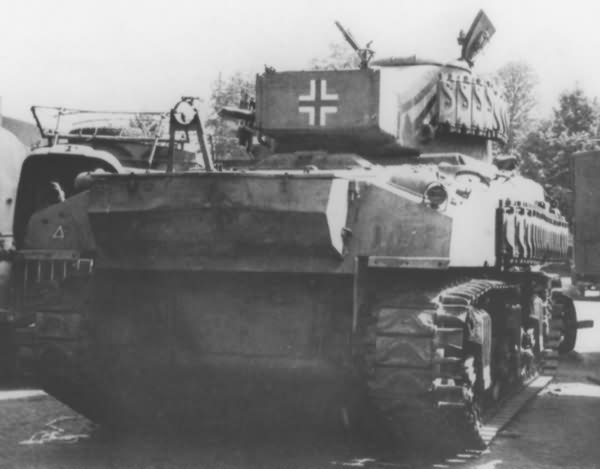
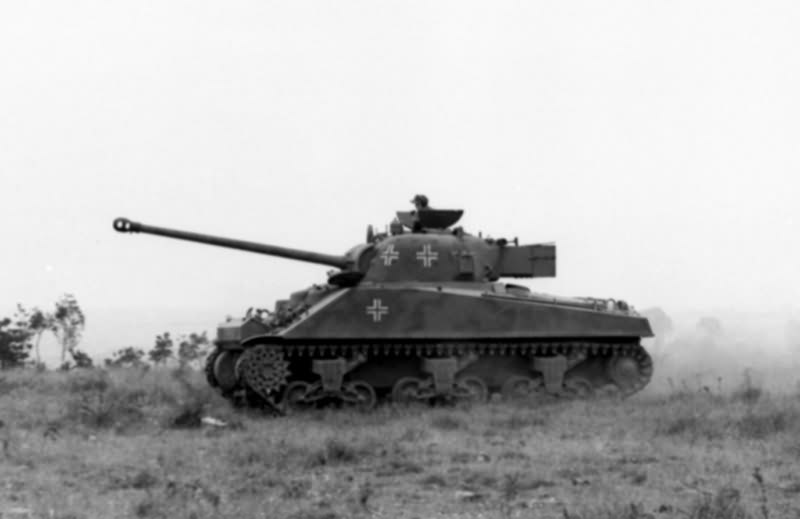
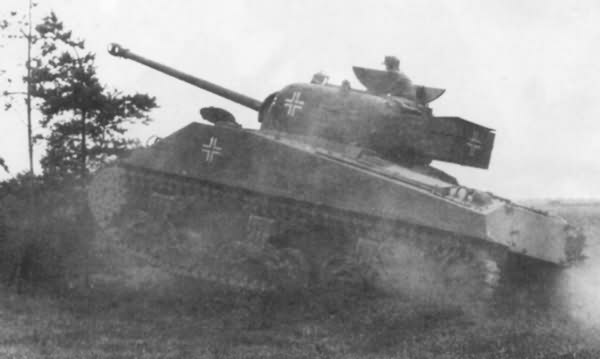
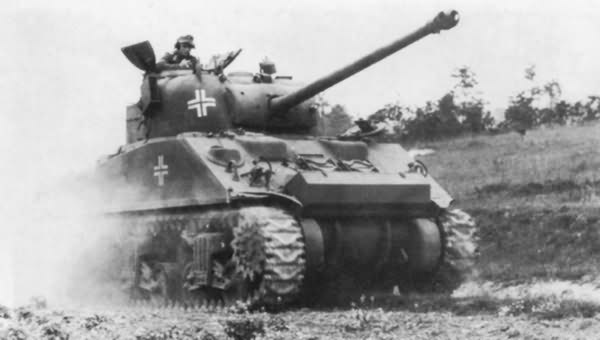
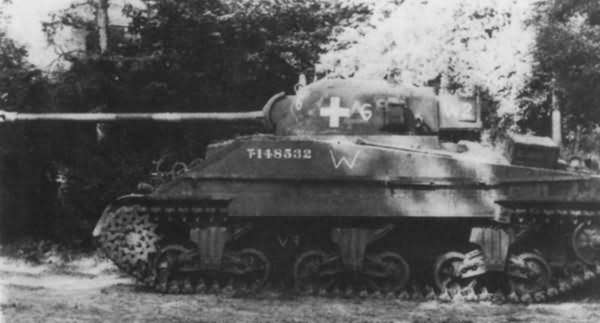
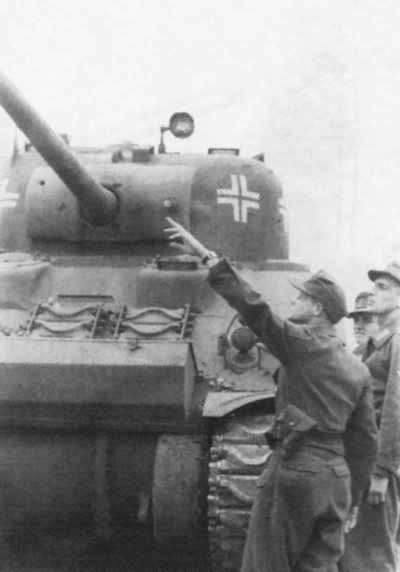
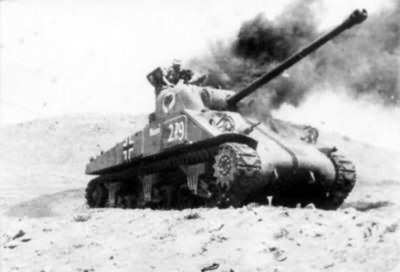
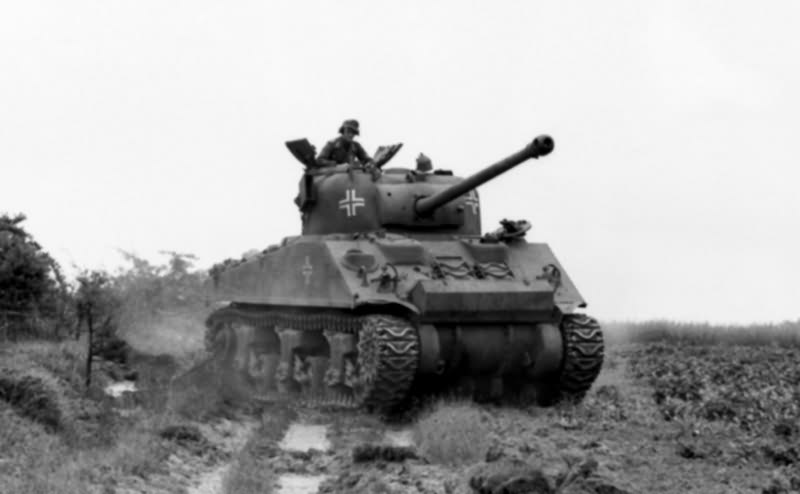
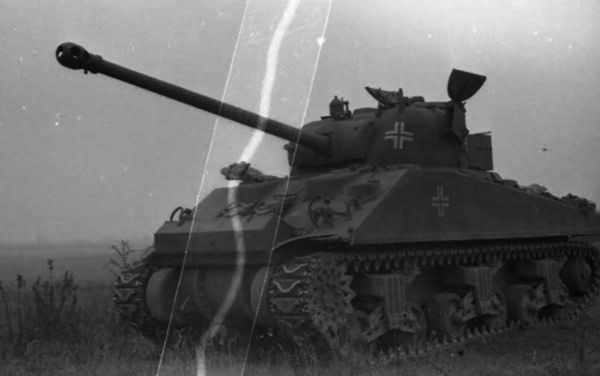
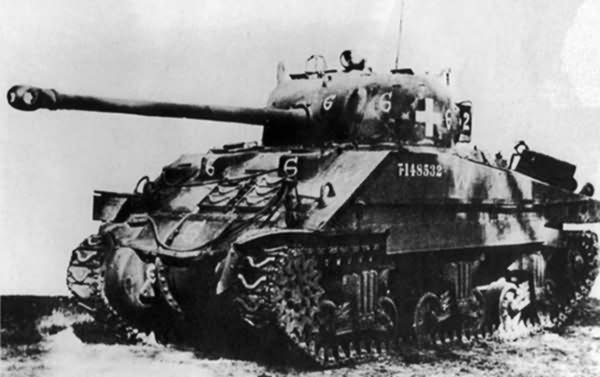
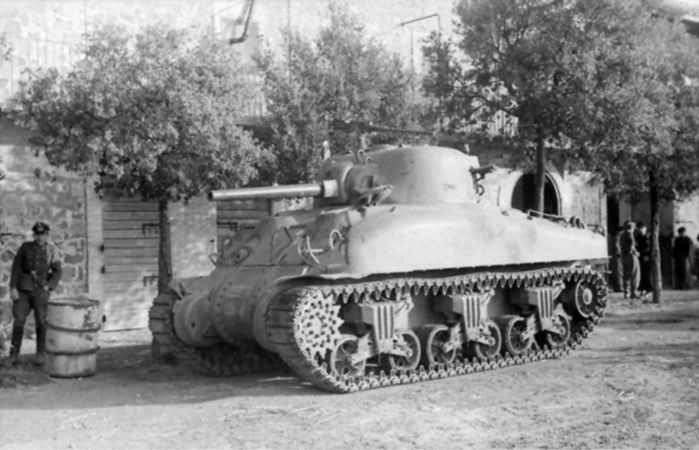
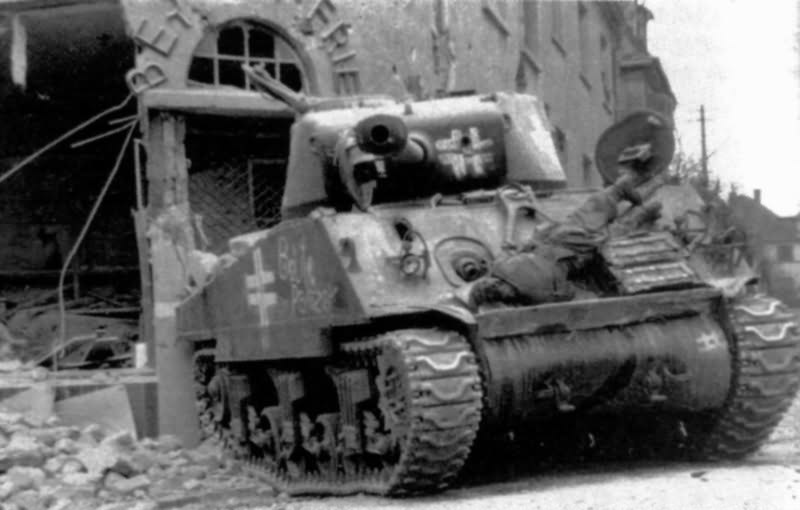
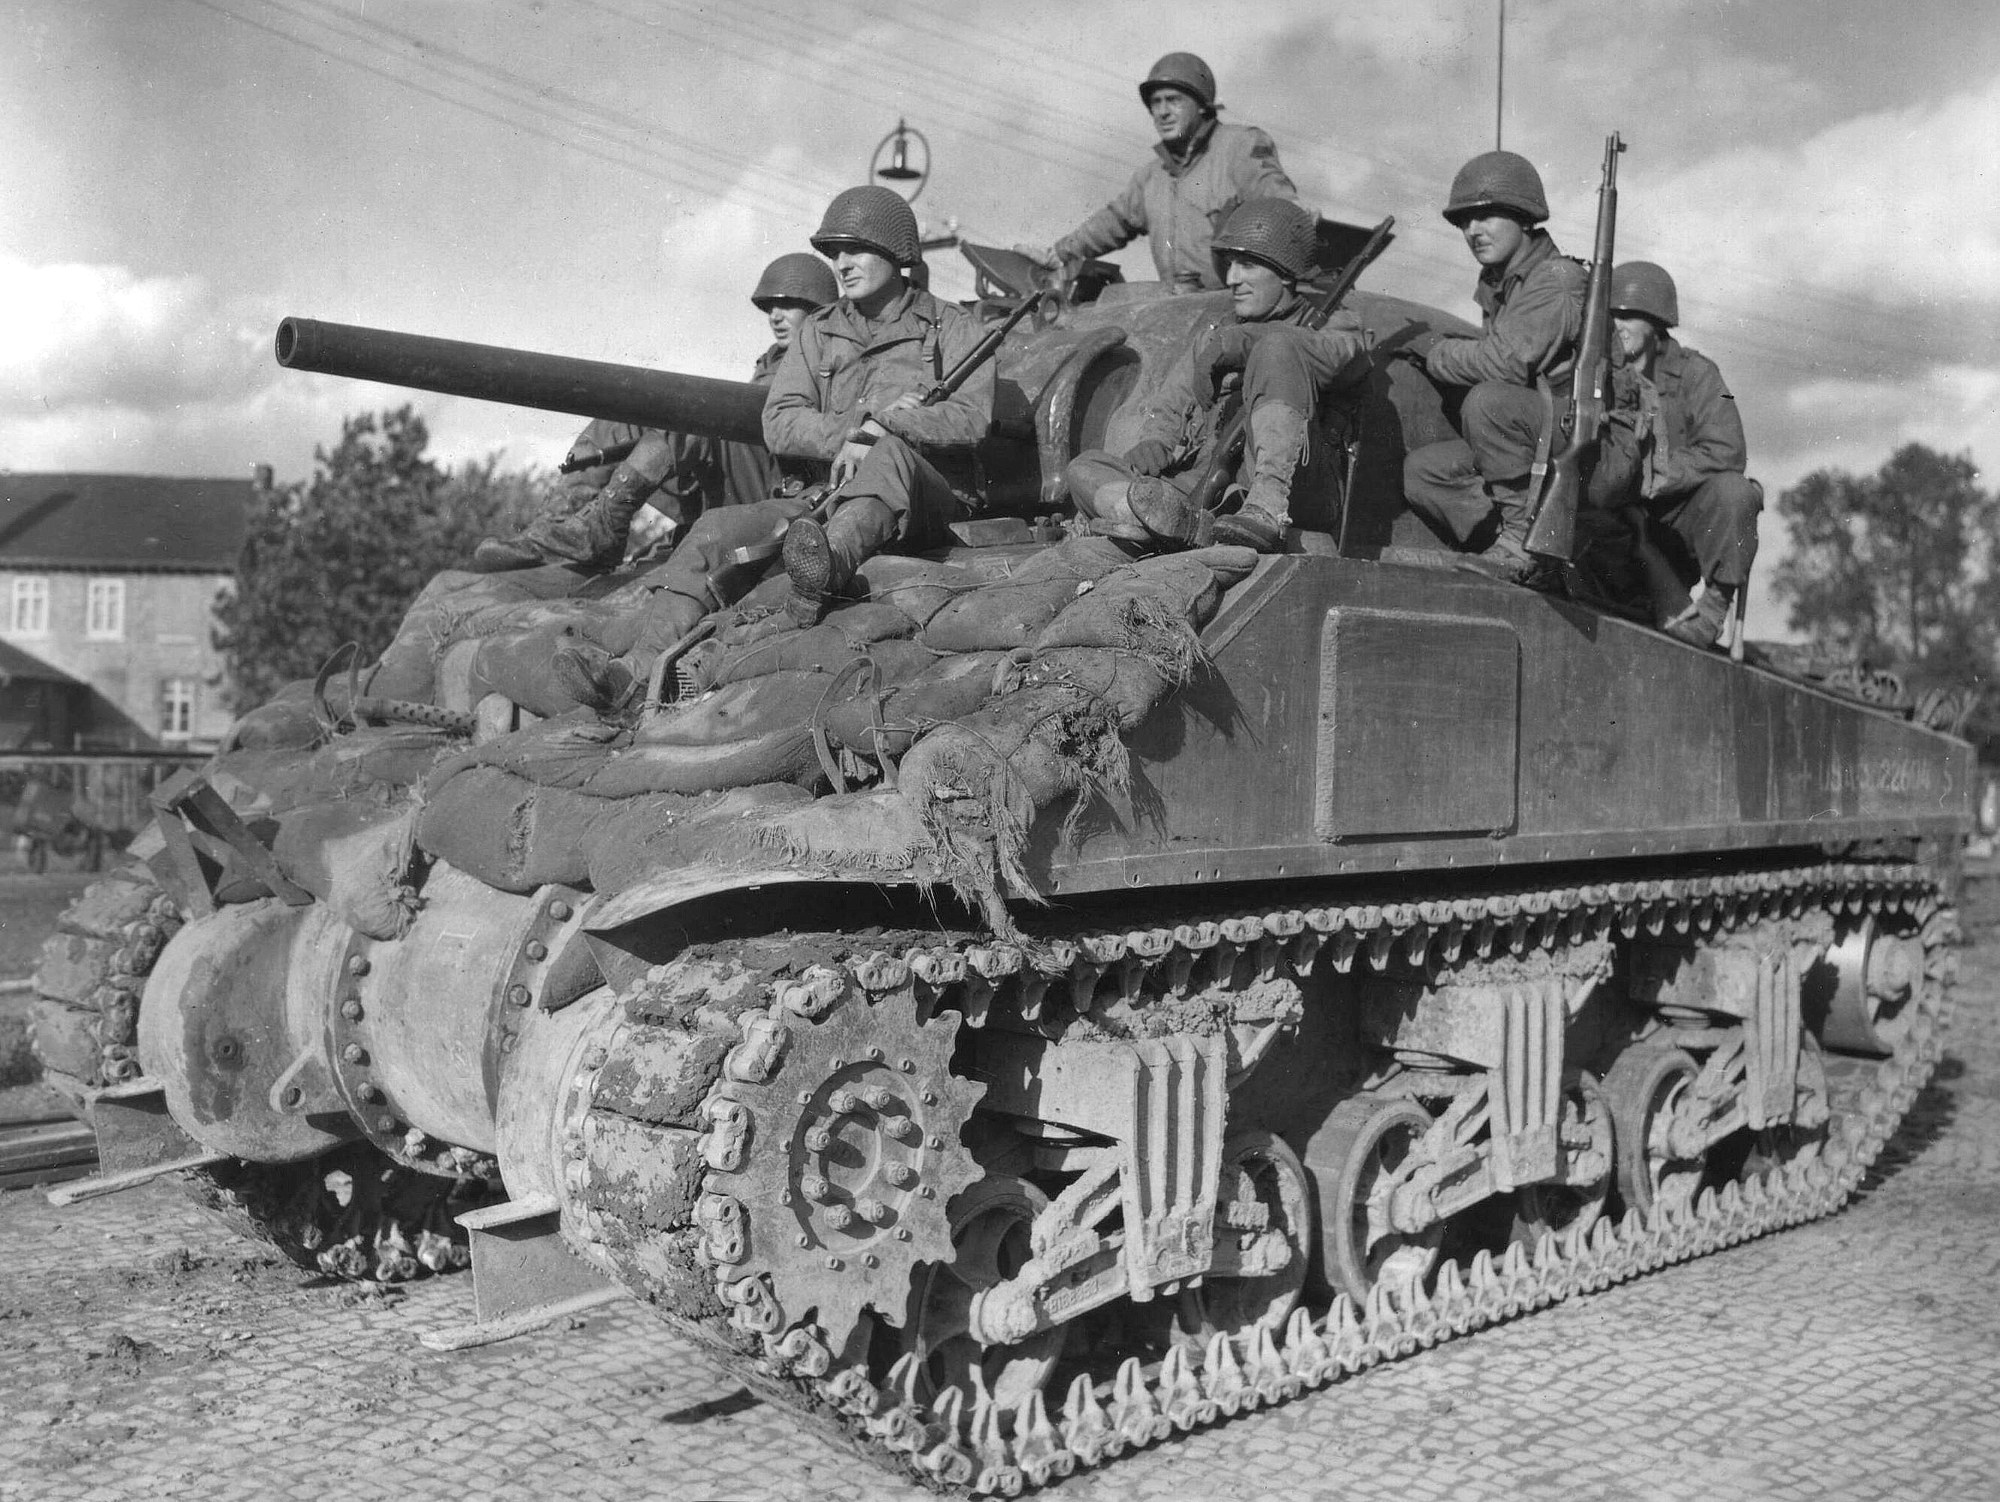
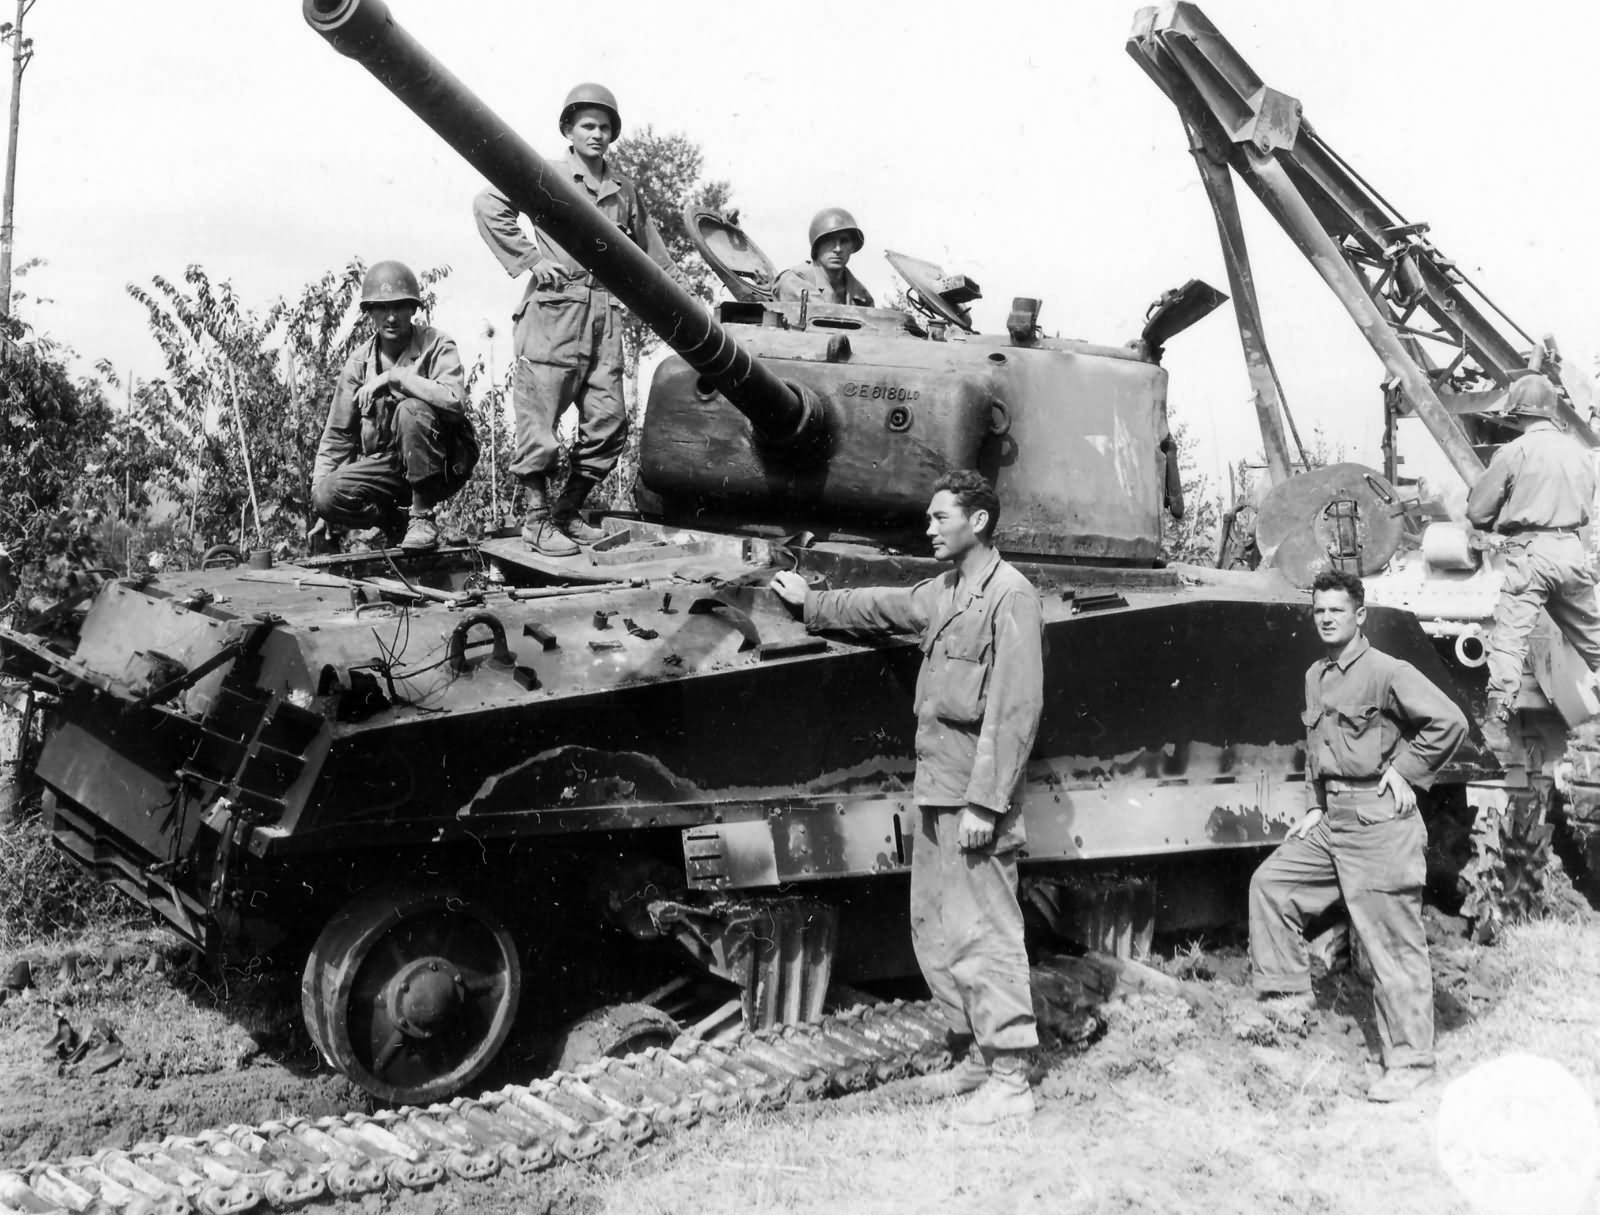
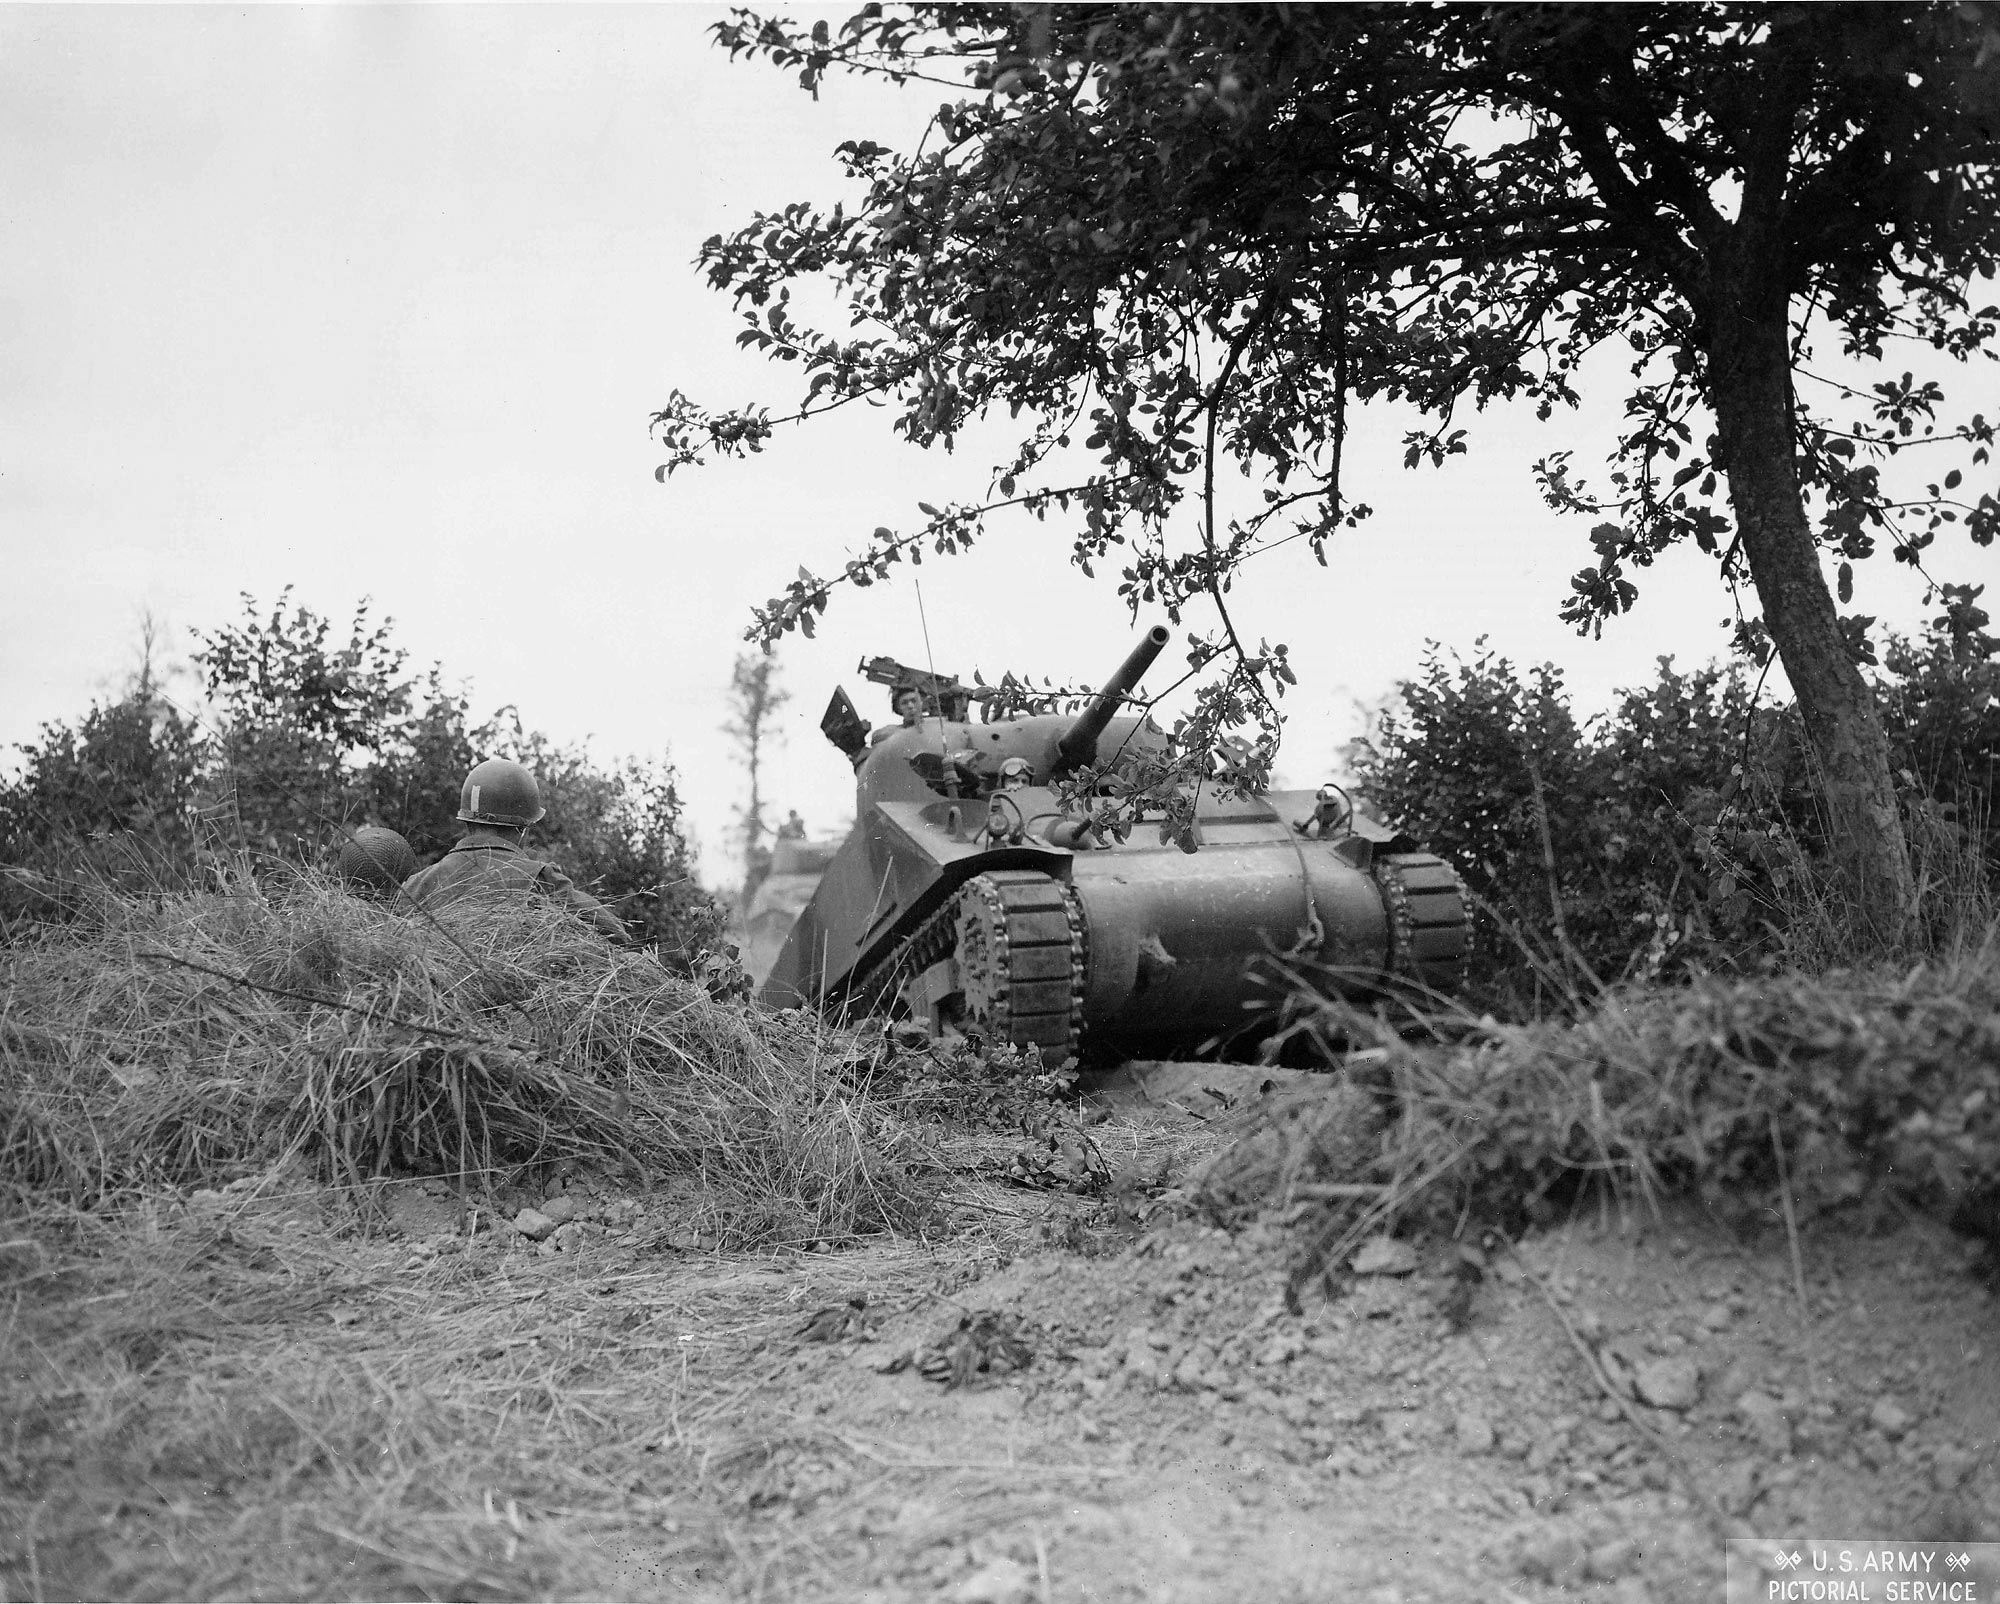
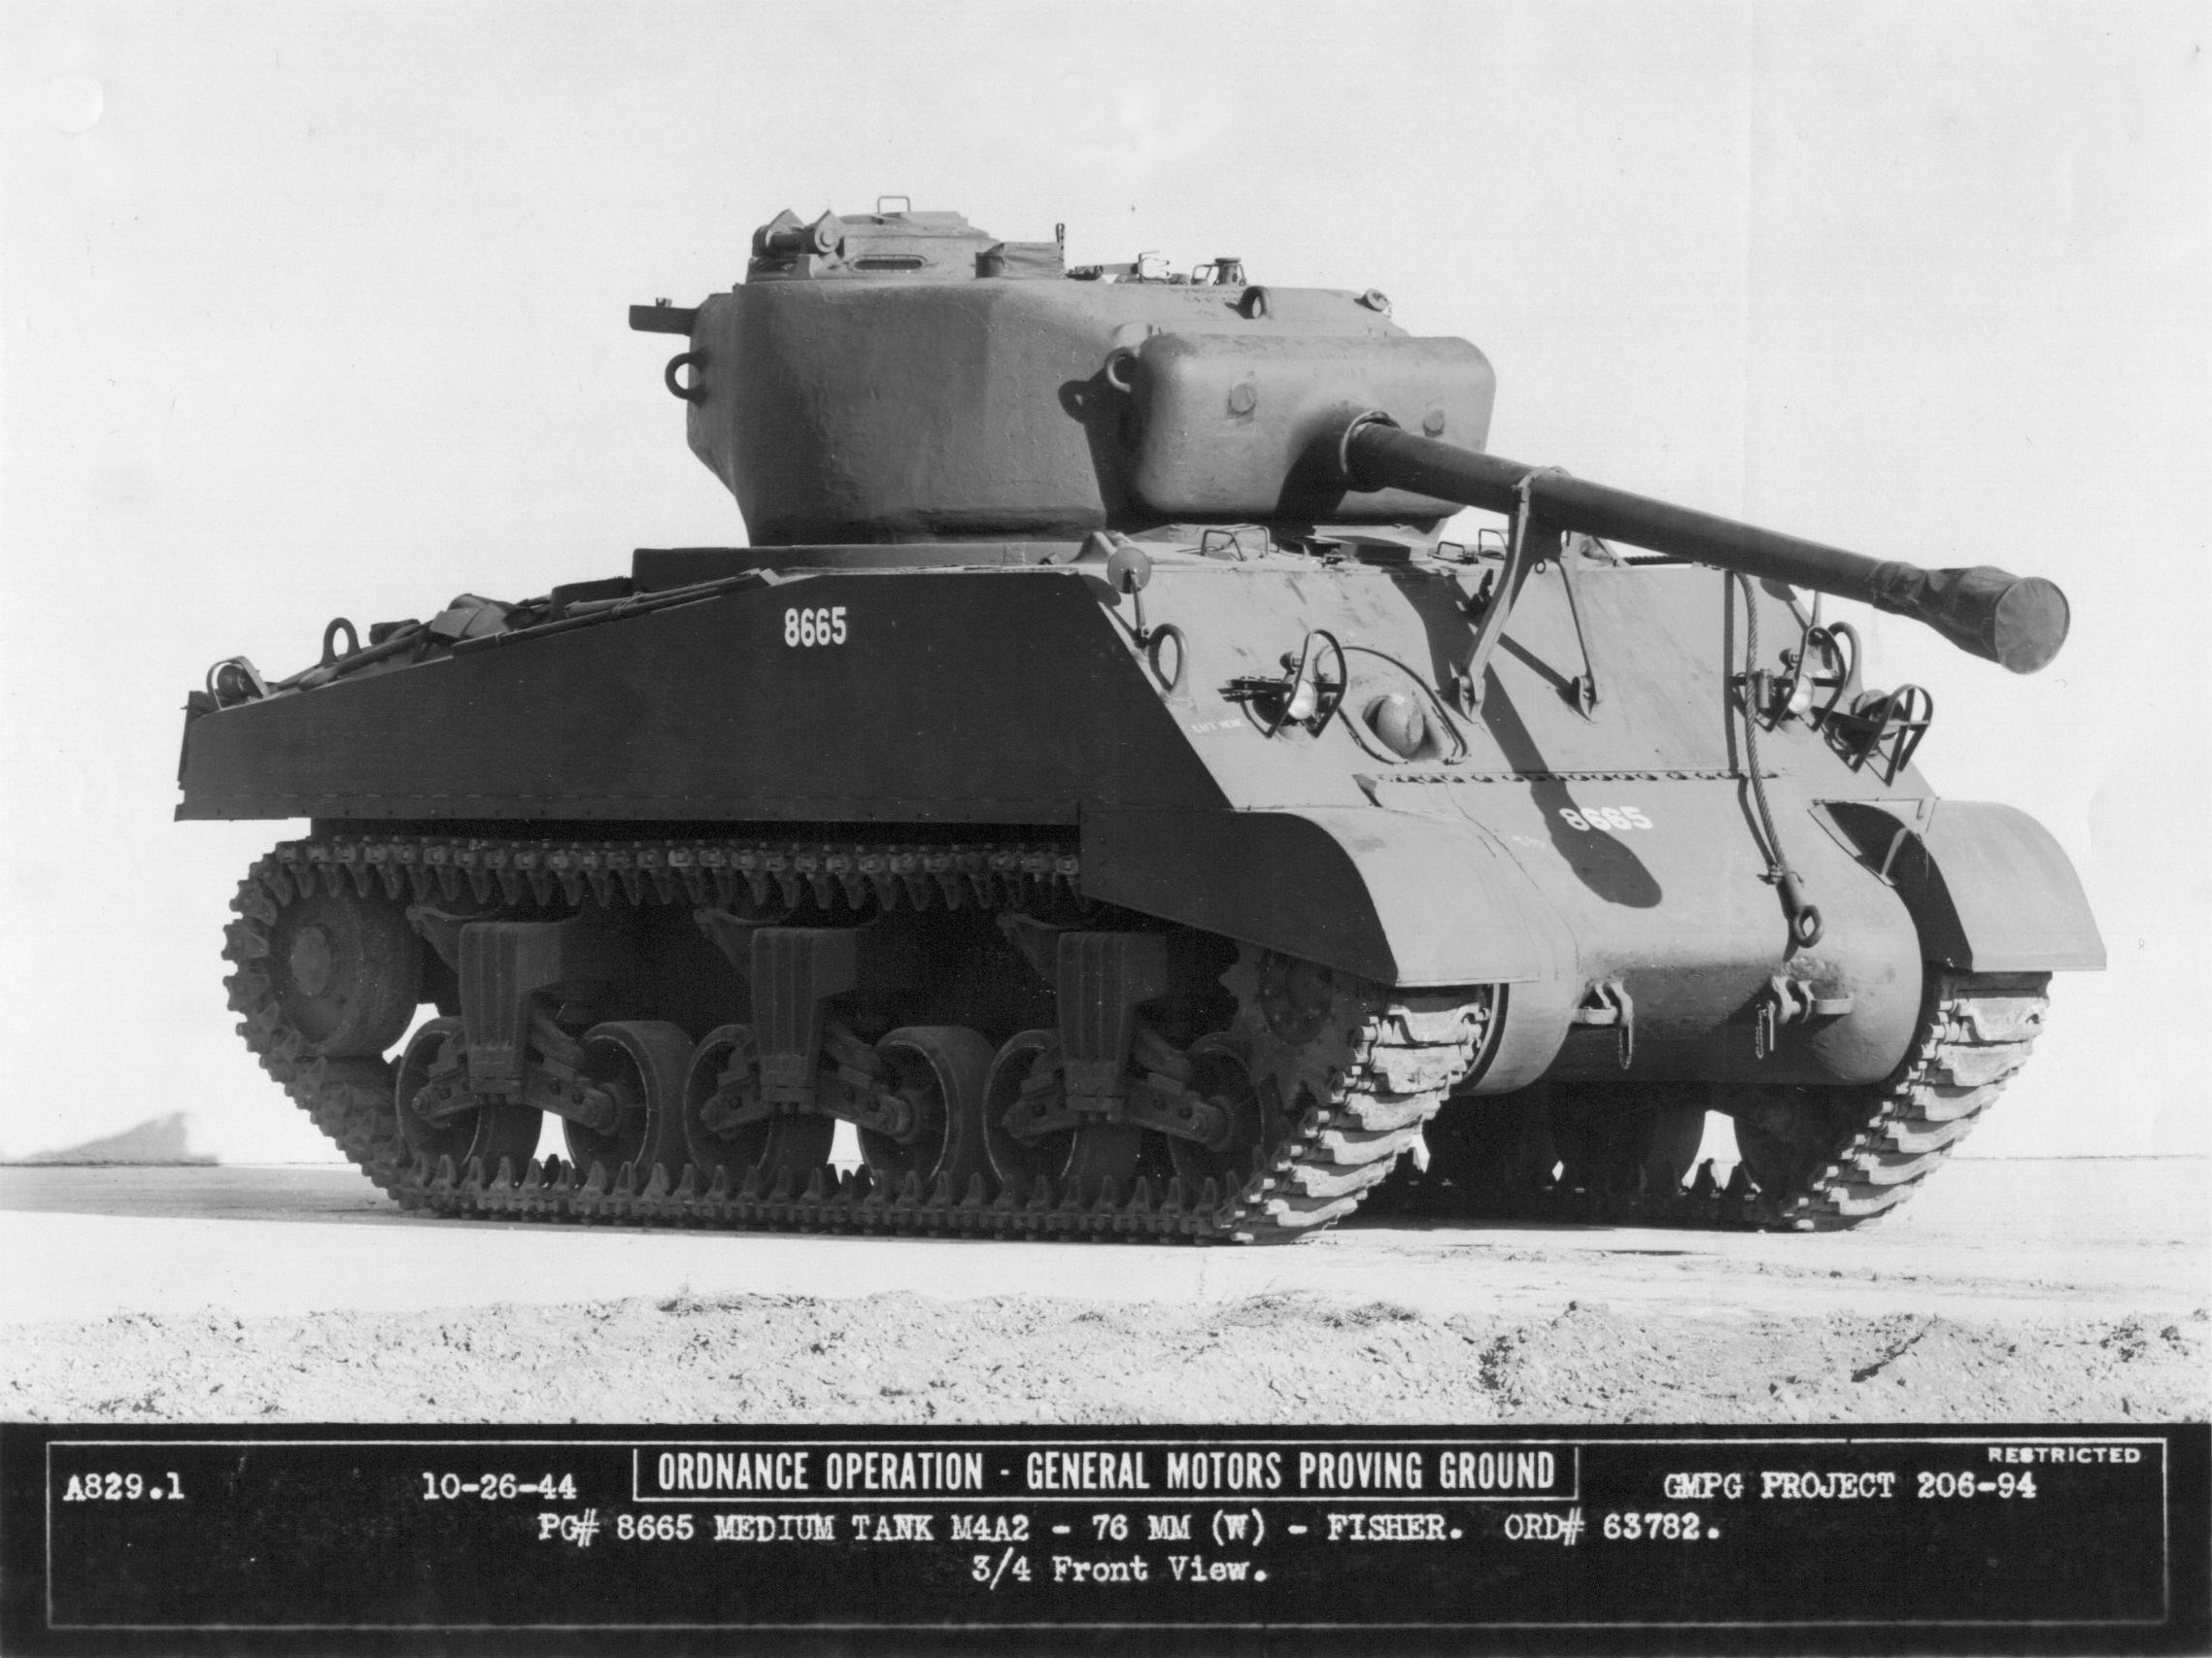
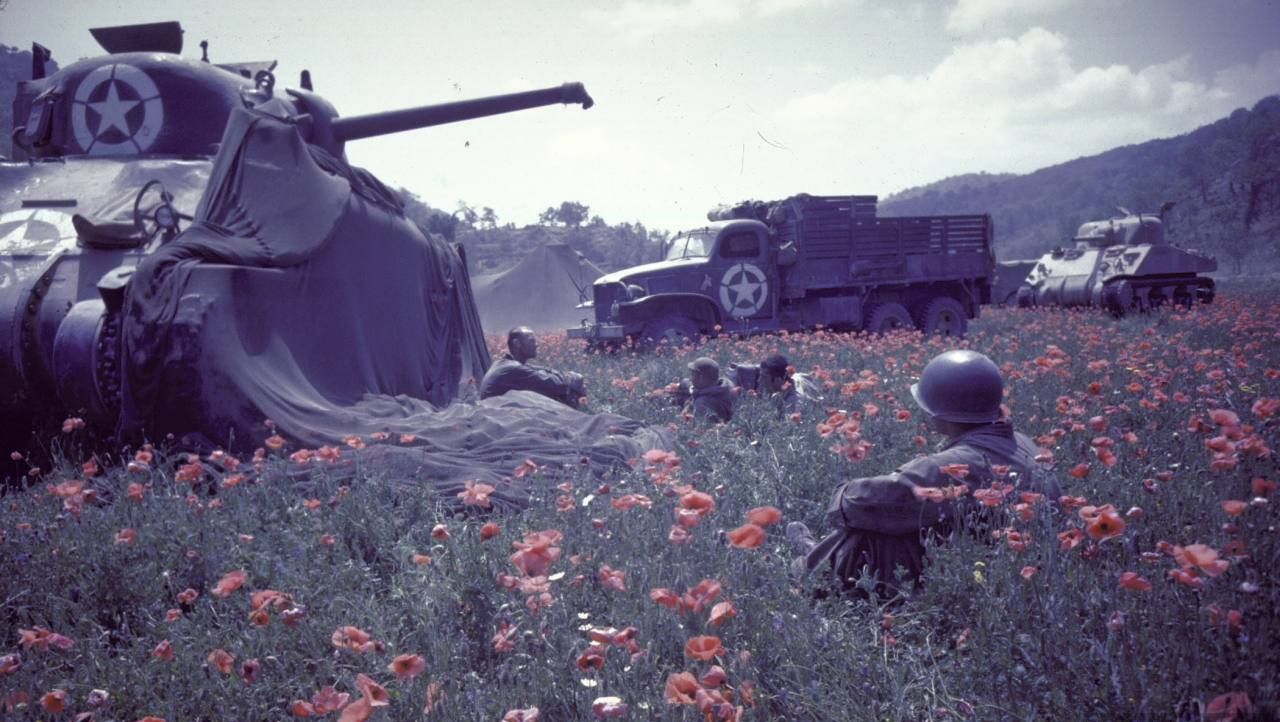
The subject of the video is  Black Magic, a small hatch, late production M4A1 if the turret came on it, though the turret or gun mount could be from other tanks. When it comes to restored Sherman tanks, I think being concerned about matching numbers is not a thing that seems to be worried about, and since it was so well designed and built, parts readily interchange. This sherman started life as a canadian Grizzly, basically totally the same as an M4A1 with an extra small hatch in the hull floor.

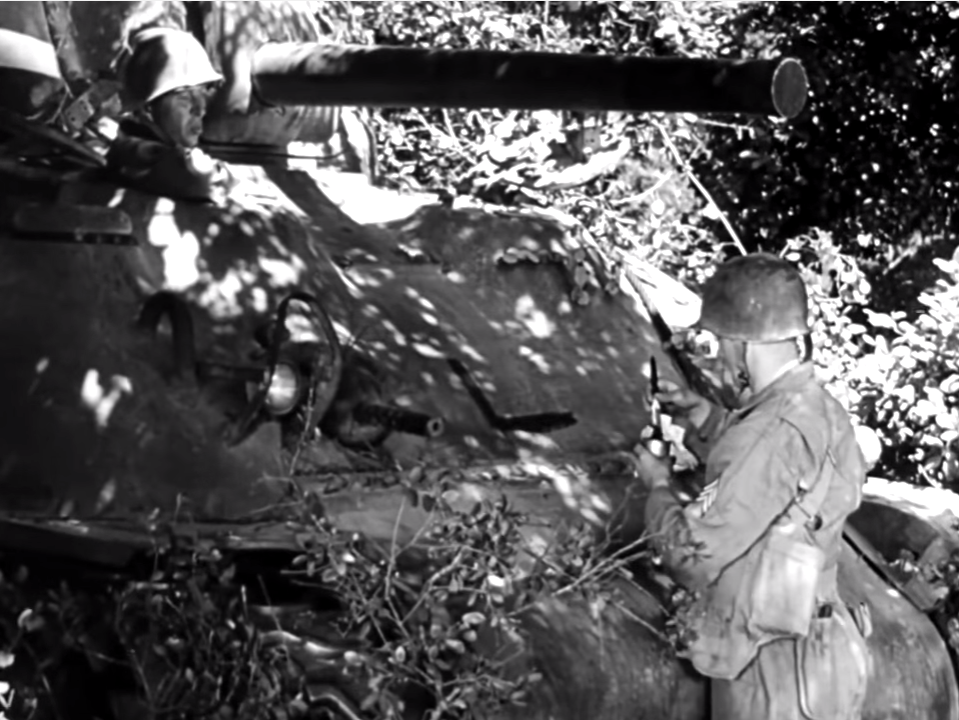
This tank has almost all the quick fix upgrades, the extra armor over the hull ammo boxes but lacks the cheek armor on the turret, and the turret may, I can’t tell for sure, have the cast in cheek armor, meaning it almost for sure didn’t come on the hull.  It also lacks the armor plates added in front of the driver and co drivers positions, that the Chieftain calls “sheet metal”.  It also has some late Sherman stuff, either added by the restorers, or by a depot rebuild later in the tanks life. The spot light, and ‘gun crutch’, or travel lock as normal people use were not on most small hatch shermans. Also the all around vision cupola would not be found on these tanks during WWII.

The Tom Jentz tangent. 

The Idea that the Sherman was no more reliable than any other tank, well, I don’t buy it. I like Mr Jentz’s work, and to some degree, his books helped inspire this site, since there was so little info on the web with really detailed info on the Sherman other than the Sherman Minutia site. I don’t think he really knows much about the Sherman if he thinks tanks like Panther and Tiger just needed more spare parts to be as reliable as the Sherman, it is a ridiculous idea. I do not think there was a single part on the Sherman that had a 500 kilometer life span, and that’s double the Panthers final drives.

First: The Chieftain himself has done Hatch posts on reports from the British, about how much more reliable, the M4A4 Sherman was than the Cromwell, even when both had full crews working to keep them running. both tanks were run thousands of miles, something late war German tanks could not do.

Second: In one of his own Hatches talks about the French experience with the mighty panther showed they averaged 150 kilometers per final drive set! Much less if the crew was hard on them.  There was no major automotive component including the oil, that had to be changed every 150 kilometers on any model of Sherman.

Third: This will focus on the Panther, since it was a major part of Germany’s late war armored force, and how terrible it was. This tank didn’t have just one flaw that should have disqualified it for production it had at least five. It was generally poorly reliable across all its automotive components, along with the final drive, 2500 kilometers for the motor and 1500 for the tranny were hugely optimistic and most of these tanks broke down and or were destroyed before they had to refuel. You had to take the whole drivers and co drivers compartment apart and the top of the hull off to change a transmission! Don’t get me started on the weak turret drive system that Rube Goldberg would have loved.  The  ‘wonderful’ dual torsion bar suspension and interleaved road wheels would cause any maintenance nazi to find the nearest US Line and surrender instead of working on it!

. . .

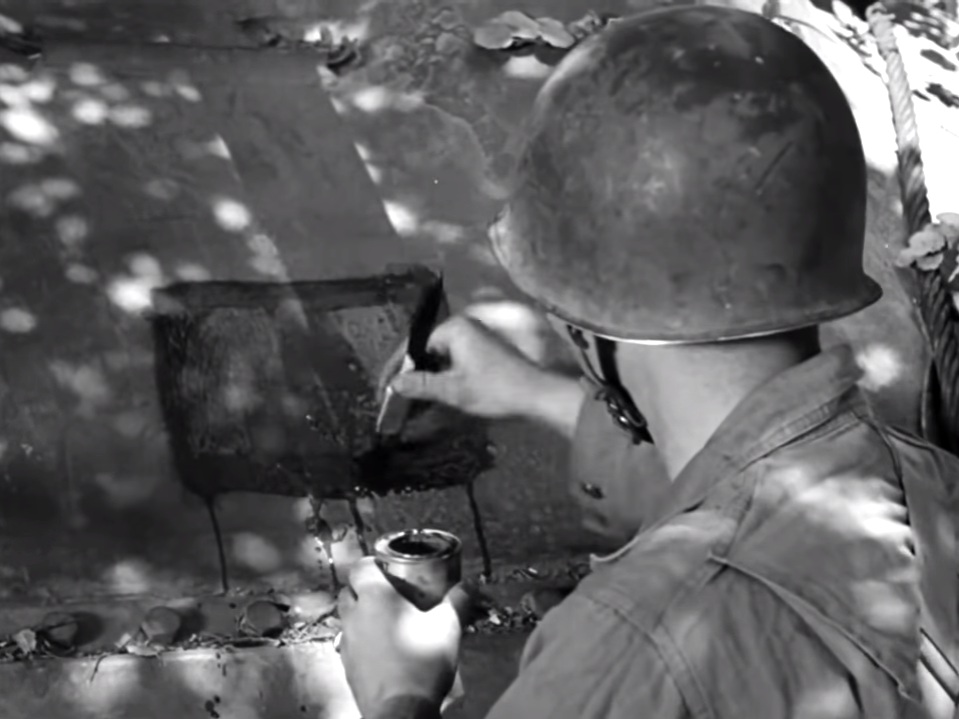
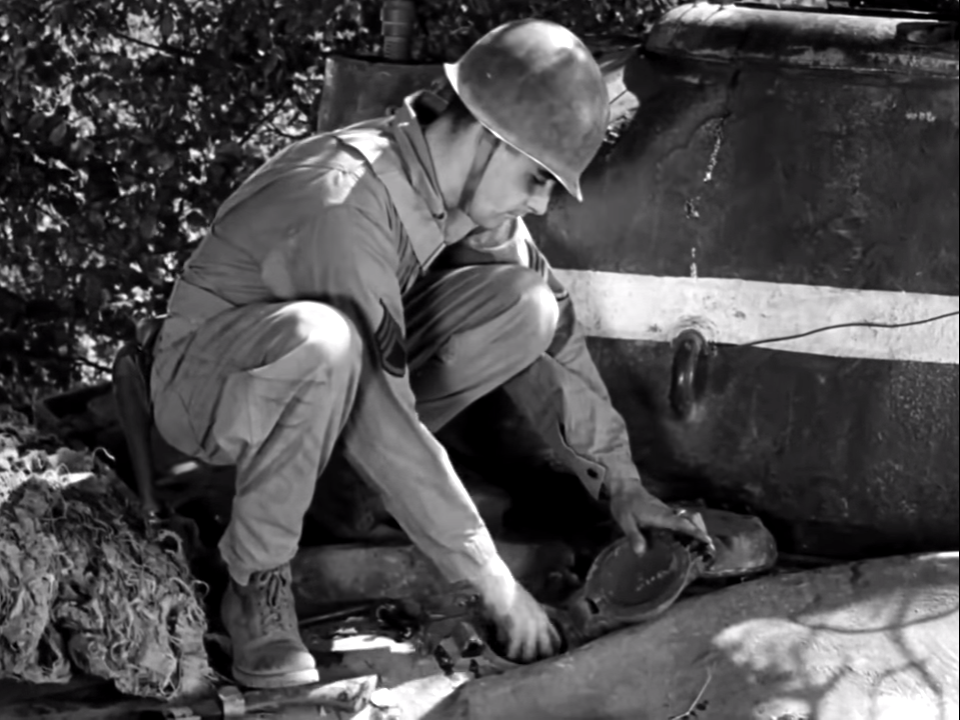
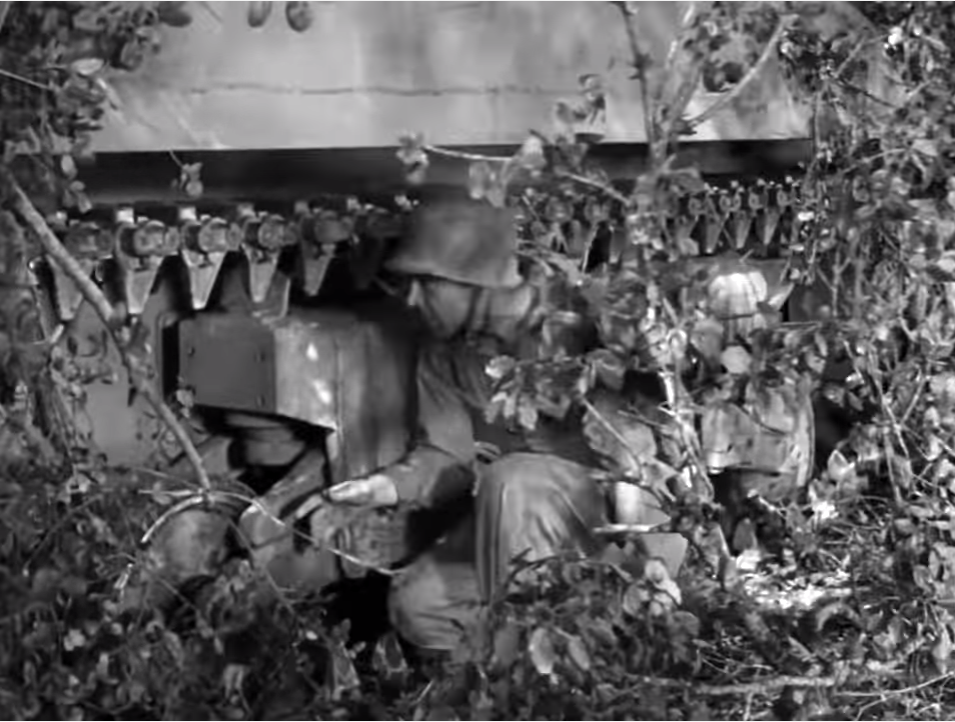
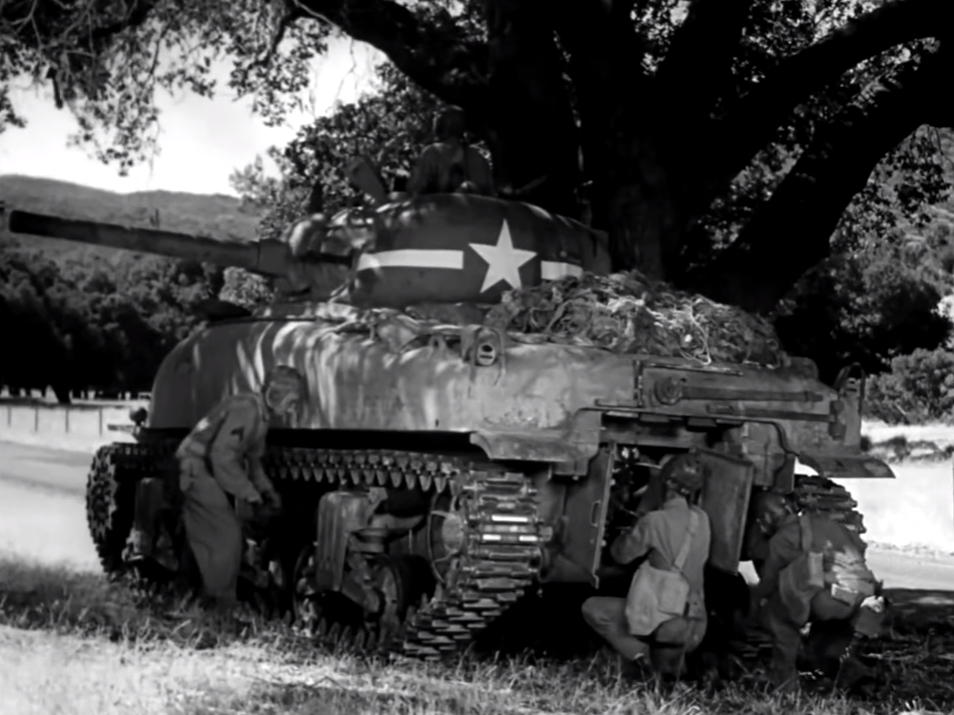
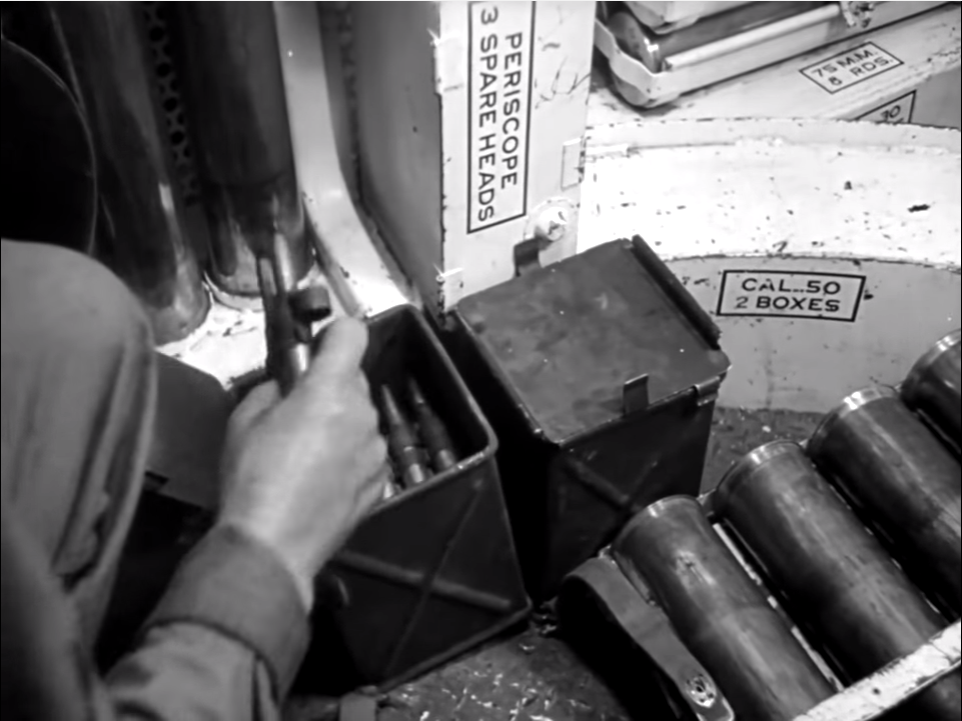
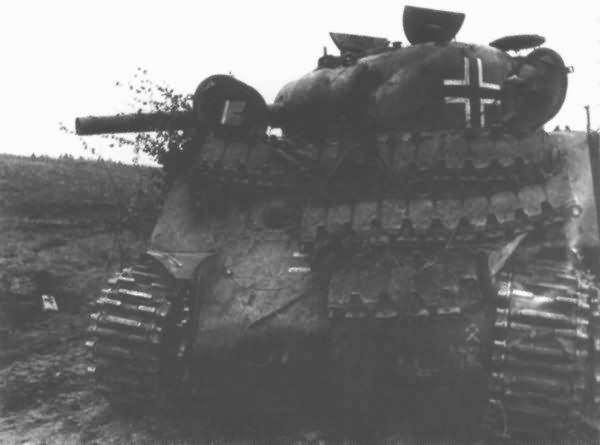
Another thing to note, you can see the holes drilled vertically in the suspension bogies, these are the tops of the holes the bolts that hold the suspension caps on go into. They were covered up with body filler by the factory, but on most restored and old Shermans the filler is gone, and they don’t fill the holes.

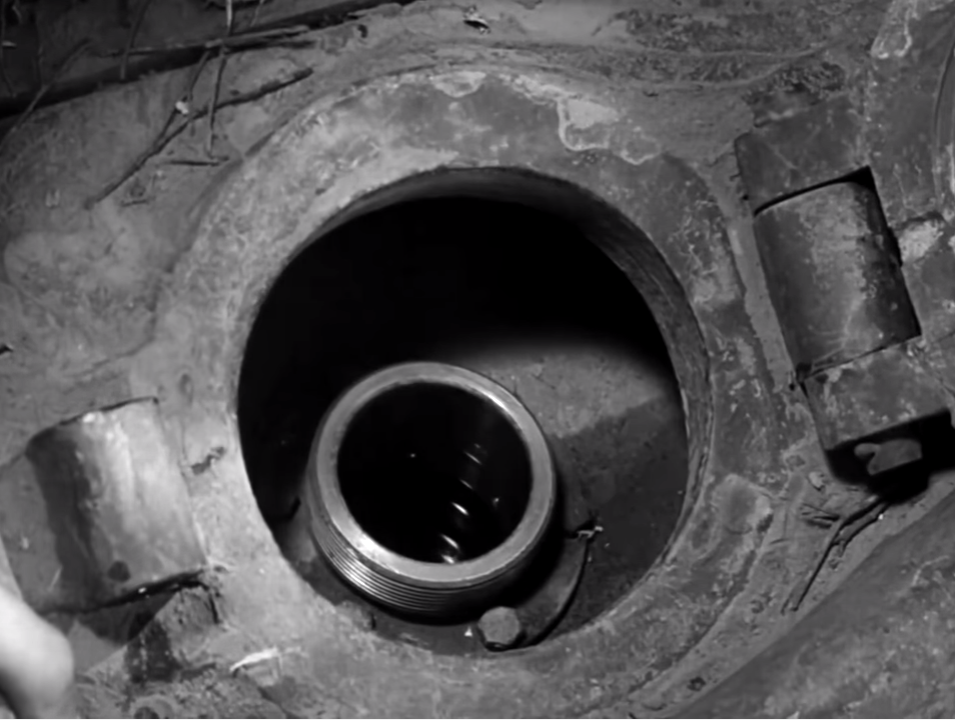
Note: the odd groove in the center of the rear Hull casting, this wasn’t done on all M4A1 tanks, and may have been unique to General Steel castings.

On the problems with the R975, I have not heard of complaints about the engine being easy to blow, and would be very surprised if the throttle wasn’t governed to prevent it.  On having to crank the engine before starting, I have it on good authority, that the crew could just start the tank and run it for a few minutes every 45 minutes to an hour to avoid having to hand crank the motor.

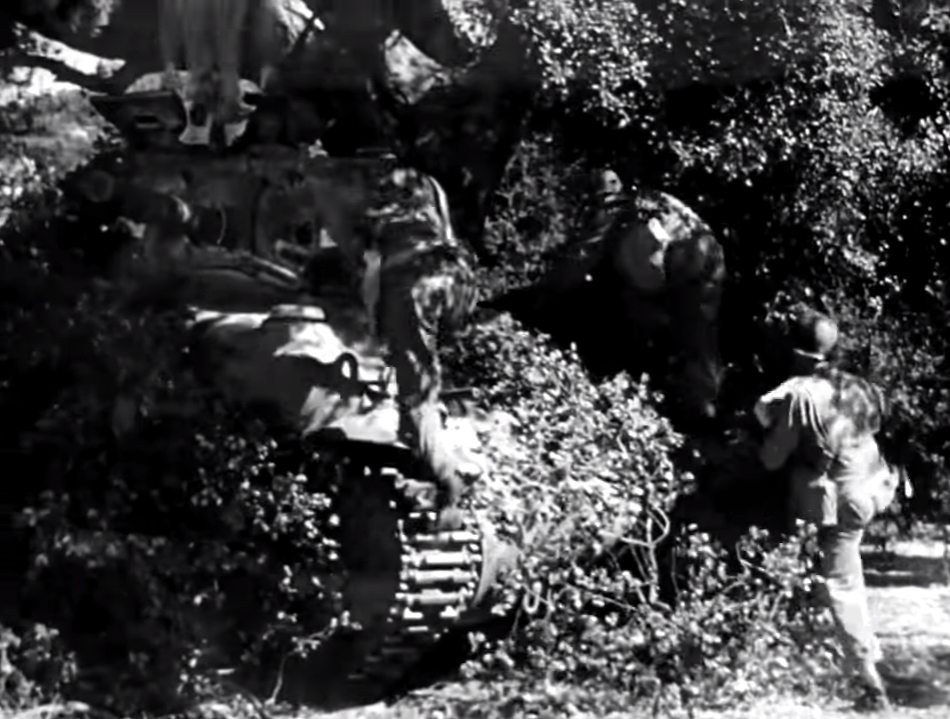
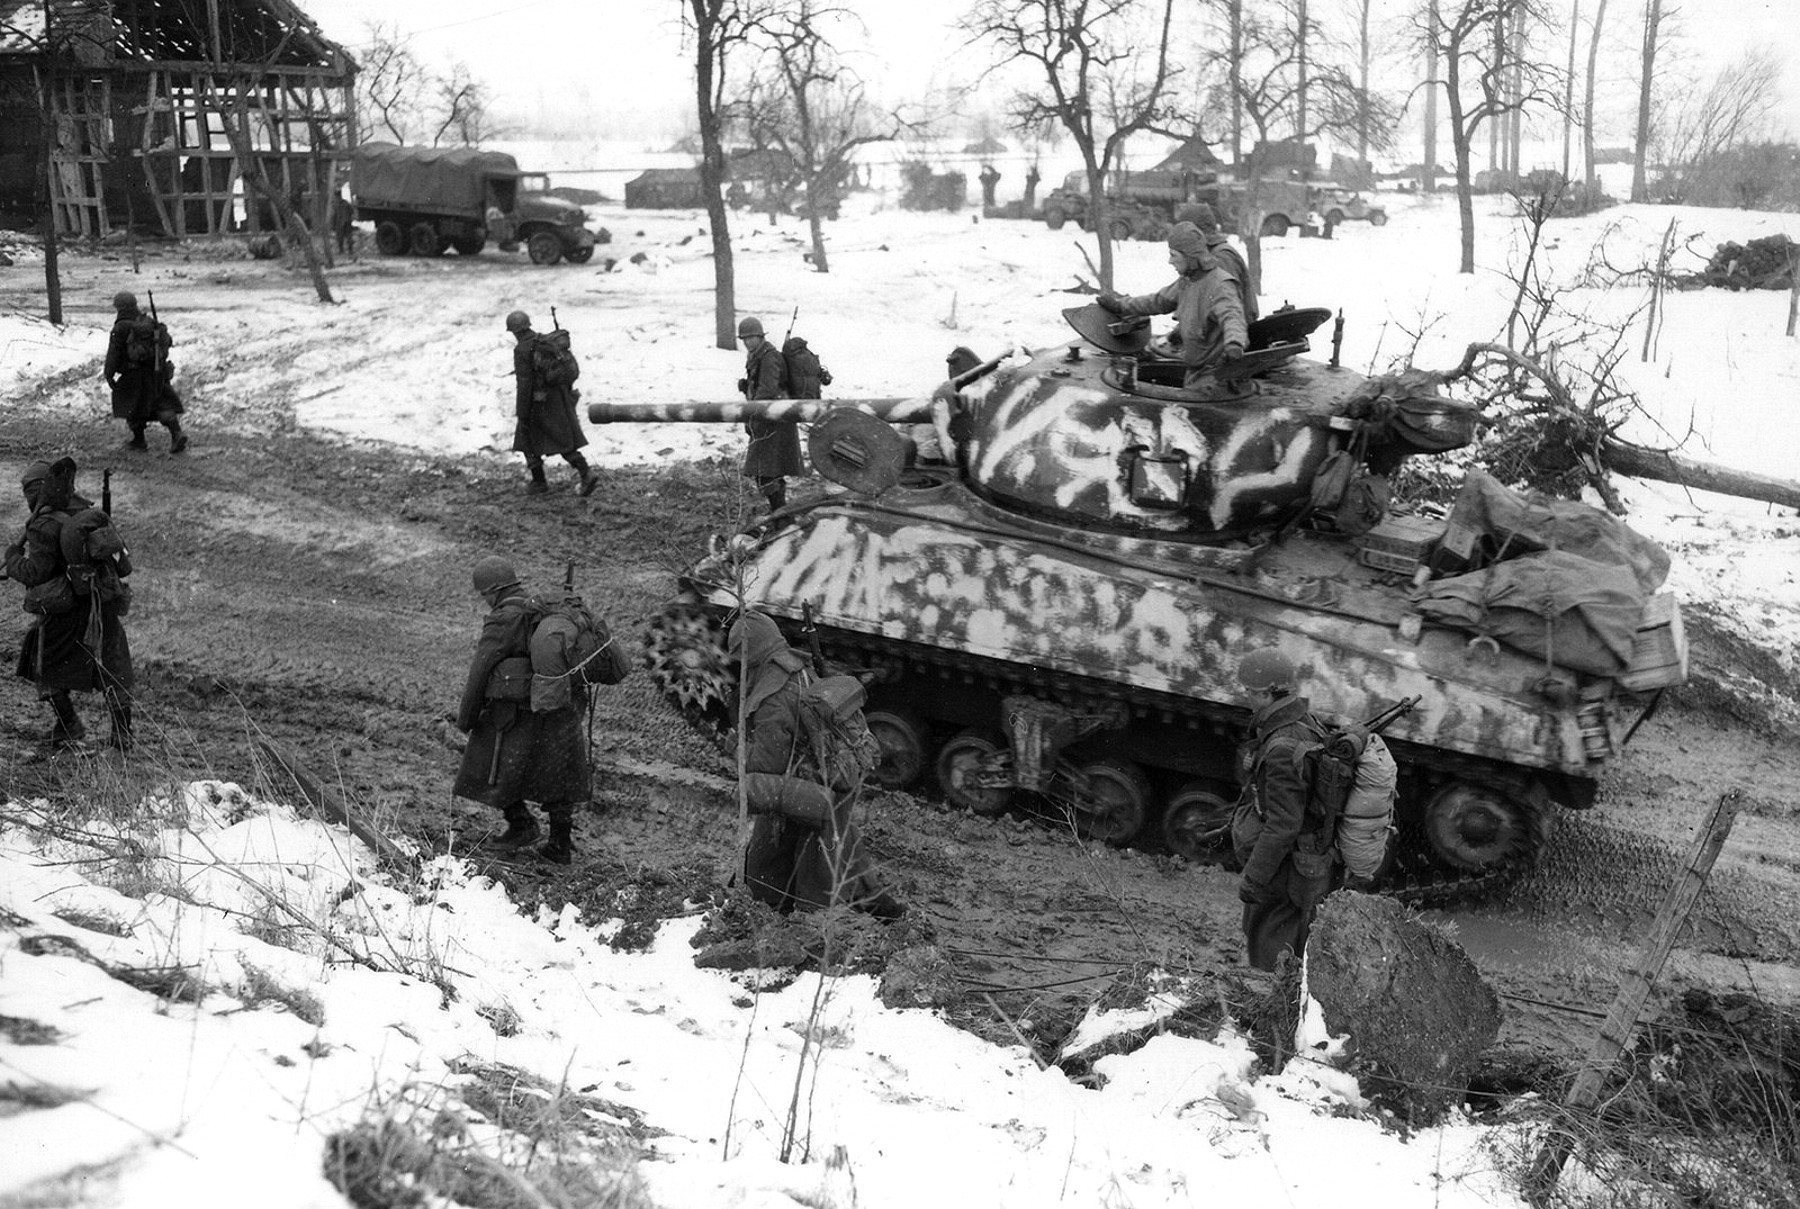
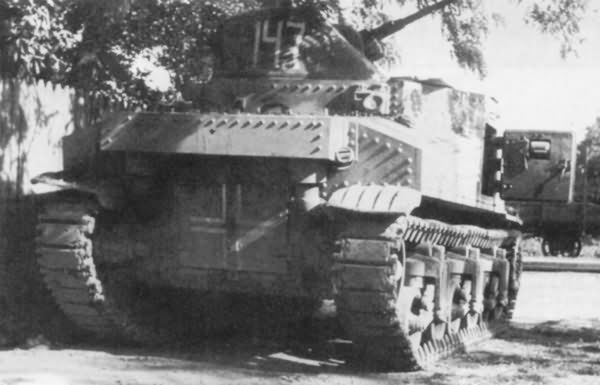
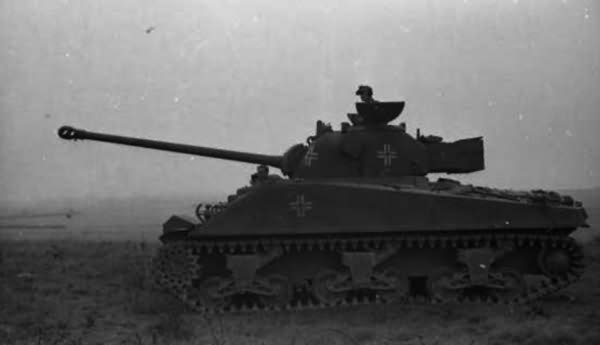
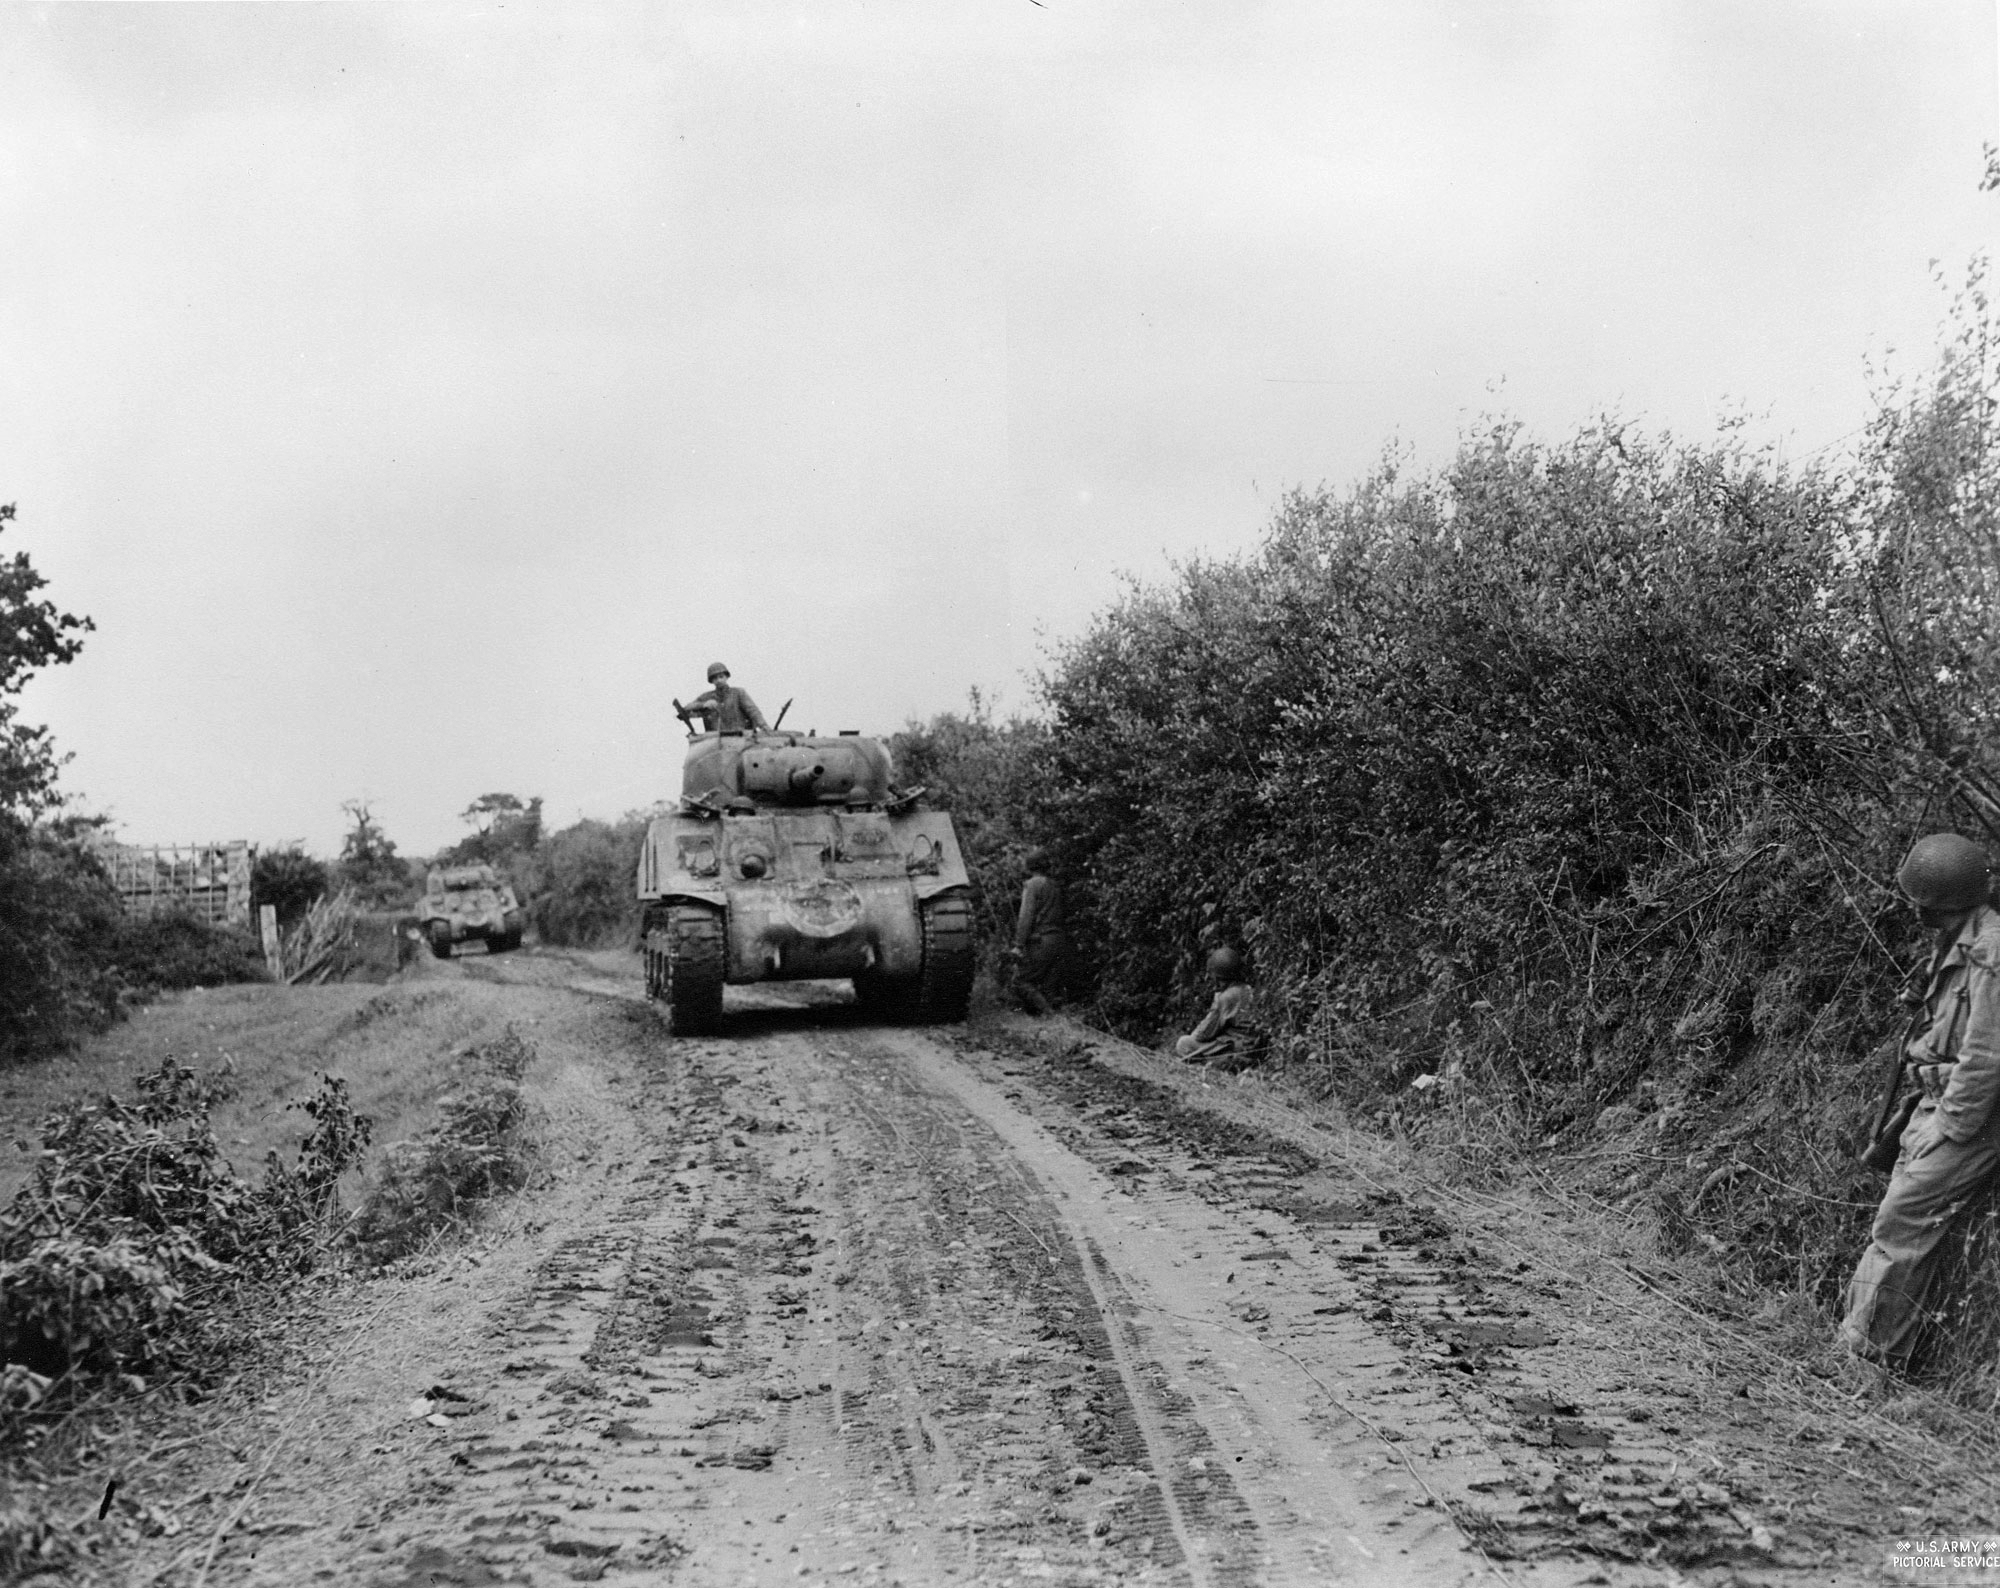
Many of units removed the sand shields in ETO to prevent problems with mud.

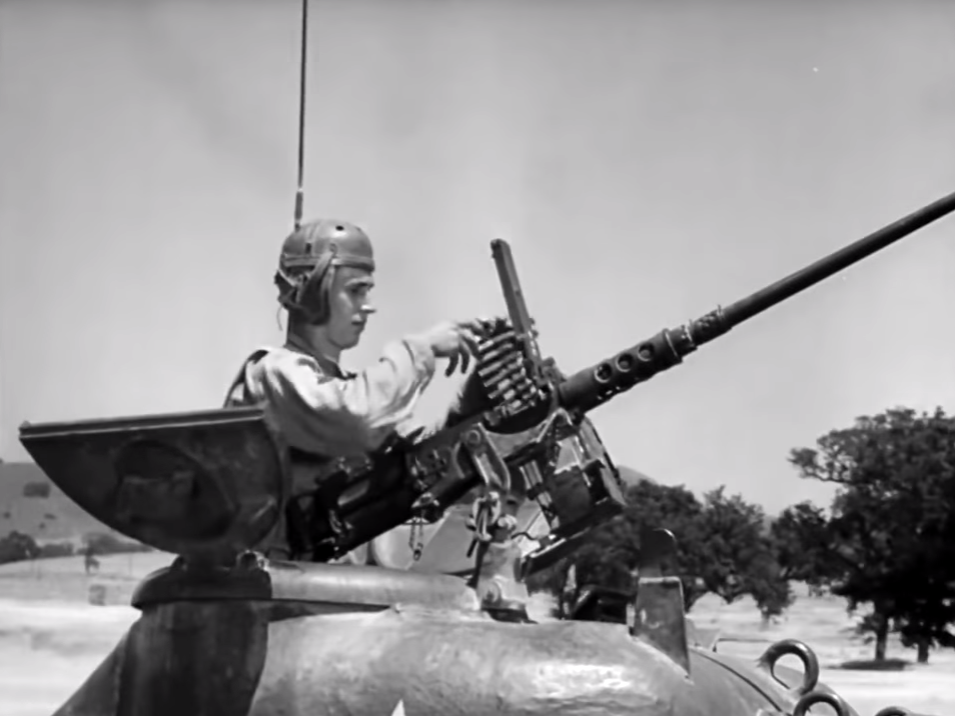
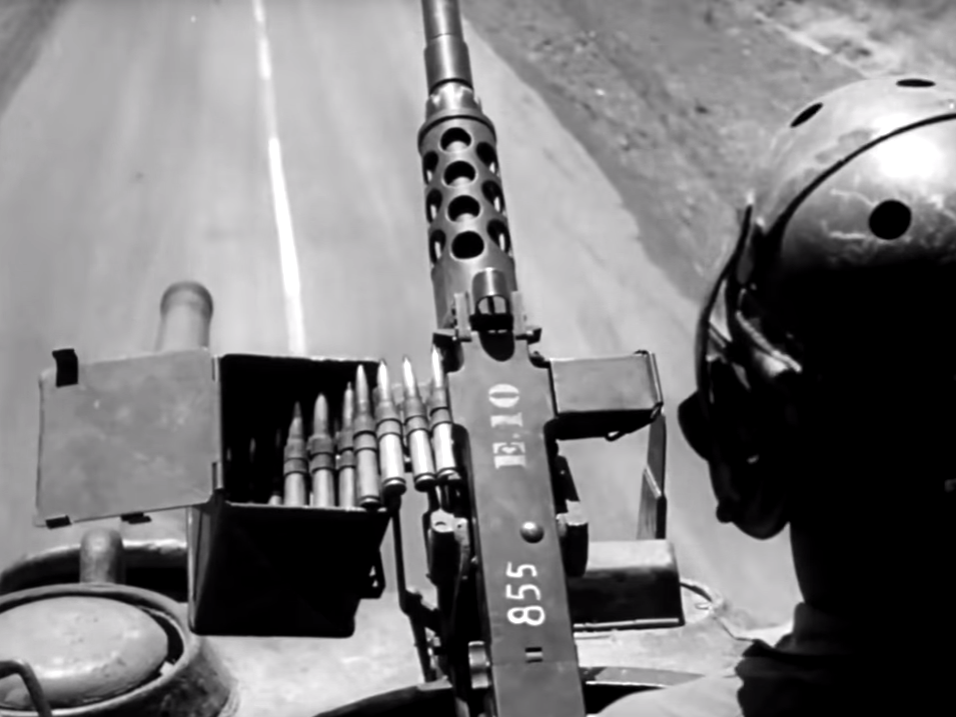
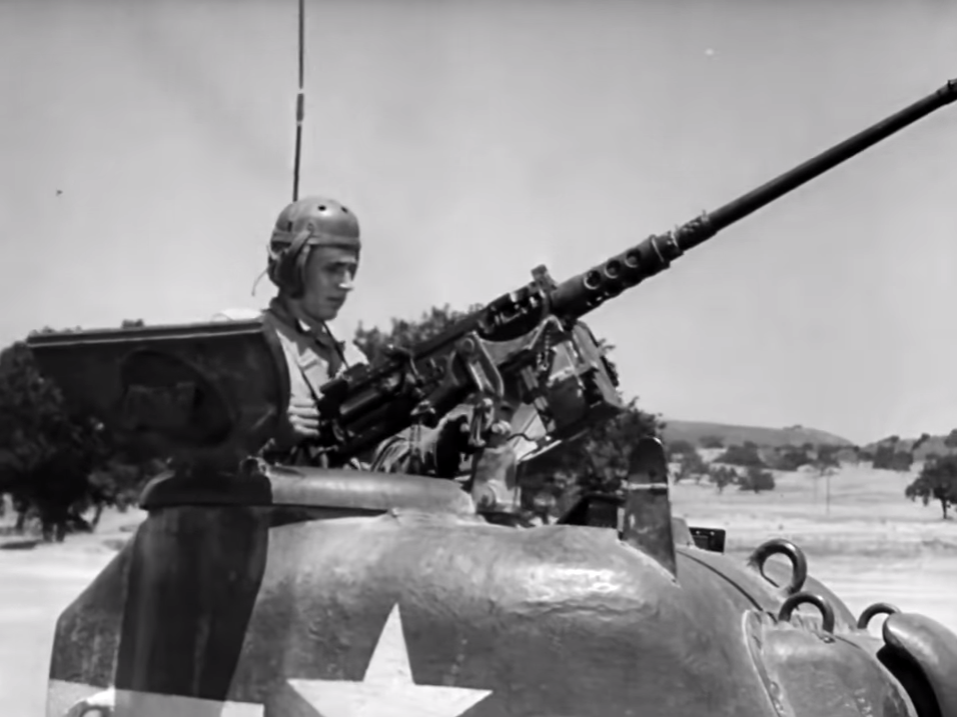
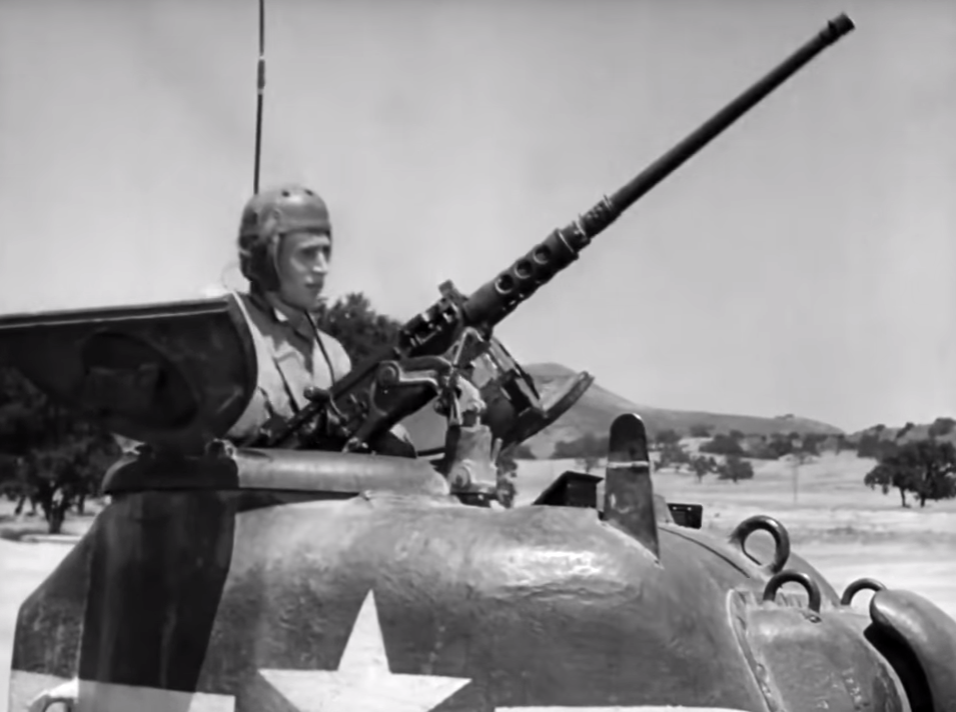
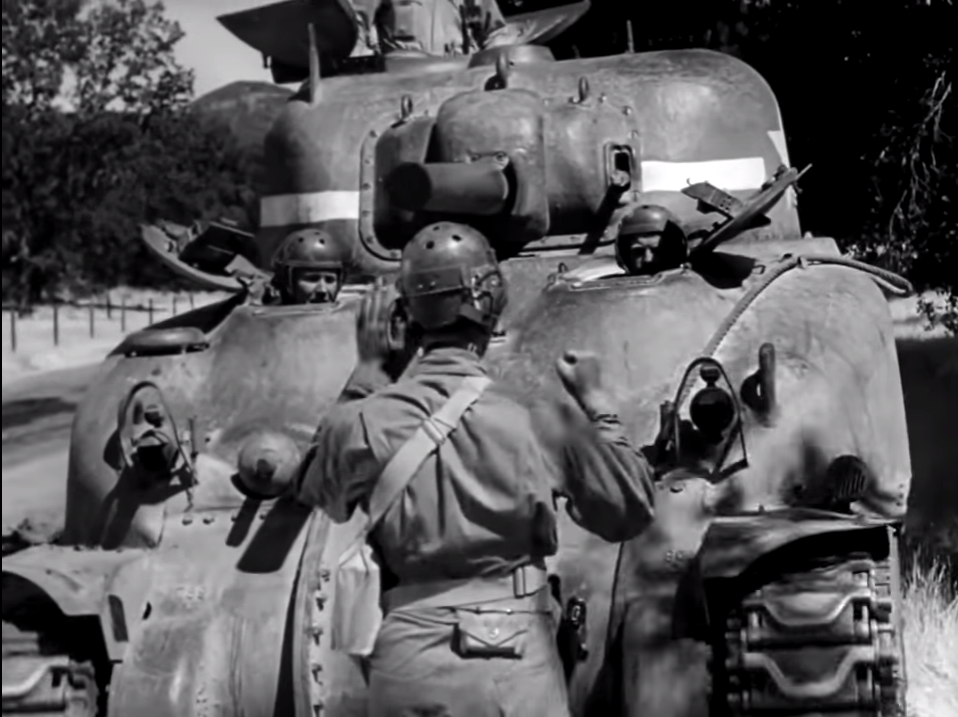
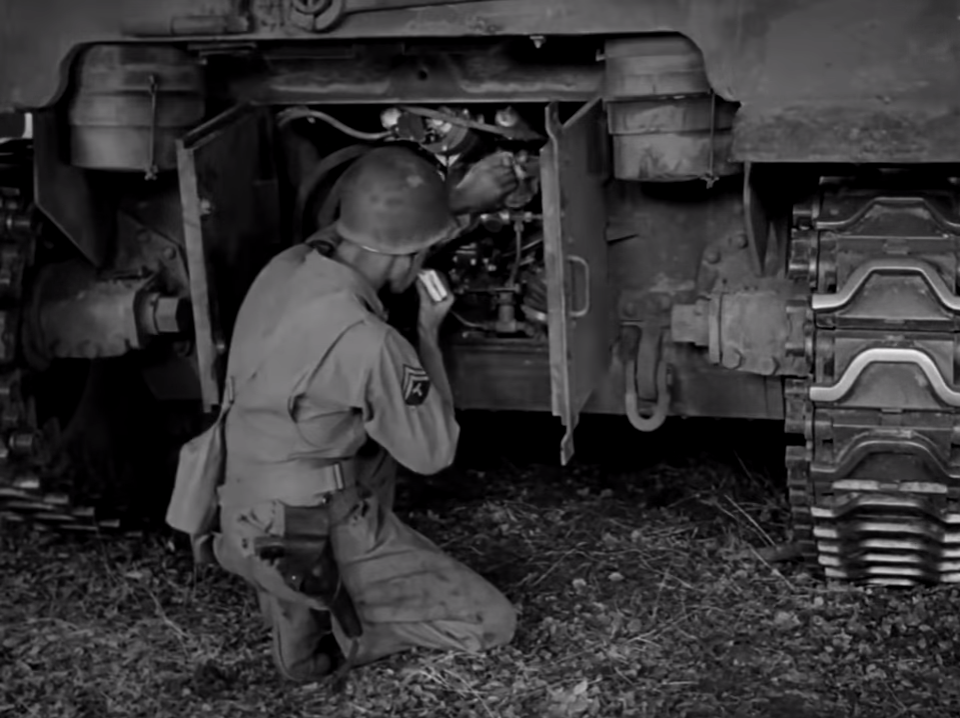
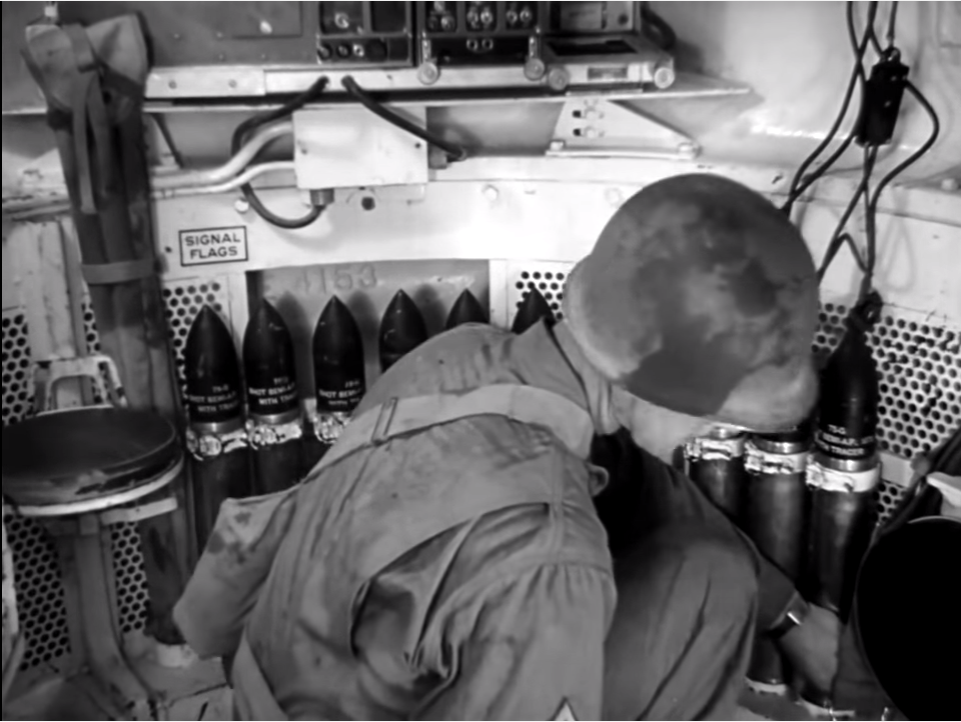
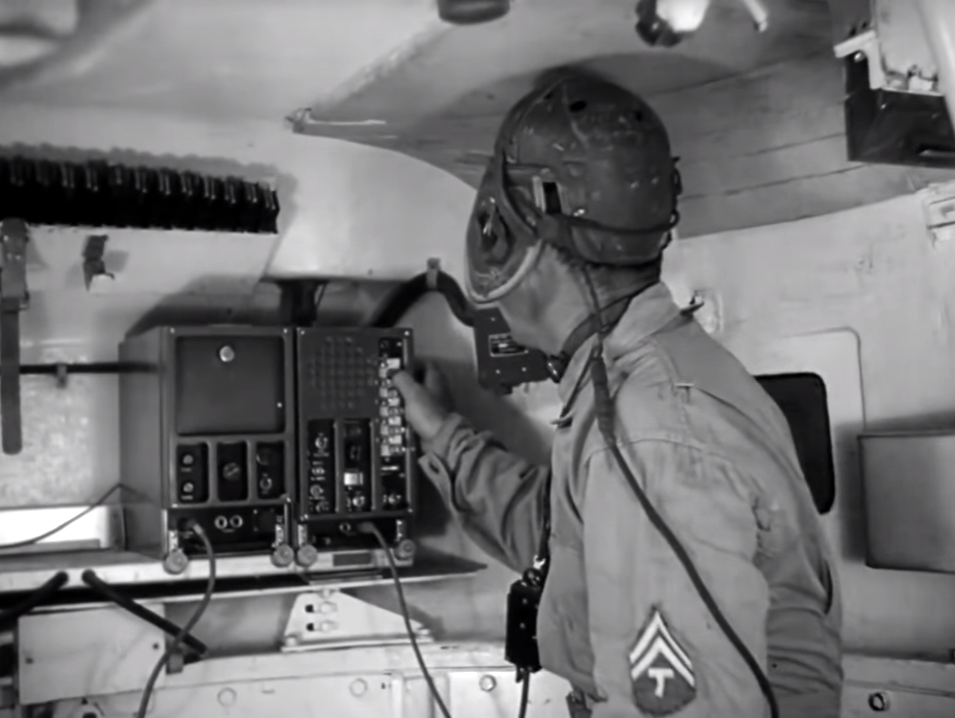
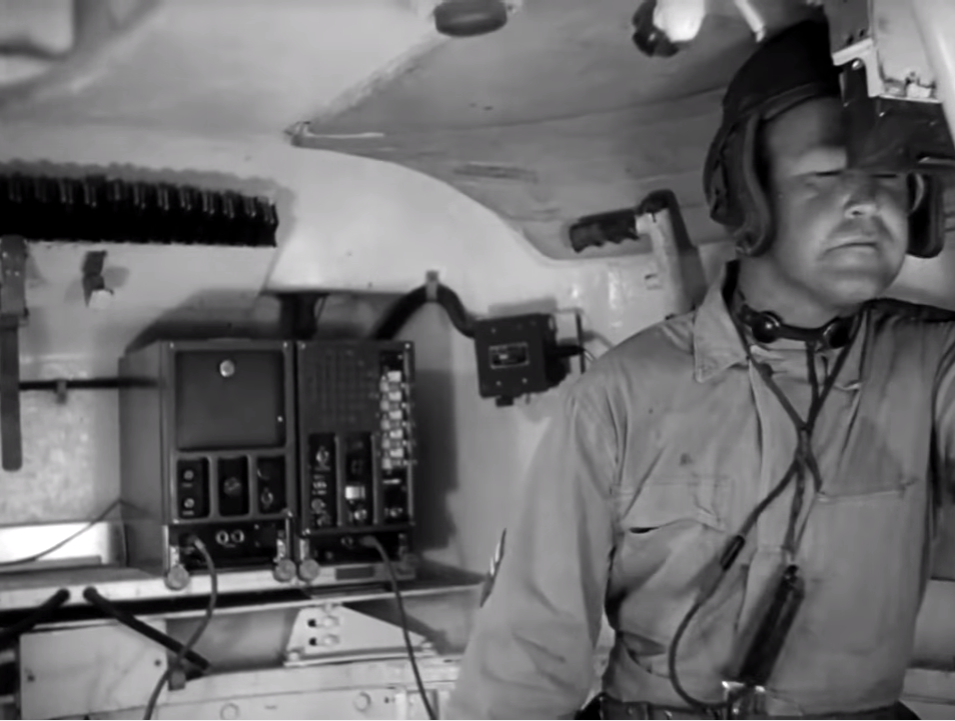
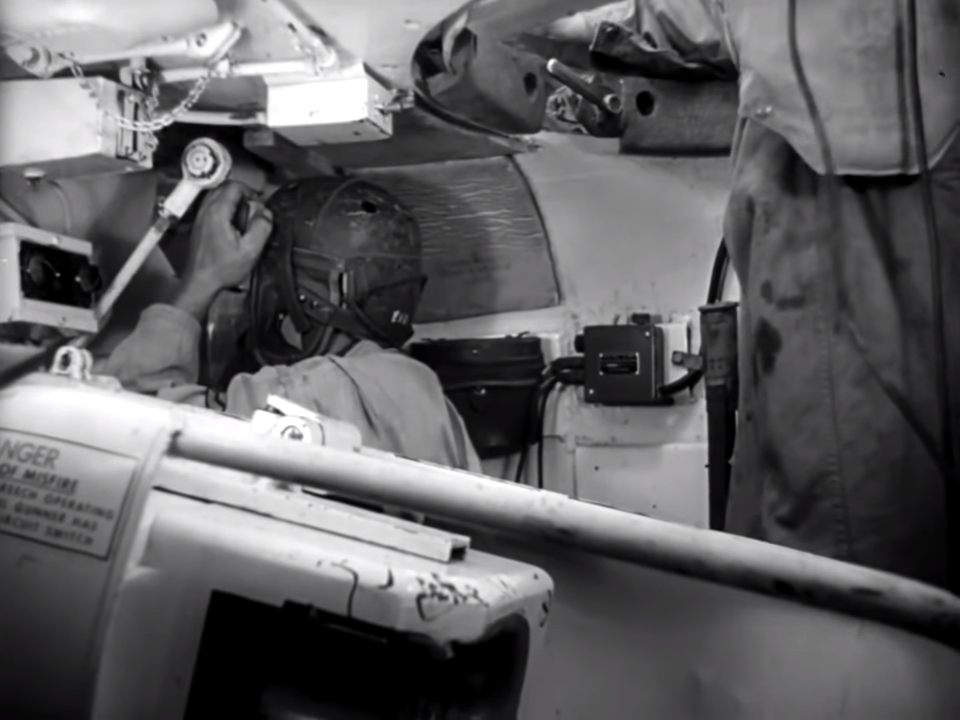
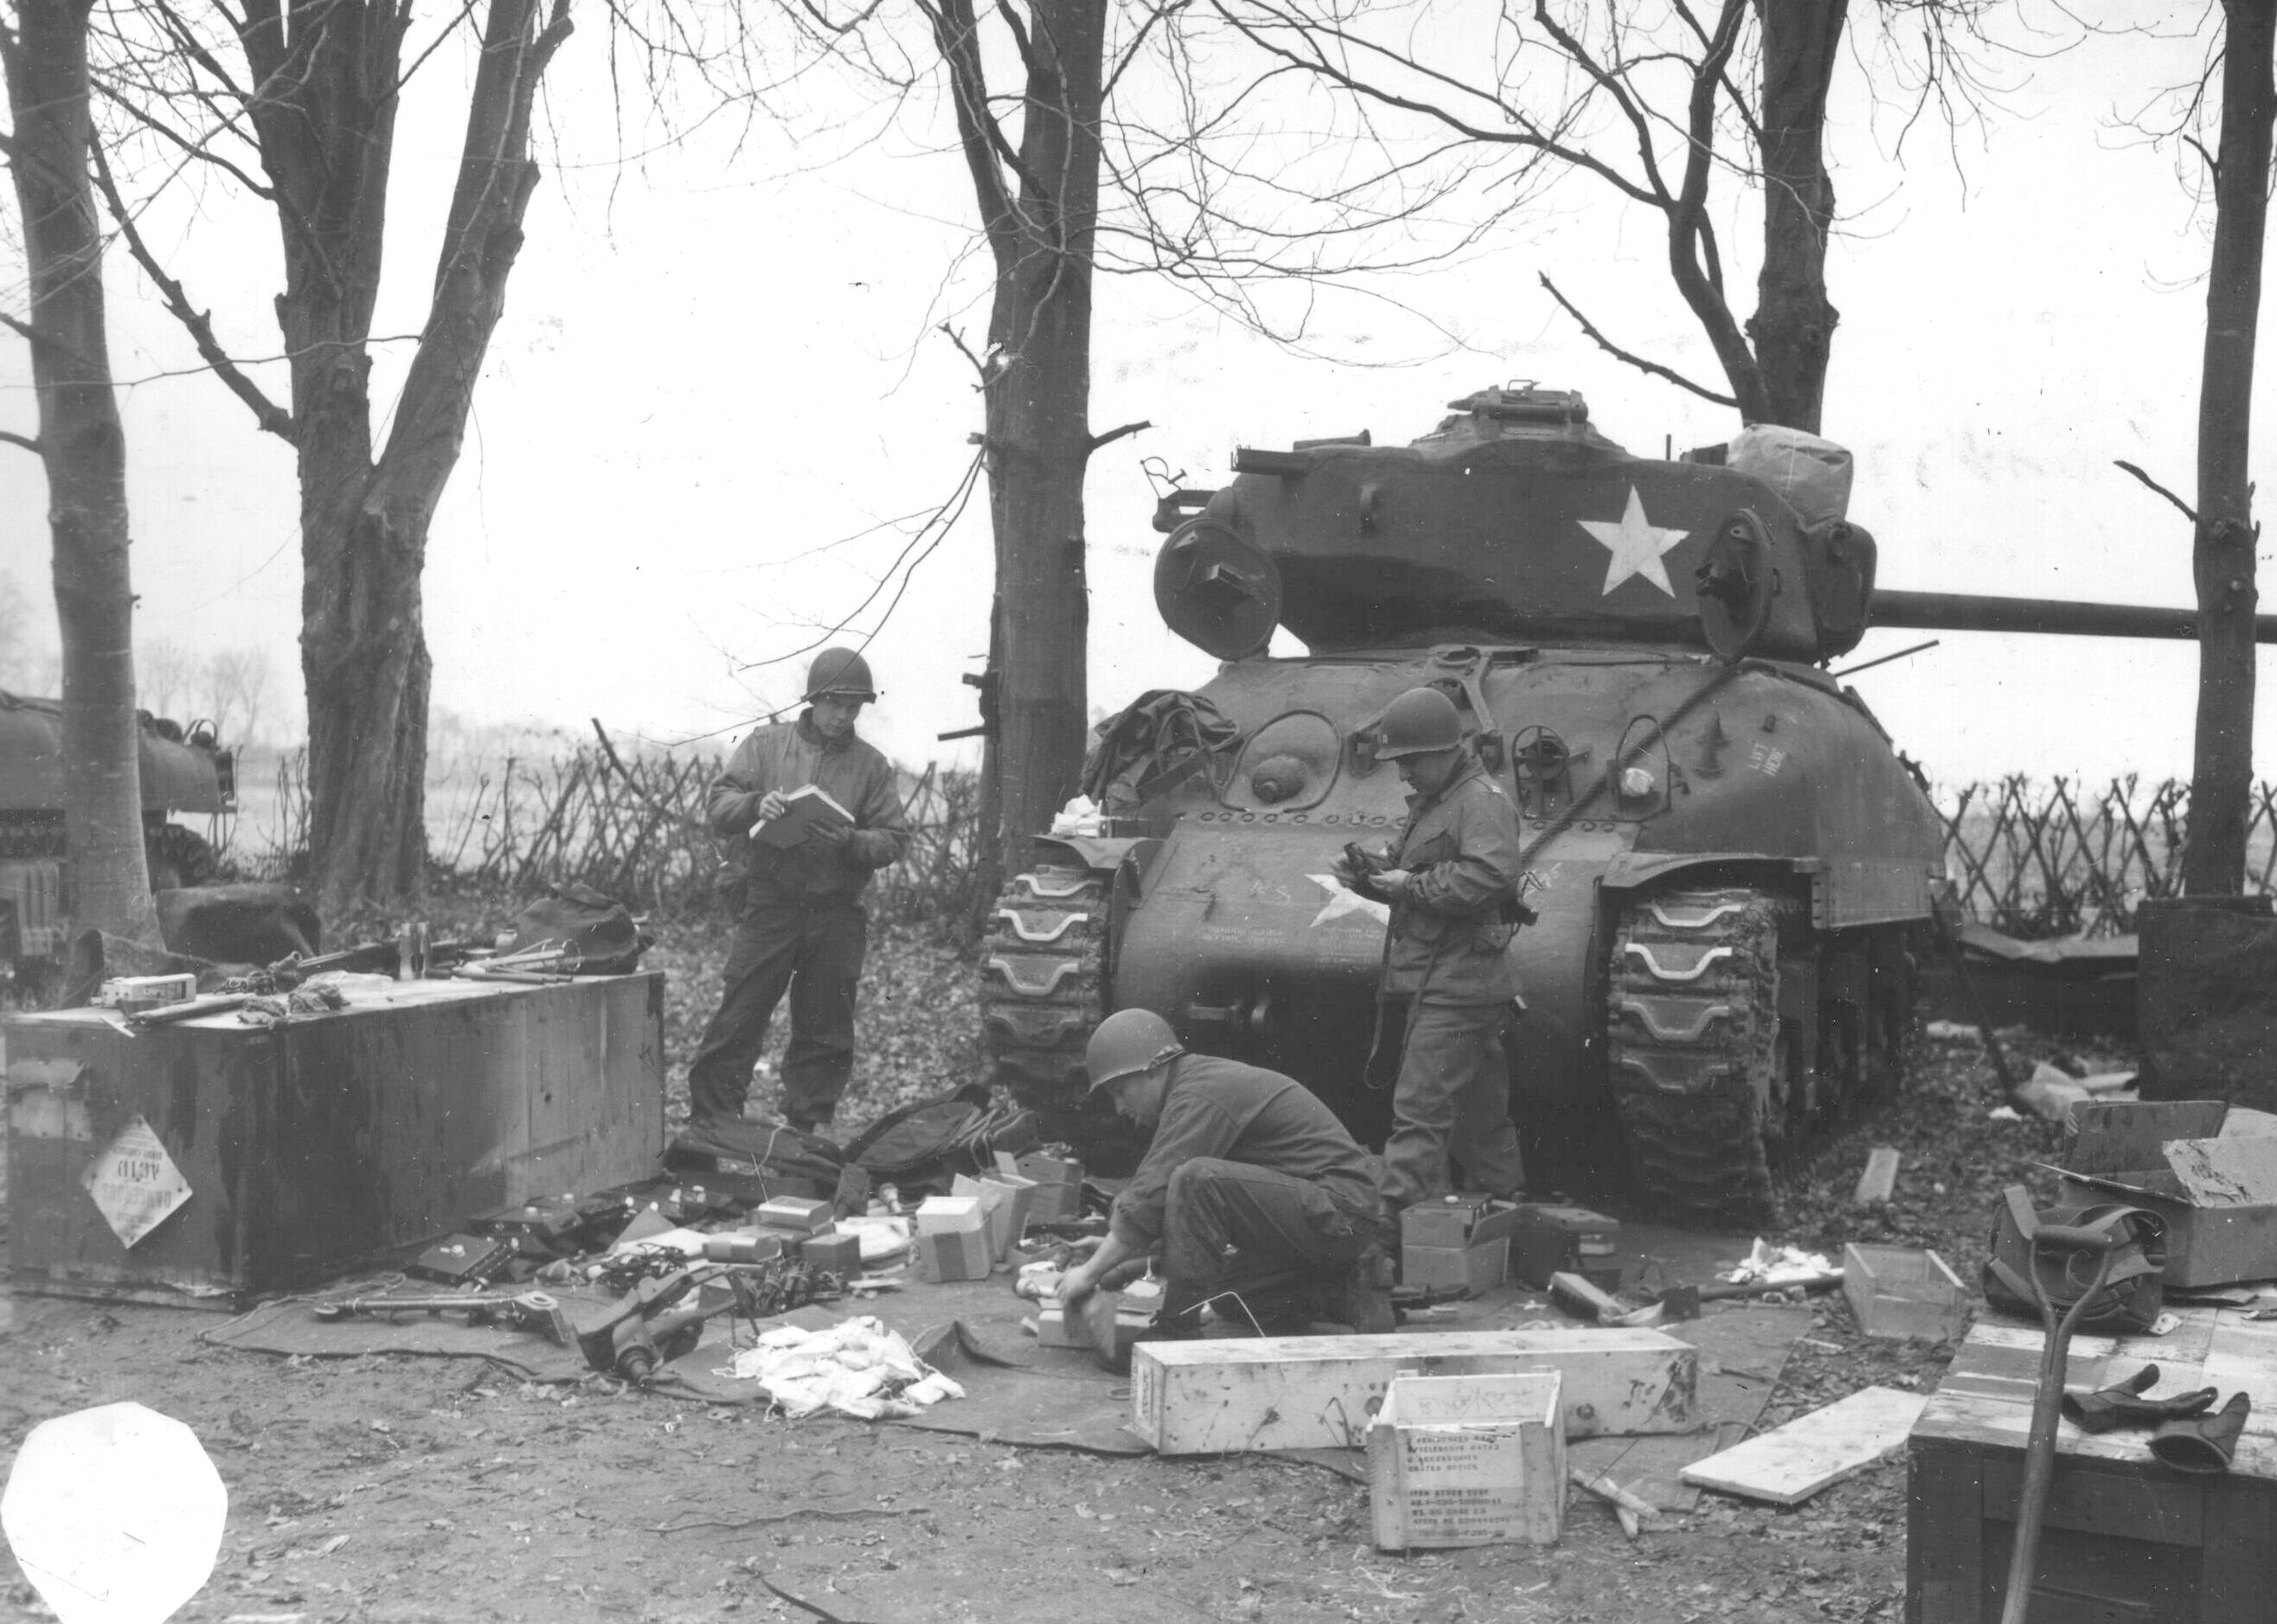
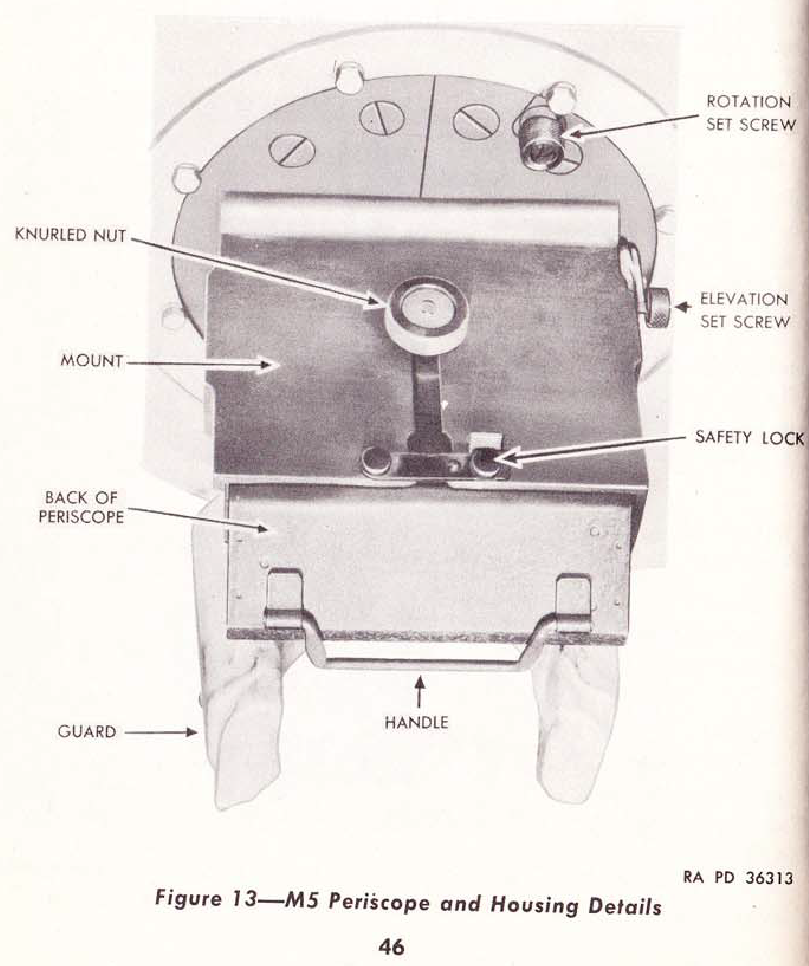
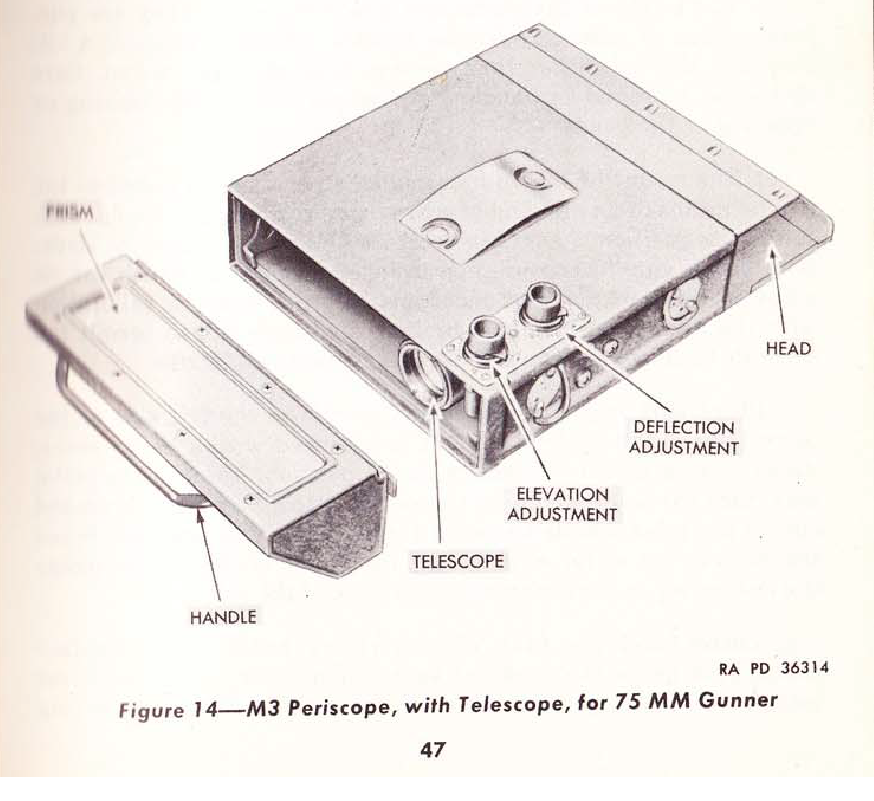
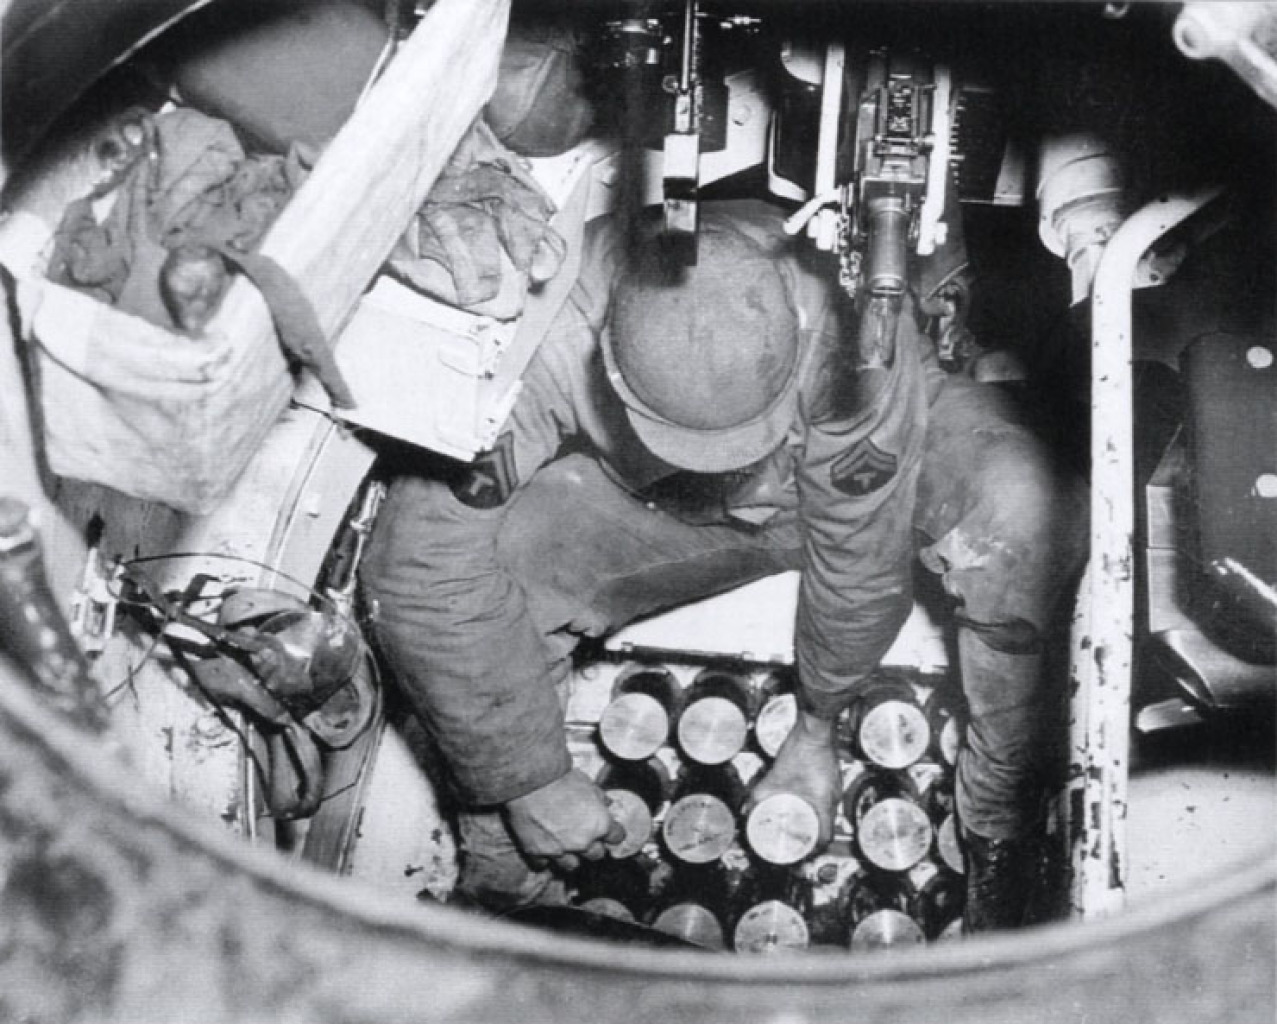
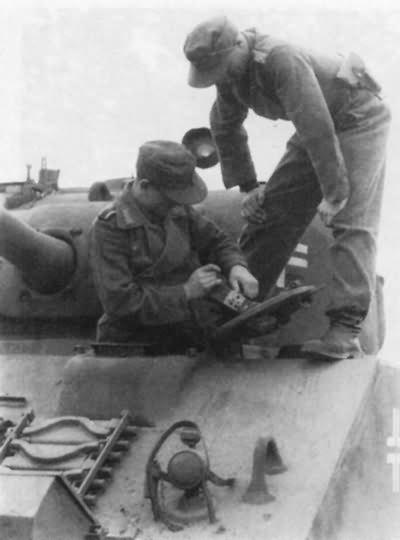
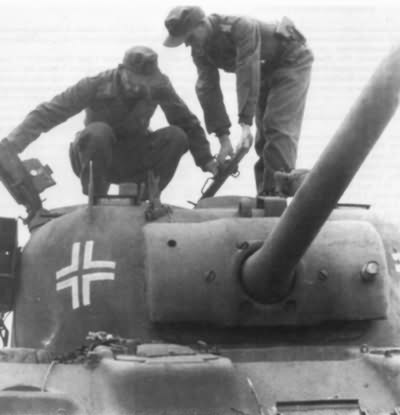
The Commanders vane site is an early version bolted to a late war vane site pad. The tank has the early style gunner’s periscope.  The gunners periscope is missing the linkage going down to the gun.  The radio looks like a 528.  Note the Armored doors on all the ammo boxes and ready rack. The tank is missing a lot of interior storage, it may have been removed in preparation on shipping the tank out to it’s new owners.

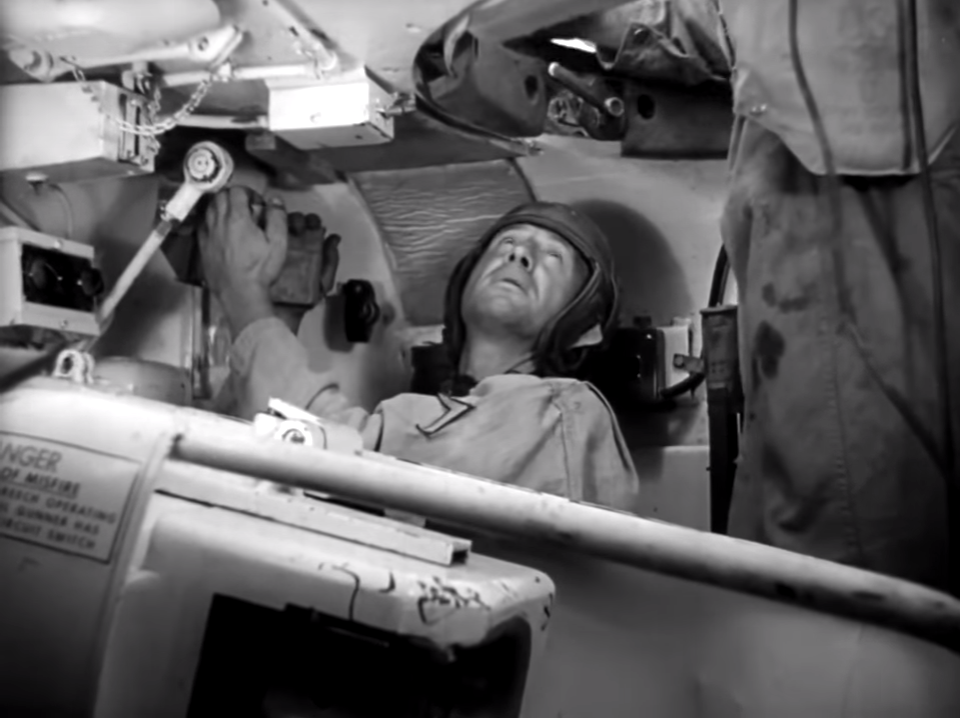
I‘m no expert, but I think the Chieftain confused a .30 cal ammo bin for the 75mm ammo bin right next to his shoulder for the location of an SCR-506, I just can’t see a WWII radio fitting in the tiny box! You can see how sparsely filled the interior is, as issued the tank would be stuffed full of items to help fight it, live with it, or keep it running.  The Chieftain shows just how easy even a small hatch Sherman was to get out of,  the the Loader was still going to have some issues though.  I wish he would have tried the belly hatch out, but maybe it’s welded shut or something.

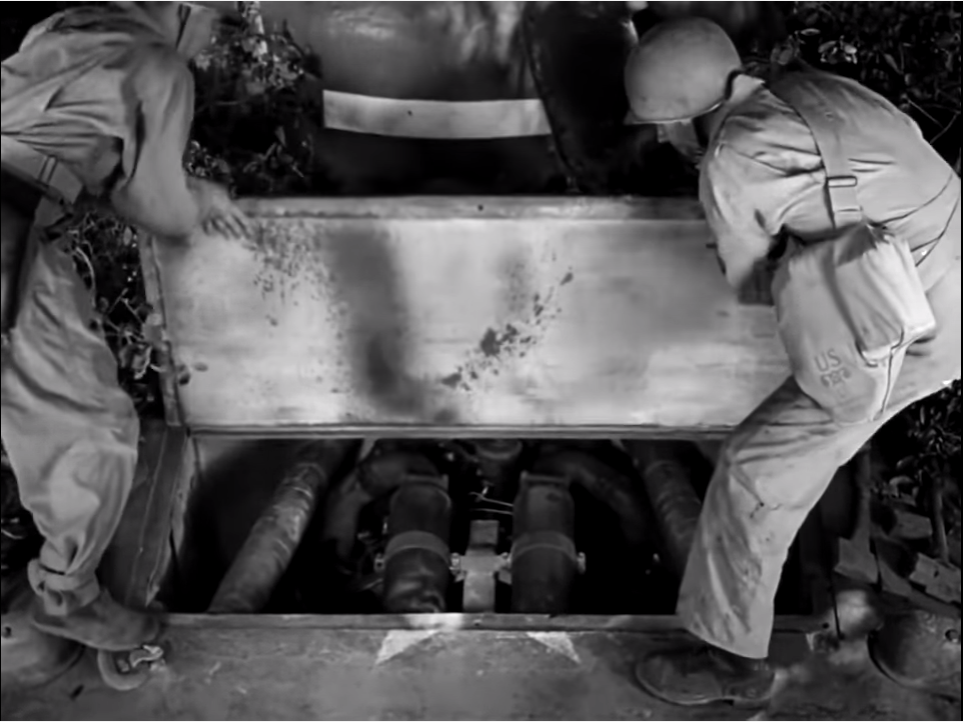
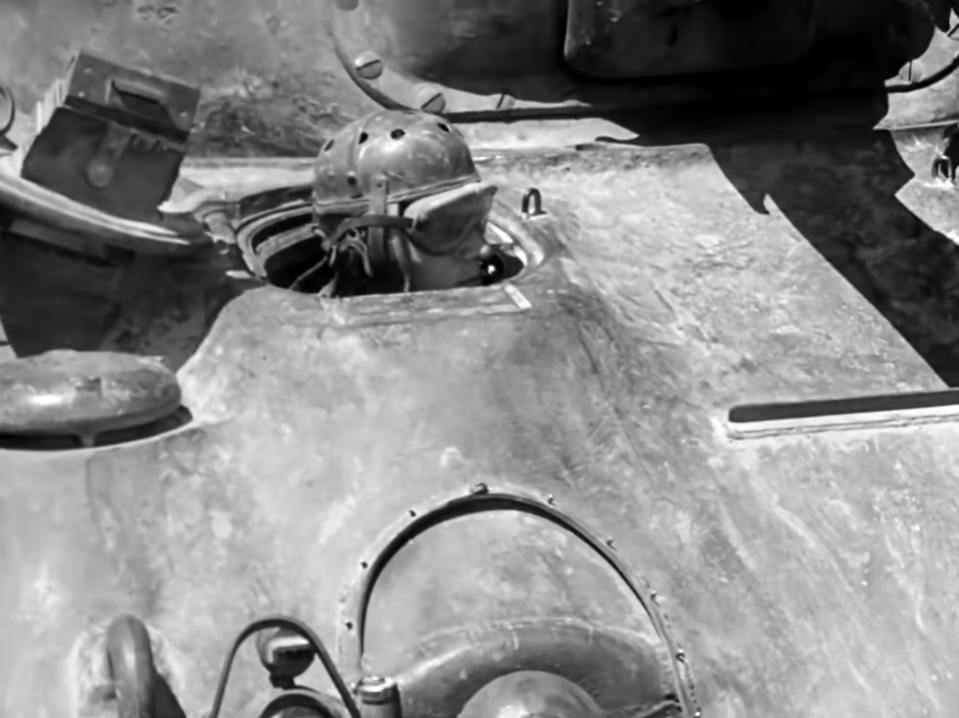
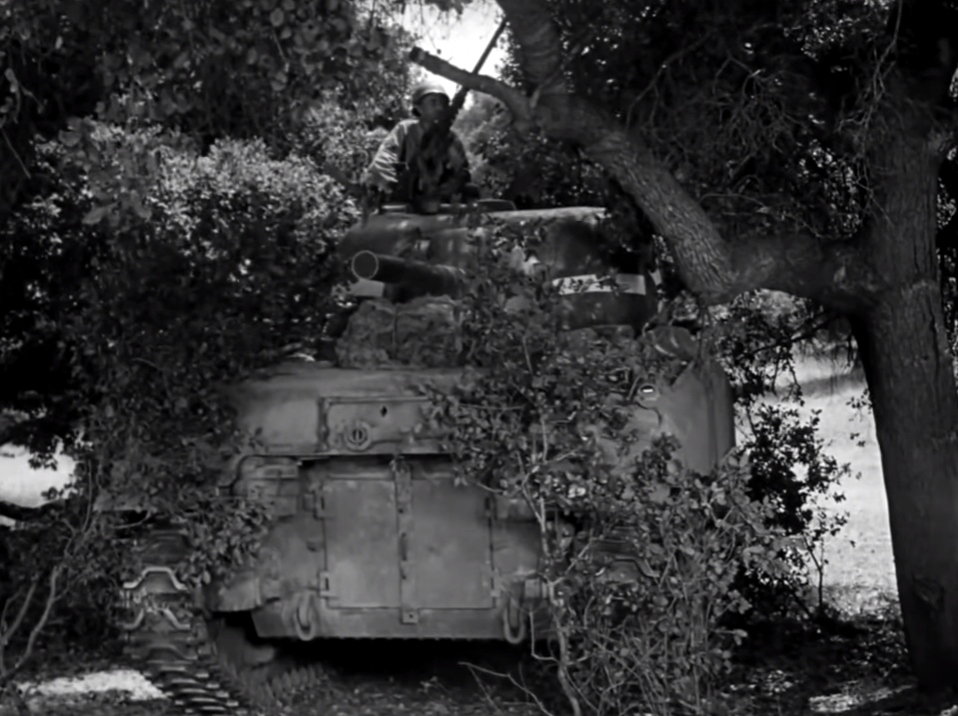
He covers the small floor hatch on the Grizzly tanks, and you get a nice shot of the early escape hatch.  They also show the generator mounted on the rear of the transmission in one of the shots, briefly.  You can also see the full turret basket’s mesh screening that separated the turret crew from the hull crew. Part of the quick fix was to cut this all out.  I suspect most of the inconsistencies in the tanks details are due to the restoration crew using the Sherman parts they could get their hands on.  Very few people would  even notice or know it had the wrong commanders hatch, or even whole turret.

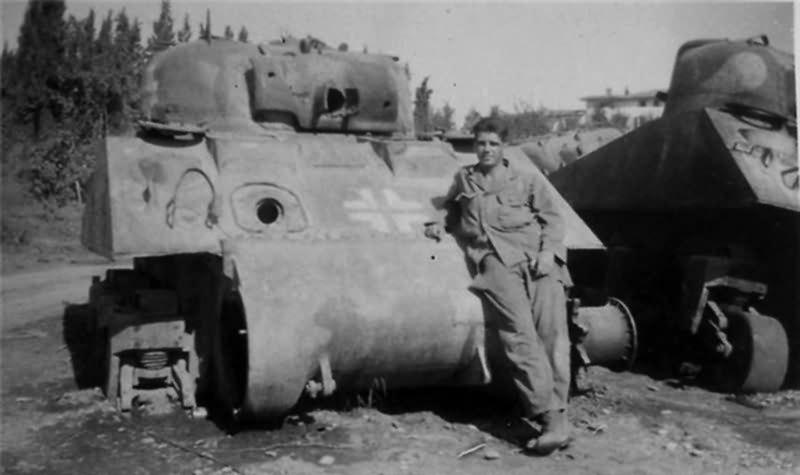
A note on the tank, it belonged to a the Military Vehicle Technology Foundation, a fancy name for the collection of a man named Jacques Littlefield. He had a passion for armored vehicles of all types but really liked tanks. He restored many to full functionality, including working main guns and machine guns on some tanks.  Owning a working tank cannon is easier than you would think, and far easier than getting the paperwork approved to own machine guns in California, and Jacques Littlefield did both.  He employed a restoration crew with world class skills and did some amazing restorations, including a Panther A that was impossibly damaged, but still brought back to life.  That Panther was his crowning achievement, and he was a real mover and shaker in the international military vehicle restoration scene, seeing that tank run was one of the last things he achieved, because cancer claimed him shortly after.

The MVTF was supposed to make sure the collection of vehicles, that were a labor of love his whole life, lived on when he passed. Unfortunately the location of the MVTF, Portola California, on a large chunk of very private property, with very limited parking really presented some problem.  The collection was used often while it was there, by TV productions like Myth Busters, and was a staple for the Wargaming Staff for their productions, and occasionally opened up to groups of vets, or other interested people.  There were other difficulties with the location, and ultimately the collection was donated to the Collings Foundation.  They reportedly decided to keep 40 of the most significant vehicles and auction the rest off.  The money from the auction was going to be used to build a facility in Stowe Massachusetts, but due to zoning issues, the permits were not provided, leaving the vehicles they did keep in limbo.

I‘m sure the Collings Foundation, a really amazing Charity, they keep many rare WWII aircraft, and cars, including race cars running, has a plan for the rest of the tanks. Their website only lists the Panther in their collection, I hope that doesn’t mean they sold the rest when the museum fell through.  That’s not a criticism of the CF, they I’m sure know their business far better than I do, and they really are a top notch group of people. Just browse that site to see the airplanes they’ve gotten flying.  The only real B-24 liberator and a working F-4 Phantom are just two of the notable planes!!  If you know anything about aviation, you know just how complicated and expensive keeping an aircraft like a Phantom flying is, especially if you don’t have the resources of the U.S. Navy or Air Force backing you.

I have to say, this is one of the best Chieftain’s hatches they have done. Granted, I’m a tad biased, since it was on the Sherman, well a Grizzly made into a later model small hatch Sherman anyway, and the Chieftain really has gotten pretty good with the Sherman and its sub variants, and even has a book on US WWII TDs on the way.


#63 Security On the March: How a WWII Sherman Tank unit prepared for an attack on march.

Security on the March:  With the Sherman Tank

seconmarch

Tank and AFV News posted a link to a fascinating YouTube video covering march security of mechanized units, the film is from early 43. This Army training film is almost a half an hour long, and it’s really interesting, and has some rare shots of men working inside a Sherman.  The film takes place somewhere in the US, probably on a Hollywood backlot, the Desert Training Center was pretty close so getting the tanks to Hollywood wouldn’t be hard. At times the film is clearly using special effects, and that lends more credence to it being done in Hollywood. The film covers security on the march, and does it by covering a tank platoon, and what it should be doing. It covers night movement, camouflage when stopped and gives tips on being stealthier in your tank; it also covers how to use the columns firepower if attacked from the air.

m4a1-haulingrear-from-army-training-filmm4a1-haulingrear-from-army-training-film4

The tanks used were all early M4A1s, but not super early since they are not DV tanks, but still have shorty gun mantlet and no telescopic sites, they do have heavy duty suspension as well. The tanks also have full turret baskets, with the 12 unprotected ready rounds, and no armor over the sponson ammo racks or the turret cheek add-on armor. Its possible training tanks did not have these features removed like tanks slated to see combat, or the film was made very early in the war.

m4a1-haulingrear-from-army-training-film12
This image shows the big picture of a moving column a troops. This film only covered the role of the main body.

It is an Official War Department Training film, number T.F. 21 2035, and I want to make sure and thank Jeff Quitney for putting it up on YouTube! I had never seen it before so it was a real treat.  He has a lot of other good content up on YouTube as well so check it out.

m4a1-haulingrear-from-army-training-filmm4a1-haulingrear-from-army-training-film6

Now let’s talk about the contents of the Training Film.

Right off the video starts off with a M4A1 driving by on a dirt road, it’s going at a good clip, and you can just make out another M4A1 trailing behind it at a few angles. The next shot shows a tank crew in front of their M4A1 going over a map with commander, and it just keeps getting better. I took well over 100 screen caps watching this film.

m4a1-haulingrear-from-army-training-film8m4a1-haulingrear-from-army-training-film7

The training film makes it clear there are the five things that need to be kept in mind at all times to make a road march safe.

  1. Advanced prep
  2. Alertness
  3. Concealment
  4. Dispersion
  5. Firepower


The enemy’s goal in an ambush would be to get to the main body of the column, and the film talks about how they should move, and covers things down to where each vehicle is to point its gun, to be prepared for an attack that might come either from the air, or ground. The film focuses on the actions of a single, five tank, platoon in the main body of the column, and then covers each of the five steps previously mentioned, and how that platoon would do them.


  1. Advanced Preparation: Because good prep makes for smooth operations.

  • Be ready for gas, liquid vesicant detector paint, this pain, turns green to red when vesicant gas droplets touch it. A large square of this stuff was painted on the front of the tank. Then the decontaminator stored in the tank could be used to spray down the tank. The crew was also issued gas masks, and this was the time to make sure they were in working order.

m4a1-haulingrear-from-army-training-film13 m4a1-haulingrear-from-army-training-film14 m4a1-haulingrear-from-army-training-film16 m4a1-haulingrear-from-army-training-film15

  • Check the tanks readiness out. The Commander needs to check the tanks fuel level personally. The Crew, checks the engine out, checks the tracks, and checks out the ammo load. Do not leave with an empty ammo rack if ammo is available. Main gun rounds should be clean and undented.

m4a1-haulingrear-from-army-training-film17 m4a1-haulingrear-from-army-training-film18 m4a1-haa5png m4a1-haa3png m4a1-haa1 m4a1-haa2

  • Platoon leader review whole route on the map with all tank commanders. Cover all points of interest along the route, likely ambush spots, landmarks, areas of good cover for rest points etc. Each tank commander will then pass all this info along to all his crew members, ensuring they can all fill in for each other. If one tank has to fall out for any reason, its crew knows the whole route and plan.

m4a1-haa10 m4a1-haa11 m4a1-haa12 m4a1-haa13 


  1. Alertness: Because surprise is the enemy’s best weapon, always be on guard for attack, air or ground.

  • Every man in each tank turret is an air observer, the Tank Commander should always be looking around the tank, scanning the ground and air, and looking back. The Co-Driver should be watching the flanks, because the Driver is watching the road. The gunner and loader should be using their periscopes, all scanning for an attack.

m4a1-haa18 m4a1-haa19 m4a1-haa20 m4a1-haa21

  • The crewmember in the turret hatch needs to be alert, so when the commander is tired and needs to take a break, the gunner or loader will swap places with him. The Commanders position, no matter who is manning it has to be ready to receive signals from the platoon or company commander and pass them on, be they flag, or hand or radio. He also has to be able to see a messenger that needs his attention. The Loader should help the commander tend the radio, and the crew should listen to the radio to keep informed.


m4a1-haa31 m4a1-haa32 m4a1-haa33 m4a1-haa35

  1. Concealment: Keeping a 32 ton tank as hidden as possible!

  • Dust is bad. You can’t hide tanks in a dust cloud, so don’t drive on soft dusty shoulders if you’re on a road. Even if that shoulder is shady, and will make the tank more pleasant inside, the dust can be seen for miles. Sometimes it can’t be avoided, but try to do so as much as possible. Line formation is best for use in places dust cannot be avoided. Driving at a slower speed can help minimize dust as well.
  • Shielding Terrain is to be taken advantage of anytime it won’t produce large amounts of dust.
  • Shade is ok is it does not make extra dust, and can help hide you from air observation.
  • Your goggles can reflect light for miles; if you’re not wearing your goggles store them in the tank. If they are needed to protect your eyes, they should be covering them. This applies to any shiny object.
  • Do no silhouette your tank on a hill or high ground. Drive around the base of the hill. If you have to drive on a hill stay below the crest.

m4a1-haa63 m4a1-haa61 m4a1-haa50 m4a1-haa62 m4a1-haa45 m4a1-haa44


  1. Dispersion: Bunching up is bad, if you are to close one artillery round, or bomb can damage multiple vehicles.

  • Bunching up like a bunch of cows with their tails in the breeze is bad. This makes you a big target.

m4a1-haa65

  • Proper daylight spacing is at least 75 yards between tanks. If visibility and terrain allow, you can have more than 75 yards, but never less.  In hilly terrain it is easy to bunch up, keep your eyes on the tank in front of you if it starts slowing down; you will have to as well.

m4a1-haa66 m4a1-haa54

  • Falling Out. If your vehicle has to fall out for some reason, engine troubles, or some other issue, make sure you pull far enough off the path to not cause a bottleneck on the path, and slow the rest of the column. Make sure and signal the column and platoon so they know what is going on. Don’t try and catch up, wait for a halt, then retake your position. Fall in with the rear guard until the halt.

m4a1-haa70 m4a1-haa71


  1. Firepower: A Sherman tank packs a lot of punch, keep it ready, it’s your ace in the hole

  • The main gun should be trained out and ready, but not loaded. The lead tank and the next in line keep their main guns aimed straight ahead. The third tank in line keeps its gun trained out to the right. The fourth tank keeps its gun trained out to the left. The fifth tank will have its main gun traversed to the rear.

m4a1-haa74

  • M2 .50 anti-aircraft guns should be kept half loaded, so they can be quickly brought to bear on any attacking aircraft. To keep the column covered, alternating tank commanders look forward and to the rear during air attack.

m4a1-haa75 m4a1-haa76 m4a1-haa77 m4a1-haa78

  • Do not halt, during an air attack. Your tank is much harder to hit when moving. Even if you have good concealment, do not stop. When a plane is sighted signal the rest of the column, close all hatches but the commanders, alternate the .50 AA guns and engage the aircraft.

m4a1-haa88 m4a1-haa89 m4a1-haa90

  • Report the results of any air attack up the chain of command. TCs report to Platoon Leaders, Platoon Leaders to Company Commanders, etc.

m4a1-haa91


Halt security: Units on the move have to stop, for human reasons or mechanical ones, and you can’t just do it willy-nilly, there’s a plan for that too.

There are two kinds of stops a unit on the march will make. The short ten minute halt, to check the tanks out, for the crews to stretch their legs, no major maintenance will be taken on these short halts. The second kind is the Long halt. On the long halt, the tanks can be repaired if anything major popped up and refueled, and the crews could get some chow.

Security rules and things to note on the short halt:

  • Check the ground where the tank will be parked, make sure the tank won’t get stuck, or sink in. Back into the spot so you will not have to back out if the tank needs to move out in a hurry.

m4a1-haa94 m4a1-haa95 m4a1-haa96 m4a1-haa97

  • First Echelon Tank Maintenance should be done on the short halt, check the tracks, tighten the end connectors, check the motor out, lube as needed.

m4a1-haa113 m4a1-haa114

  • Review the course, check out the route the column is taking on the map, and review it with your crew and the rest of the platoon.

m4a1-haa99

  • Be Alert, post guards, at least two from each crew. One man must always be on the platoon leader’s radio. Do not let the enemy sneak up on your position.

m4a1-haa100 m4a1-haa101

  • Disperse on the halt, in the same pattern as on the move; each tank is still responsible for covering the area they were covering with their main gun. Use any cover available on the halt to conceal the tanks as best possible from air or ground observation. Spacing cannot be less than 75 yards.
  • Each tank will have the commanders .50 manned.

m4a1-haa103 m4a1-haa104

  • When pulling out, each tank will keeps its spacing, and will not stop on the road to form up. 

m4a1-haa108 m4a1-haa109

Security Rules and things to note on the long halt:

  • All the rules for a short halt apply
  • You can pull further from the road on a longer halt. A guard has to be posted near the road to receive any signals though.
  • Dig Prone Shelters, you might not be able to get back into the tank in a surprise air raid or artillery attack.

m4a1-haa112

  • Eat while you work, you never know how long the halt will be.
  • Take more time to conceal the tanks, cut or break off tree branches and use them to break up the tanks lines. Rake the tanks tracks leaving the road away.

m4a1-haa119 m4a1-haa115 m4a1-haa116 m4a1-haa117 m4a1-haa123 m4a1-haa124

  • Use shade and any local cover to hide the tank, move the tank as the shadows used to hide them move with the sun.

m4a1-haa120 m4a1-haa121

  • If no cover can be found, use the camo net.

m4a1-haa122

  • Some camo is better than nothing.

m4a1-haa14


Special Rules for night marches:

  • If under air attack, Stop, for both concealment, and to prevent bunching up.
  • If under air Attack, Do not fire, unless you are sure you are spotted.
  • If under air Attack, Turn off your marker lights, the video doesn’t say this, and they used models in the film, but I think it’s a safe assumption.
  • No light, not even a smoke, and smoking is bad anyway, mmmkay.

 m4a1-haa125


Now for some thoughts on the film, it is really very interesting for several reasons, and the quality is very good. The main reason it’s interesting is the look at prewar combat, or pre air superiority march doctrine. The attention paid to defense from air attack would not be pushed nearly as much even by the Italian campaign and would be almost an afterthought by Normandy. Later films probably pushed very carefully searching for well concealed AT guns and infantry that the lead and flank scouts may have missed.

It is also interesting how gas attacks and preparation for them is first thing they cover. I’m sure shortly after most unit got in combat they ended up losing or discarding most gas related gear, and I can’t ever recall seeing a man carrying a gas mask case or a square of the gas detecting paint on any vehicles in combat photos.

The night shot of tanks moving is clearly done with models. The machine guns used during the mock air raid also appear to be prop guns. If you watch carefully, most of the film, the .50 M2s have the normal short cooling sleeve with round holes, during the shooting scene, these have slotted sleeves, and the barrels do not seem to recoil at all.  The explosions look like typical Hollywood fare as well. It should come as no surprise Hollywood was willing to help the war effort; this is just one example of many. All the big studies did propaganda movies and even Bugs bunny and Disney got into the act.

I have been looking the tanks over, they are all M4A1 75 tanks, they are all small hatch hulls, but none are DV, they all have heavy duty suspension bogies. Two have three piece cast differential housings, the rest have the first version of the cast one piece diff housing. The turrets all look the same for the most part, with the short mantlet, so M34 gun mounts with no telescopic sights. Some of the gun mounts have slanted lift rings, others don’t seem too. At least one turret has the port for the spotlight on the roof. One tank has the siren mounted in the front plate with the odd single brush guard, the rest seem to have them mounted on the fenders.  Two or three of the tanks appear to have T54 steel chevron tracks, while two or three seem to have T47 steel bar cleat tracks. I’m bad at spotting the little clues that give away who made what, but I think two of the tanks were made at PCF in Washington; I think the two tanks with three piece diffs are from PSC in Illinois.

m4a1-haa9 m4a1-haa6 m4a1-haa23 m4a1-haa22 m4a1-haa28 m4a1-haa27 m4a1-haa69 m4a1-haa126

#61 Storage Ammo and Everything Else: The Army packed a lot of Gear and Tools into the Sherman, along with the Ammo, Guns and Men

Storage Ammo and Everything Else: The Army packed a lot of Gear and Tools into the Sherman, along with the Ammo, Guns, and Men

When most people think about a tank, wait, well, most people don’t think about tanks, but when people who think about tanks think about them it’s the gun, the armor, the motor and it running around doing tank things that they think about. That’s not all that a tank is about; a tank is also about storing things, lots of things. Not just ammo, I mean sure, thousands of rounds of MG ammo and over 100 main gun rounds on late model Shermans, but even after the crew had packed all that stuff in, there was still a hell of a lot of other stuff they carried around. The tank had everything it needed to be maintained by the men it was issued to, including manuals, and a limited number of common spare parts for certain components and as much gear the tankers could accumulate to make their lives easier strapped on outside too.

M3 Lee ammo chart
A chart from the M3 Lee manual, TM9-750 showing the internal ammo layout

There are at least 61 hand tools used for maintaining the tanks automotive components.  Most of these tools were stored in a tool bag behind the driver. Some items like the non-magnetic screwdriver for adjusting the compass were stored in brackets on or near the device they were specifically for.  The oiler was mounted on a bracket by the assistant driver. He probably used it a lot. The huge track adjusting wrench and all the pioneer tools were mounted on the hull on the outside of the Sherman with the 20-foot long tow cable. The tanks weapons, including the main gun, also has a bunch of tools specific to them, also stored in the tank. These included combination wrenches and other special tools to maintain the machine guns, and an eye bolt and breach removing tool for the main gun adding between 6 and 10 more tools.  These tools were stored in a toolbox or a spare parts box. The grease gun, or gun lubricating, was mounted on the right rear lower hull, under the turret basket. It had an extension hose stored with it, and probably tubes of grease. This is what the crew would use to lubricate all the grease fitting that just about anything that moved had.

Шерман-1 (2)
The crew of an M4A1 (76)W Sherman load all the stuff that comes with a freshly issued tank into it.

Now the crew had to pack in the communication gear.  The tanks radio antenna broke down into 6 parts including the case and was stored on the blanket roll rack on the rear of the tank on late model Shermans. The early Sherman manuals do not list a location for them that I can find. There was also a flag set, M238, it had its own bracket on the right side of the turret.  This flag kit came in a case, had 3 flags, red, orange, and green, and 3 flagstaffs.  You also had the radio setup in the back of the turret that was technically removable.  The radios also came with a spare parts kit, small tool kit, and spare tubes and a crystal box to change frequencies.

75ID_Riedwihr_45 (1)
An M4A3 (76)W tank with a lot of stuff stored on the back

The tank was issued with 12 signal flares (they shoot up in the air), and they were mounted in their own box on the battery box. There were 3 white star parachute flares, 3 white star cluster flares, 3 amber parachute flares and 3 green parachute flares. Then there was the panel set. The set, I think was the big orange panels they put on the rear deck, so attacking fighter-bombers could tell US tanks from German ones, came with two panels, and two cases for them. They were also stored in the blanket roll on the foldup shelf on the rear of most late model Shermans.

The Sherman had two fixed 10 pound CO fire extinguishers that could be triggered from inside the tank, and outside if you knew where the pull handles were. They also provided the crew with 2, four pound CO fire extinguishers, on mounted on a bracket on the right side of the transmission, and the other mounted on the rear of the turret basket.  They also supplied a small decontaminated apparatus, called the M2, essentially a 1 ½ quart fire extinguisher, filled with a decontaminating agent instead of fire retardant. These were issued all the way into the sixties as a way to clean something like mustard gas residue from the areas of the tank the crew needed to touch. It was stored in a box in the hull, and probably got thrown away a lot.

The crew’s needs were taken into account, and there was a specific storage location inside the tank for 2 days of rations for the five-man crew. Each crew member also had an M1910 canteen mounted near their position.   There was a ration box in the right rear sponson, and it could hold either, 30 boxes of “K” rations,  60 cans of “C” rations or 2 or the much larger “D” rations. There was a small 1 burner Coleman stove stored with the rations. You see an awful lot of pictures of Sherman tanks and other AFV with a lot of ration boxes tied on the tank, so the crews appear to have liked to have more than two days food on hand. Of course, rations boxes are not bulletproof, and I bet it wasn’t all that uncommon to find shell splinters or bullets in the ration cans when stored outside.

We are not even close to done here, next up, sighting gear.  The tanks were issued with an M13 binocular set; this consisted of the M13 binoculars and the M17 case.  These were secured to the turret wall in its own bracket, near the commander’s position.  On late model Shermans, there was a box next to the radio that held 2 spare vision blocks for the commanders all around vision cupola. In a box behind the driver, you could find 10 spare bulbs for either the elevation quadrant or azimuth indicator. There was also a case for the Gunners Quadrant M1with its own bracket above the 5-gallon water can installed in the right sponson.

GUnners periscope

The periscopes and telescopes deserve their own section so here it is. There was a holder for the periscope in the periscope box in the turret, along with 3 periscope heads, for the M6 periscope. There were two hull periscope boxes with the same contents. There were 6 more periscope heads on the bracket for the driver’s hood for a total of 15 spare heads.  I’ve read several accounts where both the Germans and Japanese aimed at the periscopes and vision blocks to blind the tanks.  In at least one case in the Pacific, the tanks ran out of spare heads during the battle and were blind without opening a hatch. I bet periscope heads were popular as an extra spare on the tank.  Now, that was just heads, there were 12, M6 periscopes in each late model Sherman. Six mounted in in various places, one in the driver’s hatch that rotated, and a fixed one in front of him. The co-driver had the same layout, just on the other side, he used the hatch or fixed periscope to aim the bow machine gun.  The loader had had a rotating periscope at their station, and the commander had one in his hatch. There were two complete M6 periscopes in brackets on the turret walls, one near the loader, and the other by the commander. The amazing piece of American tank engineering, the driver’s hood holder, stored four complete M6 periscopes, along with all those spare heads and the drivers hood!

GUnners periscopeII
This is the predecessor to the M4A1 periscope

The gunner had his own special set of periscopes. He had an M4A1 periscope with telescope M38A2. On late model Shermans this was the auxiliary sight but allowed the gunner to have a nice wide field of view to find the target, the commander was handing off, mounted in his fixed periscope. He had a complete spare M4A1 periscope in a box on the floor by his feet.  They did not give him a spare telescopic sight, in late model Shermans, the M70F was used, and it was mounted on the gun mount. He also had a series of lamps to illuminate the reticles of the M70F and M4A1 sights. He also had lamps for the M1 quadrant, and another for the M9 quadrant.

the drivers hood

Oh, we are not even close to done here people, so hang on, it gets even more exciting when we get to the ammo storage and storage changes in a few paragraphs.  Anyway, let’s cover some more ‘general equipment’, before getting to ammo storage.  Let’s see, the tank had 5 M1936 OD canvas bags to store much of the gear that’s been mentioned, and 1 tool bag for most of the tools listed, stored behind the driver. There were 3 flashlights TL-122 on brackets around the turret, one near the commander, one by the gunner and one by the loader. They carried 12 spare batteries in box C101039. This is the same box all the lamps for the gunner’s sights went.  There were also 5 safety belts for the crew’s seats, it may not seem like a vehicle that doesn’t hit 35mph would need them, but off road, I bet they were handy.  The tank came with an 18-quart canvas bucket that was stored in the right sponson.  There was a special inspection lamp stored in the toolbox. The spare bulb was stored with the other spare bulbs in box C101039.  The Home light auxiliary motor had its own accessory kit, it was also stored in the sponson toolbox in the right front sponson.  This little kit had a spare spark plug, and the rope and wood pull handle to start the unit if the batteries were dead, plus a set of tools to maintain it.

M4A2 early storage
M4A2 ammo storage. Diagrams like this seem to have gone out of favor in the later manuals, as none of them seem to have them.

The Army liked to make sure a tank crew had lots of stuff to read, so they dedicated a small compartment in the right rear sponson for manuals. The manuals ranged from the one for the Homelite generator TM9-1731k, the spare parts list for the tank model, SNL G-104 in the M4A3s case, to manuals for both machine gun types FM23-50, and FM23-65, the manual for whatever main gun the tank had, and the mount it used. There was a manual for the model of the Sherman, TM9-759 for the M4A3, TM9-731B for the M4A2 etc. If there was a system on the tank the crew was expected to maintain, there was a manual available to tell him how to do it. I’m sure in some cases what actually got to the troops with the tank when it was finally issued varied a lot though.

Ok, now for the guns and ammo, as we know, a Sherman could have the M3 75mm gun, the M1A1/A2 76mm gun or the M4 105mm Howitzer. They all also had 2 and in some early models 3, M1919A4 Machine guns and one M2 HB machine gun.  On many models, there was a two-inch smoke mortar as well.  Then there were the personal weapons of the crew, on late model Shermans, 5 M3 .45ACP submachine guns were supplied, on early Shermans, a single M1928A1.  Each crewmember was issued an M1911A1 .45 ACP pistol as well.  These weapons, biggest to smallest all had kits to keep them working, and for the machine guns, they carried a lot of spare parts for known parts that wear on Browning machine guns. These spare parts and tools were scattered around in various tool and parts boxes.

US-SMG-M3A1-Grease-Gun-right
M3A1, five of these were issued with the tank
M1911A1
M1911A1, each crew member had one of these as well. One of the finest handgun designs ever made.
Submachine_gun_M1928_Thompson
Early Shermans had only one of these.

All these weapons needed ammo, and in the main guns case oil! This all had to be stored in the tank. The chart below breaks down the changes in ammo loadout for all the weapons on the Sherman, as the tank went through production changes. The earliest Sherman tanks had ammunition stored all over the vehicle in ammo racks with no additional protection.  Ammo was placed in sponson ammo racks, with some around the base of the turret, and in a floor ready rack.  More was stored under the floor. These early tanks had a fully floored, and screened in turret basket, with only two sections open to the hull. On these early Shermans, and we could be talking, an M4, M4A1, M4A2 or M4A4 most of the direct vision tanks would fit into this category.  These tanks, once the ammo around the base of the turret, and ready rack were used, would have to rotate the turret so the openings I the basket matched up with the hull racks, and or co-driver so he could hand in ammo from the rack near him.  The idea behind the full turret basket was to protect the crew from getting their limbs severed by the rotating turret if a crew member stuck it in the wrong place.

Sherman tank ammo loadout chart

As soon as the Sherman saw extensive combat use, it was clear, they were prone to fire. This was nothing new, every tank was prone to fire, and the Sherman had a tendency to burn catastrophically often launching the turret in the air. When the Army did a study into why this was the case, they found the main gun ammo was the main cause of catastrophic fire losses.  When you take a look at the ammo layout chart in the other image, you can see with the ammo stored, in unprotected internal bins all over the crew compartment, an ammo fire was going to be common problem.

M4A4 small hatch storage
This is an ammo layout diagram for the M4A4 tanks, this should be similar to all small hatch early non wet setups before the extra armor was added over the ammo bins.

The first try at a fix for the problem started pretty fast.  The fix was to remove the unarmored ready rounds from around the base of the turret, and reduce the size of the floor ready rack and to make it armored. The hull ammo racks were all covered in armor, and extra armor was added to the outside of the sponson racks on both welded and cast hull Shermans. On late production cast hull tanks, the thicker armor over the sponson racks was just added to the casting.  They managed to keep the number of main gun rounds pretty consistent even with these changes. Another aspect of the early fix was the removal of the turret screening around the turret basket. The ammo rack changes along with some other improvements were offered in kit form to US tank units already deployed, and it was eventually incorporated into the production lines, and tank overhaul facilities. Many Shermans in British use did not see these get these improvements.

This M4 composite seems to be under fire, and has a lot of junk on the back. Notice the soldier looking at the camera.
An M4 composite hull tank with a lot stuff loaded on the back.

The real big change in Sherman storage came when the hull changed from the small hatch to large hatch configuration, though all the late model M4A2 tanks with large hatch hulls and 75mm turrets still got the dry ammo storage setup with add-on sponson armor. The other exceptions are the M4 and M4A3 105 tanks, they had their on dry storage setup. The M4 Composite hull tanks with large hatch hulls also kept the dry storage layout.  So, the M4A1 (76)W, M4A2 (76)W, the M4A3(75)W, The M4A3 (76)W tanks all had the improved wet ammo racks. This change included moving all main gun ammo into the floor of the hull under the turret. These ammo racks were also surrounded by water filled jackets. Early production wet tanks retained the turret basket, and had hatches that could be opened to access the hull ammo racks, later they only installed a half basket, and eventually removed the basket floor entirely.

Укладка-Шерман
A loader checking out the ammo loaded in the wet storage on an M4A3 (76)W tank

On early Shermans a lot of stuff other than ammo was stored under the turret basket, in the floor, were the ammo was now going. This included the batteries, and a generator setup on some models. Also many of the items listed in the early part of this article were stored in the hull floor. These items including the batteries were moved up into the sponsons. The generator was moved to the rear of the transmission.  While making all these changes, they managed to pack even more ammo into the 75mm wet Shermans!

US_3rd_Armored_Division_M4_Sherman_Tanks_in_Action_in_Belgium_1944
Loads of stuff on the back of an M4A1

So, when all is said and done, if you take into account each round of ammo, a Sherman has nearly 8600 items packed into or onto it, officially. Granted, 7500 of that number is ammo, that still leaves 1100 items stored in or on the tank the crew had to keep track of  and I’m sure I didn’t take some things into account. You also have to think about all the personal gear the crew would have stuff in and on the tank. Anything they didn’t want shot or possible stolen had to be stored inside, even with all the official stuff in the tank, the crew would find places to stuff their most valuable personal things.  Less valuable things, like their uniforms and anything they decided to keep that couldn’t fit, was all hung outside.  If you look at late war pictures of Shermans, they are covered in stuff tied down on their rear decks. It’s no secret US troops were fond of taking souvenirs, and it got pretty rampant once they got into Germany.

20--1AD in Italy-X3
Just tank in all the stuff around this M4A1 75

Sources:  Hunnicutt’s Sherman, TM9-752, TM9-731G, TM9-759, TM9-731B, TM9-754, TM9-750, TM9-748, TM9-745   

#59 Subjugated Shermans: Shermans in Nazi hands

Subjugated Shermans:  Sherman tanks captured and used by the Nazis

Updated 9/23/18

M4A1, and M3 Lee in Nazi hands
1. This early production M4A1 75 tank has DV ports, and the stubby mantlet. it was captured from the 1st Armored Regiment of the First Armored Division of the US army, in Tunisia in 1943 and is being tested in Germany at Kummersdorf. Note the armor thickness and angle stenciled on the tank, the Germans were giving it an extensive workout during their testing. The tank was named War Daddy II. I think the most interesting part of this photo is the two Germans on the tank. Look at their faces, they look so sad, they were probably really depressed the allies had such a great tank, and they were stuck with the junk they were issued. 

Sometimes a tank crew can get spooked and bail out of a functional tank. Or a tank can be left disabled on the battlefield and be repaired by the bad guys. The Germans were so desperate for tanks they happily used any Shermans they captured, and unlike the T-34 they didn’t feel the need to modify the tank in any way. The Germans managed to capture Shermans from the Russians, UK, and Americans. The Japanese never captured an intact Sherman. I don’t think the Italians managed to capture one either.

Depending on the crew quality, little things can cause them to abandon the tank, and it seems to be a universal problem since I’ve read of just about all of the warring nations having crews bail out from fright when the tank had sustained only minor or cosmetic damage.  In other cases, the tank takes real damage, like a lost track, an engine problem or a hit that took out an internal fixture, but an experienced crew might stay in the tank.  The crew has a duty to destroy the tank before leaving it behind. There is a whole procedure covering how to do it, and what to destroy if you only have a short amount of time, including many methods.  The methods range from blowing the tank up with special grenades to just destroying the machine guns, main gun, and radios.  This is covered in FM17-67 Crew Drill and Service of the Piece Medium Tank M4 Series.

There are many reasons why a crew might not be able to destroy their tank. If the crew is killed as they bailed out or after, or captured, if they are under fire while they get out, the tank falling into enemy hands isn’t going to be on a soldier’s mind in most cases. In some cases, the green crews could panic and bailout, and not bother even checking the tank over heading for the rear, but this was not a common thing for American tank crews once North Africa was done.  I’ve read of many cases of German crews just leaving the tank, hatches all open, without booby traps and walking off when their Panther inevitably broke down or ran out of gas. I’ve read cases of them bailing out after the tank was hit a few times but still technically functional. Unlike for the American and Allied tankers in General, as the war went on, German tanks, like all their troops, declined in quality, and by late 44 Tank crews got very little training in their vehicles.

The Sherman was an automotive masterpiece the Germans could only dream of producing, they were still capable of keeping them running, it was that good. A German tank mechanic would find even the A57 a breath of fresh air in ease of troubleshooting and reliability. They also liked to use the captured Shermans as ARVs, often with the turrets removed. Having a very tough powertrain and a reliable and robust motor is a very nice thing in an Armored Recovery Vehicle, and the Shermans were just that. It must have been terribly frustrating for the Germans to get a Bergepather in place to try and tow a broken down Panther, only to have it break down too!

Now onto the photos, sorry, but the Germans seem to be as bad at photography, at least of captured Shermans, as they are at tank design, so many of the images are small and blurry. The captions have been updated in great extent to the efforts of Roy Chow, who sent in a very nice comment correcting my many mistakes.  Thanks again, Roy!

German_M4_Sherman_and_crew
2. An M4A2 75 dry, large hatch Sherman, this was a very late production 75mm tank, near the end of the run. Note the armored patches on the hull, it has the large hatch hull but still had the dry ammo racks. The crew looks pretty pleased with their tank, it was more reliable, got better gas mileage and was more comfortable than the Panzer III or IV that were stuck in before. This tank even has a loaders hatch.
m3_lee_10
3. Germans looking at a captured Lee they got to crew and ‘probably’ wondering why their nation couldn’t produce a tank as reliable as this one. Though to tell the truth, the main tanks of Germany were still the PIII and IV at that time, and these tanks were decently reliable, though not on par with the M3/M4 series. They were not giant RVs of Death, like the Lee, so not as cool. 
m3_lee_07
4. This M3 Lee is the same one as pictured in image 3.  Note the lack of side door, meaning this was a later production Lee tank. Like all things American of WWII origin, the Lee saw lots of production changes to improve the design, and they got put into the production line as long as it didn’t slow the line down. 
m3_lee_06
5. An M3 Lee being tested by the Germans at kummersdorf.  This tank has 147 painted on the side of the turret. The next six images are all of  M3 Lee 147.
m3_lee_15
6. Another shot of 147, it appears to have an M3 gun.
m3_lee_09
7. In this shot, we can see it’s a fairly early Lee, it has the Machine gun portholes in the front hull, and the 37mm gun lacks the stabilizer counterweight. The main gun is an M3, not the earlier M2 though.
m3_lee_16
8. Another blurry shot of  Lee 147
m3_lee_03
9. Another blurry shot of 147, this time from the side, the Germans seem to be keeping it clean and well maintained.
m3_lee_04
10. Maybe the best shot of 147, you can make out the lack of counterweight on the 37 ( it looks like another .30 barrel under the 37 when it’s there)
m3_lee_02
11. Three shots of the same captured M3 Lee, lend-lease tank, in Nazi hands.
m3_lee_11
12. Cross shape and general layout say this is 147 again, but no way to tell for sure.
m3_lee_05
13. Here is 147 again, with War Daddy II the M4A1 from the first image in this post, in the testing field at Kummersdorf,  the German Army Proving grounds.  I’d love to know what all that junk on the front of War Daddy II is.
m3_lee_13
14. A Soviet M3 Lee lend-lease tank in the hands of the Nazis, who were clearly more than willing to use a tank with a decent gun that was reliable. This tank has 135 on the turret, does this mean 147 could have been a captured Soviet Lee?
M3_Lee_captured_in_Tunisia_DAK_Afrika_Korps (1)
15. Nazis marveling over the advanced M3 Lee tank. This was probably the first time they had seen a stabilized 37mm gun (note the machine gun barrel like thing under the 37mm gun). This tank also had a stabilized 75mm M2 gun. The Germans never managed to get a stabilizer in a tank during the war. The star and band on the turret lead me to believe this is a knocked out US tank.
m4_sherman_firefly-06
16. The Germans sure did like to take pictures of Shermans at just the right angle to make it really hard to tell what model it was. Thanks, Nazis. Anyway, this tank was photographed a lot and is a Firefly Vc.
m4_destroyed
17. An M4 tank that the Nazis had been using, knocked out and back in American hands.
m4_sherman_firefly-04
18. A Firefly Vc in use by the Nazis, this is the same tank as in image 16. This is a pretty good image and shows the box normally mounted on the rear hull, mounted to the front on this tank, that and the cross placement make spotting it easier. It does not appear to have received any of the add-on armor over the ammo racks on a thin spot in the turret cheek.
m4_sherman_firefly-12
19. Same tank as above, this time on the move, only the driver and commander unbuttoned.
m4_sherman_firefly-11
20. A Nazi tanker marveling at the superior design of the American periscope on this Firefly Vc. This is the same tank as above. Note the headlight guard has a bit of a dent in it.
m4_sherman_firefly-21
21. A Firefly Vc in Nazi hands. This one appears to be a different tank, from all the previous shots, the cross placement is different, the hull storage box is in the right place, and this one has the number six painted in several places the one from Pic 16 does not have.
m4_sherman-75-03
22. Captured M4A1 with writing on the side, the same tank is in the picture below. This tank is a mid-production small hatch tank.
m4_sherman-75-04
23. An M4A1 in the hands of the Nazis, with a Nazi flag soiling its front plate, if tanks had souls, this one would be crying out in pain for being subjugated by the Nazis! note the shorty gun mantlet meaning this M4A1 still only had a periscope main gun sight.
m4_sherman-76-01
24. An M4A3 76w tank captured by the Germans and then knocked out, this shot is actually the last in a series of three, the earlier ones can be found further down. (I plan on fixing this).
m4_image002
25. A Firefly Vc, see the big bulge behind the turret for the radiator, in Nazi hands. It must have bewildered the Germans a tank with an engine so complicated could actually be reliable! Anyway, thanks to reader Roy Chow, we now know this tank probably belonged to 2cnd Canadian Amd Bde, and was one of three captured by the Nazis, painted Yellow, and put back in action before being recaptured by Commonwealth troops. One of the tanks still survives in the Dutch Cavalry Museum in Amersfoort
m4_sherman_firefly-29
26. A captured Firefly Vc, in use by the Nazis, note a large number of German crosses, they really didn’t want to get friendly fired. This really appears to be the same tank from Image 16.
m4_sherman_firefly-07
27. A captured Firefly Vc with a pair of Nazis in front of it. This appears to be another shot of the Firefly in image 16.
m4_sherman_firefly-08
28. The same old Vc from image 16, you can see the armored box is clearly missing from the rear hull in this shot.
m4_sherman_firefly-05
29. our old pal, the Vc Firefly from image 16.
m4_sherman-75-15
30. A captured M4A1 near a bunch of Nazi horse carts. Yeah, the Germans still depended on horses and horse carts for much of their supply chain. The Nazi was bad at logistics. 
m4_sherman_firefly-27
31. A  shot of a knocked out captured Firefly Ic or Vc, probably a captured Canadian Vc in Holland.
m4_sherman-03
32. AM4A3 76 w tank captured by the Nazis, and then destroyed by the US Army, being inspected by US Army troops
m4_sherman_firefly-20
33. A captured Vc Firefly in Nazi hands. The seems to be the same tank as the one in image 21. This tank is covered in the number six.
m4_sherman-75-00
34. A knocked out M4A2 large hatch tank, captured by the Nazis from the Soviets.
m4_sherman_firefly-31
35. A Vc Firefly in Nazi hands, this one looks like our old pal from image 16
m4_sherman_firefly-09 (1)
36. Nazi tankers look over the suspension of their Vc Firefly, this is another shot of the Firefly from image 16
m4_sherman_firefly-10
37. A captured Vc Firefly with Nazis looking at it. Image 16 strikes again.
m4_sherman_firefly-23
38. An Ic Firefly being used as a movie prop
m4_sherman_firefly-30
39. The Germans sure seem to have a lot of captured Firefly tanks, well, as Roy pointed out, not really, they just took a lot of photos of the same firefly from Image 16.
m4_sherman_firefly-32
40. This image has been flipped, you can see the armored plug and commanders hatches on the wrong side on this Vc Firefly. I’m betting it’s the same tank from image 16.
m4_sherman_firefly-28
41. This one is either an Ic or Vc Firefly in Nazi hands. I can’t tell on the wheel spacing at this angle. This seems to be the same tank as the one from images 21 and 33.
m4_image001f
42. A captured M4A1 75 tank. This is an interesting tank, an M4A1 with an updated hull with the DV ports removed, with three piece diff cover, and a turret with the short mantlet, but also later suspension.
m4_image003
43. An M4 in Nazi use.


m4_image004
44. A late production M4A3 75w  and three other Shermans in Nazi hands, the two furthest right appear to be M4A1 75s. Tanks captured during the Battle of the Bulge? (I was super wrong on this caption)
m4_sherman-76-02
45. A captured and knocked out M4A3 76w with a dead German on the front of the hull. This shot was taken shortly after it was knocked out, this is the same tank as the M4A3 76 in image 24. This tank belonged to the 4th AD before capture and was being used by the Germans in the defense of the town of Aschaffenburg. It was taken out by a US M36  TD.
m4_sherman-01
46. An M4 hull being, modified for use as an ARV, in Nazi use. The crew looks very pleased with itself, and this confidence clearly comes from having an awesome ARV at their disposal.
m4_sherman-75-09
47. A very bad shot of a captured small hatch M4A1, the same one from pictures 22 and 23.
m4_sherman-75-01f
.48 An M4 captured by the Germans, it looks like they cannibalized it for parts. since the final tranny and final drives are missing. The name of the hotel leads me to believe this was during the Battle of the Bulge.
m4_sherman_firefly-13
49. A pair of Nazi tankers on their captured Firefly Vc, this looks like our old friend #16 again.
m4_image001bb
50. Vc Firefly with lots of extra track on the front, that was in Nazi hands and was recaptured by the Brits. This is reputed to be from the same group discussed in image 25.
m4_2-
51. Several captured Vc Firefly tanks and a Sherman V also captured and in use by the fascists. I’m betting this are also the ones captured from the Canadians Holland like from image 25 and 50
m4-german-2
52. In these two shots, it looks like British Soldiers inspect a knocked out, captured M4A2, somewhere in Italy.
m4-german
53. In these two shots, it looks like British Soldiers inspect a knocked out, captured M4A2, somewhere in Italy.
m4-german-3
54. This looks like an M4A3 75w tank that fell into Nazi hands. This was probably another tank captured from Task Force Baum in late March of 45, this was the failed attempt by the 37TB of the 4th AD to get Patton’s son in law out of a POW camp.
m4-german5
55. A knocked out large hatch M4A2 75 dry tank, the Nazis captured from the Soviets.
m4_sherman_firefly-26
56. A captured Firefly Vc, it looks like it was freshly knocked out probably in Holland, this being one of the lost Canadian Vc discussed in image 25.
M36_Tank_Destroyer_Recaptures_M4A3_76_from_Germans_in_Aschaffenburg_1945
57. This image shows a Sherman that was in Nazi custody back in American hands. The Tank is an M4A3 76w. This is another image of the M4A3 76 knocked out by an M36, just after the dead Nazi was removed and parts began being stripped off. Note the missing muzzle break. You can also see this tank in images 24 and 45

Most of the images for this post came from WorldWarPhotos.com and many others came from Waralbum.ru. Both excellent sources for high-resolution images from the war.


#49 The Tank Divisions: US Armored Divisions

The Armored Divisions: The US Armored Divisions, What They Were and A Brief History Of Each One.

There were two types of US Armored Division during WWII.  The Light type and the Heavy type, I will detail out the differences between the two below. Armored Divisions were not meant to be assault troops, that was left to the Regular Infantry Divisions, the Armored Divisions were meant to rush through an breakthrough and romp and stomp as far into the enemy’s guts as they could, hopefully taking key objectives and cutting off large amounts of enemy troops.

A light US Armored Division was made up of three Tank Battalions, three Armored Infantry Battalions, and three Armored Field Artillery Battalions. These were broken up into three Combat Commands, A, B, and R. Each of these had a Tank Battalion, an Armored Infantry Battalion, and an Armored Field Artillery Battalion and each one was commanded by a Colonel.  Commands A and B were the primary combat force of the Division and R was the reserve. The Battalions could be swapped around between A, B, and R(sometimes called C) depending on strength and fatigue levels.

The Light Armored Division would also have a large number of service battalions and smaller units attached to make the Division as self-sustaining as possible:

One Armored Engineer Battalion

One Armored Medical Battalion

One Armored Reconnaissance Battalion

One Armored Ordnance battalion

One Armored Signal Company

A CIC Detachment

A Division Supply Train (made up of trucks)

A Division Artillery Battalion

A MP Platoon

A Tank Destroyer Battalion Could be assigned

An Armored AA Battalion Could be assigned


These units could be broken down into smaller, usually company sized sub units and assigned to the Combat Commands depending on the needs of the missions. The Armored Division was intended to be a self-contained unit with all the assets needed to support and move itself around a theater.  A light Armored Division had an authorized strength of just about 11,000 men, the Heavy Division had 14,500.

The main difference with a Heavy Armored Division was they had eight Medium Tank Battalions, instead of just three. They also had more light tanks, with two full light tank battalions, instead of three companies.  Only a two Armored Divisions retained the heavy designation and organization through the whole war, the 2nd and 3rd.  I have not been able to find a TO&E for a Heavy Armored Division that included an Authorized strength, but it would have to be several thousand men more than a normal AD.  I’m not 100% sure on this, but I’m pretty sure the Heavy Armored Division was done away with in a 1942 revision of what an Armored Division was, but a pair retained the Heavy TO&E for reasons I’m not sure of yet, but I will find out.

. . .

The Armored Divisions were meant to exploit a major breakthrough won by the regular Infantry Divisions.  In many cases they were not used this way, and often got thrown into the lines as the enemy was faltering, using a single Combat Command to help secure the breakthrough while the rest of the Division rushed through the breach.  No Armored Divisions saw use in the Pacific, but the Sherman sure did.  The Sherman was really the heart of the US Armored Division, and its mobility and reliability really served it well there, it allowed US Armored Divisions to make very long runs once broken through, and it would limits on fuel supplies, not the tanks mechanical reliability that slowed it down.


1st_US_Armored_Division_SSI.svg1st Armored Division: Old Ironsides

 Active 1940-1946, Reactivated 1951-Present

The oldest US Armor Division. It saw a lot of action in WWII, born on July 15 1940 at Fort Knox.

The 1st AD spent its early years figuring out what an Armored Division was going to be, and when they figured that out, they trained in the US until mid-summer of 1942 before shipped off to Northern Ireland, after a short stay they were off to England.  They were not there long, before they were shipped off to northern Africa for participation in Operation Torch.  The 1st AD would be the first US Armored Division to see combat.

They would participate in the capture or Oran, and the infamous Kassirine Pass, and then would fight to the end of the war in Italy.  The primary tank early on would have been the M3 Lee and M3 light. By the Italian campaign it was the M4 and M4A1, small hatch 75 tanks, with M5 lights. Late in the Italian campaign they would have gotten second gen 76mm Shermans.

1st AD Subunits:  1st Tank Battalion,  4th Tank Battalion,  13th Tank Battalion,  6th Armored Infantry Battalion,  11th Armored Infantry Battalion,  14th Armored Infantry Battalion, 27th Armored Field Artillery Battalion, 68th Armored Field Artillery Battalion, 91st Armored Field Artillery Battalion, 81st Cavalry Reconnaissance Squadron, 16th Armored Engineer Battalion, 47th Armored Medical Battalion, 141st Armored Signal Company, 501st CIC Detachment.

Campaigns: Tunisia, Naples-Foggia, Rome-Arno, North Apennines, Po Valley.  

The 1st AD had 1194 men KIA, 5168 WIA, and 234 DOW.  They captured 41 villages or urban centers. 108,740 Germans gave up to the 1st AD.  The 1st AD earned 1 Distinguished Service Cross,  1 Distinguished Service Medal, 794 Silver Stars, 2 Legion of Merit, 35 Soldiers Medals, 1602 Bronze Stars, and 3 Air Medals.  They were moved to Germany Shortly after the war to serve as part of the occupation forces and were disbanded in 1946. They were reactivated in 1951 and are still an active duty division to this day.


150px-2nd_US_Armored_Division_SSI.svg 2nd Armored Division: Hell on Wheels 

Active 1940-1995

The second US Armored Division put together and it saw just about as much as the first. This was one of only two Heavy Armored Divisions; all others were converted to the later ‘light’ TO&E. Formed at Fort Benning on 15 July 1940, on the same day as the 1st.

They shipped out for use in Torch, but were kept in reserve until the invasion of Sicily. They saw a fair amount of action on Sicily, and after were shipped back to England to be used in the Normandy landings.  The 2nd AD was landed on Omaha Beach on June 9th and fought in northern Germany until the end of the war, including the Rhineland, Ardennes and Central European Campaigns.

2nd  AD Subunits:   41st Armored Infantry Regiment, 66th Armored Regiment, 67th Armored Regiment, 17th Armored Engineer Battalion,  82nd Armored Recon Battalion,  and the 142cnd Signal Company. 

There was also the 14th Armored Field Artillery Battalion,  78th Armored Field Artillery Battalion, 92nd Armored Field Artillery Battalion, 2nd Ordnance Maintenance Battalion, and the 48th Armored Medical Battalion.  

Campaigns: Sicily, Normandy, Northern France, Ardennes, Rhineland, and Central Europe.

The 2nd AD Combat statistics: had 1102 KIA, 5331 WIA, 253 captured, 7116 non battle casualties, for a total of 13,867 casualties.  They were in combat for a total of 223 days and earned 21 DCS, 13 Legions of Merit, 1954 Silver Stars, 131 Soldiers Medals, 5331 Bronze stars and 342 Air Medals. They took a grand total of 76,963 POWs.

150px-3rd_US_Armored_Division_SSI.svg 3rd Armored Division: Spearhead

Active 1941-1945, reactivated 1947-92

Also maybe known as the Third Herd, but may be post WWII.  The 3rd saw combat from Normandy to the end of the war in Europe.  They were formed on 15 April 1941 at Camp Beauregard in Louisiana.  They trained in California at Camp Young, until January of 1943, when they moved to Indiantown Gap Military Reservation in Pennsylvania. They would train on there while waiting to deploy overseas.

The 3rd AD arrived in Europe on September 15th 1943, they debarked in the Liverpool an Bristol area and trained there and on the Salisbury Plain preparing for the invasion.

They would first see combat almost a month after the June 6th landings in Normandy.  They would fight in the hedgerows, including at Saint Lô. Later in the same campaign they would help close the Falaise Gap.  They participated in both the Battle for the Hurtgen Forrest and the Battle of the Bulge. They would continue to fight into Germany, helping with the taking of Cologne, and Paderborn, and with reducing the Ruhr Pocket.  They liberated the Nazi Death Camp at Dara-Mittelbau, and finished with the battle of Dessau. They went into reserve to the end of the war.  It did a short stint as an occupation force before being deactivated in November of 1945.  It was later reactivated in 1947.

3rd AD Subunits: 36th Armored Infantry Regiment, 32nd Armored Regiment, 33rd Armored Regiment, 23rd Armored Engineer Battalion, 83rd Armored Recon Battalion, 143rd Armored Signal Company, 391st Armored Field Artillery Battalion, 67th Armored Field Artillery Battalion, 54th Armored Field Artillery Battalion, 3rd Ordnance Maintenance Battalion, and the 45th Armored Medical Battalion.

WWII Campaigns:  Normandy, Northern France, Ardennes, Rhineland, and Central Europe. 

The 3rd AD WWII Combat Data: spent a total of 231 days in combat, with 2540 KIA, 7331 WIA, 95 MIA, and 139 captured. They had a total number of Battle Casualties of 10,105, Non-Combat Casualties 6017, and a combined total of 16,122.  They took 76,720 POWs. They earned 17 Distinguished Service Cross, 23 Legion of Merit, 885 Silver Stars, 32 Soldiers Medals, 3884 Bronze Star, 138 Air Medals, and 3 Distinguished Flying Cross.


150px-4th_US_Armored_Division_SSI.svg4th Armored Division: The no name AD! 

Active 1941-1972

One of the few Armored Division that never adopted a name, it also developed a reputation. The 4th was often used as the spearhead for Paton’s Third Army and it was a tough outfit.  Their motto was ‘They Shall Be Known By Their Deeds Alone’. Activated on April 15th 1941 at Camp Pine (Later named Fort Drum), New York.  It would train at Camp Forrest in Tennessee, and then was shipped to California for further training at the Desert Training Center. They would be housed at Camp Ibis, near Needles California during this period.  By June of 1943 they would be at Camp Bowie, Texas, for more training in the Piute Valley. They were then off to Camp Myles Standish in Massachusetts for winter training.  Finally, in December of 1943, they were on their way to Europe, England specifically to prepare for the June of 44 invasion of Normandy.

The 4th AD debarked in Normandy on July 11th 1944, at Utah beach and was in combat by the 17th.  They saw action in  Operation Cobra,  and rampaging across France, they would see action in the Battle of the Bulge, spearheading Patton’s 3rd Army’s attack north to hit the Germans attacking Bastogne.  They would see action in all the major fights in the ETO to the end of the war. They did a tour as occupation forces before being shipped back to the ZI to be deactivated.

The 4th AD spent 230 days in combat and lost 1238 KIA, 4246 WIA, 503 MIA, and 1 man captured.  This totaled out to 5988 Battle Casualties, they also had 4508 Non Battle Casualties, and total of 10496. The 4th took 90,364 POWs.


 150px-5th_US_Armored_Division_SSI.svg5th Armored Division: Victory

Active 1941-1945, reactivated 1950-1956

Another Divisions that saw combat from Normandy to the end of the war in Europe.  The 5th AD was activated at Fort Knox, in Kentucky.  Like many units after forming and some initial training, the shipped out for Camp Cooke California.  They spent a lot of time on Alert for Japanese attacks in their early training there. Next up was training in California’s Mojave desert.  They were on their way to Tennessee by March 24th for more maneuvers.  They would be there until July, and then they moved to Pine Camp N.Y. for some winter training. The 5th last stop before deploying to England was Indiantown Gap, PA, where they left their vehicles and were trucked to Camp Kilmer NJ, to wait for their ship.

The 5th were in England by February 24, 1944, and they were stay there until they deployed to Normandy on July 26. They were assigned to Patton’s Third Army, as “General Patton’s Ghost Troops”,  and would fight in Normandy, Northern France, Ardennes, Rhineland and Central Europe Campaigns.

Paths of Armor: The history of 5th Armored Division. 396 high quality pages of history on the 5th AD. NEW BOOK!

The 5th AD was in combat 161 days, and had 547 KIA, 2768 WIA, 177 MIA, and 62 captured for a total of 3554 battle related casualties. The 5th also had 3592 non-battle casualties, for a total of 7146.

150px-6th_US_Armored_Division_SSI.svg6th Armored Division: Super Sixths

Active 1942-1945, reactivated 1950-1956

The 6th was activated at Fort Knox on February 15th 1942.  The 6th spent time at Camp Chaffee, Arkansas training then went on Maneuvers in Louisiana and then they were off to sunny California for training at the Desert Training Center in Mohave CA, and then off to Camp Cooke also in Ca. They were shipped by train to the east coast and loaded onto ships for transport to England, arriving in February of 44.

The 6th was landed on Utah beach on July 18th as part of Paton’s 3rd Army. They participated in the Normandy, Northern France, Ardennes-Alsace, Rhineland and Central Europe Campaigns.

The 6th spent a total of 226 days in combat. They had 1169 KIA, 4198 WIA, 152 MIA, and 7 captured for a total of 5526 battle casualties, they also had 7290 non battle casualties.

The Combat history of the Super Sixth:  182 pages, ok scan with a lot of very good info.  NEW BOOK!


150px-7th_US_Armored_Division_SSI.svg7th Armored Division: Lucky Seventh Active 1942-1945, reactivated 1950-1953

This AD started combat in northern France and ended it in Germany.  They were a part of Paton’s third Army

boxscr3m

150px-8th_US_Armored_Division_SSI.svg8th Armored Division: The Thundering Herd Active 1942-1945

The 8th AD has a very nice website linked above.  I spend a lot of time on the Thundering Herds website, and it’s good stuff.

150px-9th_US_Armored_Division_SSI.svg9th Armored Division: The Phantom Division Active 1942-1945

This AD came in toward the end and only fought in three major campaigns. They did help secure some key bridges over the Rhine River though.

150px-10th_US_Armored_Division_SSI.svg10th Armored Division: The Tiger Division Active 1942-1945

They saw combat for a short time, three campaigns, but had a pretty cool nickname.

You can read their unit history here: Impact, the battle history of the Tenth Armored Division   NEW BOOK!

150px-11th_US_Armored_Division_SSI.svg11th Armored Division: Thunderbolt Active 1942-1945

Another late comer they saw enough action to see how disgusting the Nazi Germans were when they liberated Mauthausen Concentration Camp

150px-12th_US_Armored_Division_SSI.svg12th Armored Division: The Hellcat Division Active 1942-1945

This AD came in late in the war but saw a good amount of action.

A history of the 12th Armored Division: Hellcats   98 pages, good scan.  NEW BOOK!

150px-13th_US_Armored_Division_SSI.svg13th Armored Division: The Black Cats Active 1942-1945

These guys were in combat for 16 days, and fought in two major campaigns.

They put out a nice history book, the 13th Armored division: A history of the Black Cats from Texas to France, Germany and Austria and back to California  NEW BOOK!


150px-14th_US_Armored_Division_SSI.svg 14th Armored Division: The Liberators Active 1942-1945

15th Armored Division:  This AD was a Phantom Division, not a real AD

200px-16th_US_Armored_Division_SSI.svg16th Armored Division: Armadillo Active 1943-1945

#41 Gallery I, Mixed High Res Sherman Photos, With Comments.

Gallery I, Mixed High Res Sherman Photos: With comments!

933ZLds
A nice color photo of an M4 stuck in Italy. It’s hard to tell if it is knocked out or just stuck, for the purposes of the fight it was in there is no difference though. The tank still has the M34 gun mount, but is a non-DV hull and has the cast differential cover.
aXOJifP
A burned out M4A3 76w in Neumarkt, Germany April of 1945. This photo is a testament as to why Armor needs a heavy infantry presence in urban warfare. 
Arnoldsweiler-Germany-45_104th_ID
A knocked out M4A3 75W with concrete armor, in front of an M4A3 76w with similar armor, in the back also knocked out. This is Arnoldsweiler Germany, tank unit unknown, the Doughs(wartime slang for Infantry) are from the 415th regiment of 104 Infantry Division.
761st_Tank_Battalion_M4_Sherman_Supporting_the_103rd_ID_Nieffern_France_1945
M4A3 75 from the 761st Tank Battalion supporting the 103rd ID near Nieffer France, this could be a small hatch M4A3 from the first batch Ford made, but its hard to tell from this angle. It looks like the tank has all the qucik fix upgrades. 
747 Tank Battalion, Schleiden, 1945
A pair of up-armored, with layers of steel track and sandbags, M4A3 76w Shermans, with the 747th Tank Battalion, Schleiden, 1945. All the added stuff would be removed just about as soon as the war ended.
14th_Armored_Division_M4_Sherman_Column_in_Hochfeld_France_1945
14th AD M4A3 76w column Hochfeld France 45
13
A huge pile of rocks, with an M4A3 76W HVSS tank with add-on Armor, parked off to the side. The Easy 8 looks like it’s from the 4th AD, 37th Battalion. it looks like the rocks may be from fortifications German troops made. If you look close, this tank has the up armored front armor and it looks like it has the cheek armor added to the turret as well. 
12th_Armored_Division_M4A3_Sherman_in_Schneeburg_Germany_19451
M4A3 with the 12th AD in Schneeberg Germany 1945, this tank has a threaded and capped M1A1C and a split loaders hatch.
9th Armored Division, Westhousen, Germany, 10 April 1945
M4A3 75w Shermans with the 9th Armored Division, Westhousen, Germany, 10 April 1945, this picture is interesting, there’s a lot of garbage around the tanks, I wonder how many days they were there? This image shows what was almost the ultimate 75mm Sherman, it has the improved large hatch hull, with Ford GAA motor and wet ammo storage, improved stabilizer, improved periscope sight, all around vision cupola, and oval loaders hatch. All it needs is HVSS suspension, and a large number got that too, though most of the 75mm HVSS tanks had 76mm turrets swapped onto them post-war by the US Army. 
3AD_Schevenhutte_44
A pair of 3rd AD M4A1 76w tanks in Schevenhutte 1944, parked in front of St Josef church on September 22, 1944, the wires hanging down are probably communication wires. The tracks on the M4A1 to the right look almost worn out, and it has an unthreaded M1A1 gun. This is very much like the ones issued for Cobra. 
3rd Armored Division, Stolberg, 1944
M4 tank 3rd Armored Division, Stolberg, 14 October 1944. The men on the tank are from the 36th infantry. This is when sandbagging started, as more and more encounters with German infantry with panzerfausts and panzerschreck began happening.  Note the interesting beams welded to the differential cover, probably from some form of hedge cutting device. 
4taqyYm
A pair of burnt out Canadian M4A2 Shermans of the 10th Armored Regiment (The Fort Garry Horse) at the foot of the church at Rots – June 1944 (Huge Image)
3rd_Armored_Division_M4_Sherman_and_T2_Grant_Recovery_Vehicle_Stolberg_Germany_1945
3rd AD M4 in Stolberg 1945, if you look close there is an M3 Lee based M31 in the background.
2AD_Toeven_45
A nice photo of an Easy 8s, or M4A3 76w HVSS tank, and what looks like an M4A1 76w in the background. The M4A1 had the split loaders hatch, with the hatch doors that only opened to 90 degrees.
2nd_Armored_Division_M4_Sherman_Debarks_LST_Normandy_June_44
A nice photo of a 2nd Armored Division M4 coming off an LST on Utah Beach Normandy June 8th.  I love this photo, and always, wonder if the Sailor sitting up above the tank to the right, has an official job, or if he was just enjoying the show. The LST was a really amazing ship for the time, a technological wonder, that does not get much credit for being one. 
1st_Armored_Division_M4_Sherman_with_Shaken_Crew_Gothic_Line_Italy_1944
A Badly damaged M4A3 76w tank that looks like it had a dozer blade. It’s from the 1st Armored Division in Italy 1944.  You can tell it’s a 1st AD tank because of the two bands on the barrel near the gun mantlet. 
1st_Armored_Division_M4_Sherman_Ponsacco_Italy_Gothic_Line_1944
An M4A1 in Italy on the Gothic line, town of Ponsacco, 1944, I wonder what this street looks like today. Note, this tank is an early M4A1, still in use in 1944 and it has none of the quick fix updates and still has the M34 gun mount. 
1st_armored_division_M4_sherman_in_piazza_del_duoma_Milan_Italy_1945
An M4 in Milan Italy in front of the Piazza Del Duomo. There seems to be a gas gun, cut in half, handing from the rear hull overhang.  Maybe they used it as a funnel?
0_155aa5_78e304fb_orig
An M4 showing its off-road prowess.
0_155a98_b2cf0c0c_orig
An M4 doing M4 things, in some ruined town in Europe. I think the tank is with B Company 37th Tank Battalion, 4th AD.
0_155a9f_f8bae6dd_orig
A well camouflaged M4 is the subject of this beautiful high res photo.
0_155a9e_db90f06a_orig
A nice high res photo of an M4 Composite driving down a street in Avranches, on August 4th, 1944, during Operation Cobra.  The town is in ruins and was  important because it was the gateway into Brittany from Normandy, this tank is most likely with the 6th AD, (thanks to Russ Amott for more info on the photo)
0_155a4f_a9633053_orig
A small hatch M4 somewhere in Europe. 
0_78d9_abb5039e_orig
A nice high res photo of an M4A4 probably about to be shipped to England, or just arrived there. Notice the ‘Comb’ device on the front differential cover, it has a wire going from it to through the bow gun mount to the tanks brake levers, so the brakes could be released without opening the extensive weatherproof packing they have done. Look at all that duct tape!!
0_78d7_a08c5401_orig
A nice high res photo of an M4A1 with a strange rocket launcher setup. Could these be aircraft rocket tubes adapted for ground use?
0_71e33_29e3b963_XXXL
A nice color shot of an M4A1,  note the M34 gun mount. 
0_7d81_ee354a41_orig
A nice high res photo of an M4A2 76 wet, a pretty late production one, much like the one fished out of the ocean in the sunken Shermans post. Most of these tanks went to the Soviet Union. 
0_7d76_940e7f60_orig
I high res pic of what looks like a couple of platoons of small hatch M4 and M4A1s parked on a street somewhere in Europe.
0_7d75_e0e86a0d_orig
A very nice high res pic of an M4 being used as an artillery piece, near Vicht Germany 17 November 1944. Unit unknown. The M4 was named ‘Ink spot’. All M4 Sherman tanks had the equipment to fire their main gun as an indirect fire weapon, and it was not uncommon to have a unit at rest tied into the artillery radio net answering calls for fire. 
1235235
Marine M4A2 on Peleliu, I think.
Italia-M4-George-Silk-1944
Shermans at rest in a pretty flower field in Italy.