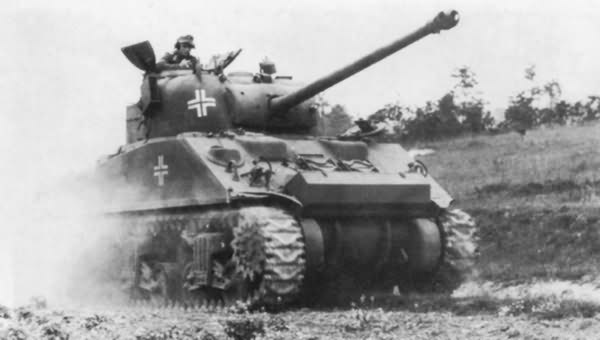
Storage Ammo and Everything Else: The Army packed a lot of Gear and Tools into the Sherman, along with the Ammo, Guns, and Men
When most people think about a tank, wait, well, most people don’t think about tanks, but when people who think about tanks think about them it’s the gun, the armor, the motor and it running around doing tank things that they think about. That’s not all that a tank is about; a tank is also about storing things, lots of things. Not just ammo, I mean sure, thousands of rounds of MG ammo and over 100 main gun rounds on late model Shermans, but even after the crew had packed all that stuff in, there was still a hell of a lot of other stuff they carried around. The tank had everything it needed to be maintained by the men it was issued to, including manuals, and a limited number of common spare parts for certain components and as much gear the tankers could accumulate to make their lives easier strapped on outside too.
There are at least 61 hand tools used for maintaining the tanks automotive components. Most of these tools were stored in a tool bag behind the driver. Some items like the non-magnetic screwdriver for adjusting the compass were stored in brackets on or near the device they were specifically for. The oiler was mounted on a bracket by the assistant driver. He probably used it a lot. The huge track adjusting wrench and all the pioneer tools were mounted on the hull on the outside of the Sherman with the 20-foot long tow cable. The tanks weapons, including the main gun, also has a bunch of tools specific to them, also stored in the tank. These included combination wrenches and other special tools to maintain the machine guns, and an eye bolt and breach removing tool for the main gun adding between 6 and 10 more tools. These tools were stored in a toolbox or a spare parts box. The grease gun, or gun lubricating, was mounted on the right rear lower hull, under the turret basket. It had an extension hose stored with it, and probably tubes of grease. This is what the crew would use to lubricate all the grease fitting that just about anything that moved had.
Now the crew had to pack in the communication gear. The tanks radio antenna broke down into 6 parts including the case and was stored on the blanket roll rack on the rear of the tank on late model Shermans. The early Sherman manuals do not list a location for them that I can find. There was also a flag set, M238, it had its own bracket on the right side of the turret. This flag kit came in a case, had 3 flags, red, orange, and green, and 3 flagstaffs. You also had the radio setup in the back of the turret that was technically removable. The radios also came with a spare parts kit, small tool kit, and spare tubes and a crystal box to change frequencies.
The tank was issued with 12 signal flares (they shoot up in the air), and they were mounted in their own box on the battery box. There were 3 white star parachute flares, 3 white star cluster flares, 3 amber parachute flares and 3 green parachute flares. Then there was the panel set. The set, I think was the big orange panels they put on the rear deck, so attacking fighter-bombers could tell US tanks from German ones, came with two panels, and two cases for them. They were also stored in the blanket roll on the foldup shelf on the rear of most late model Shermans.
The Sherman had two fixed 10 pound CO fire extinguishers that could be triggered from inside the tank, and outside if you knew where the pull handles were. They also provided the crew with 2, four pound CO fire extinguishers, on mounted on a bracket on the right side of the transmission, and the other mounted on the rear of the turret basket. They also supplied a small decontaminated apparatus, called the M2, essentially a 1 ½ quart fire extinguisher, filled with a decontaminating agent instead of fire retardant. These were issued all the way into the sixties as a way to clean something like mustard gas residue from the areas of the tank the crew needed to touch. It was stored in a box in the hull, and probably got thrown away a lot.
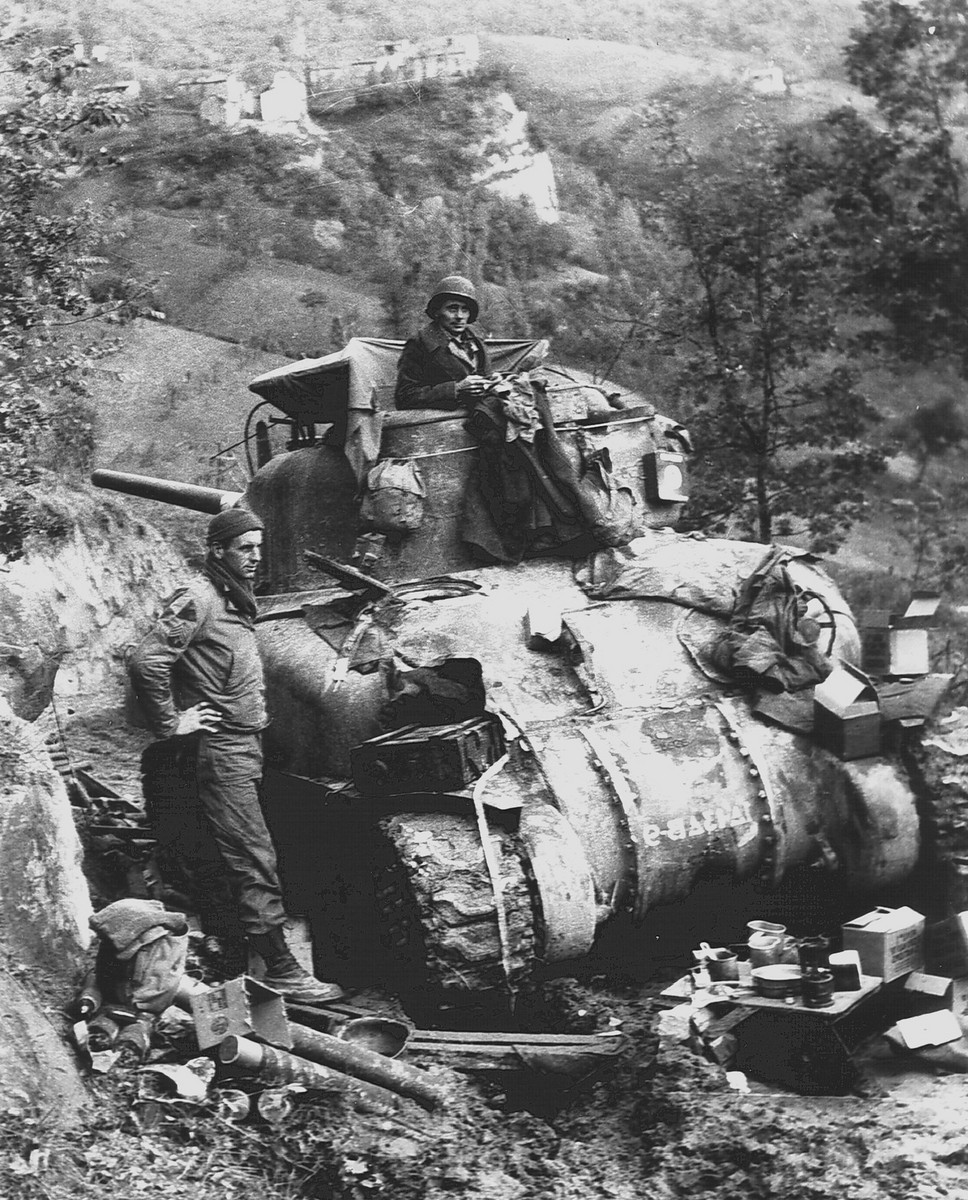
The crew’s needs were taken into account, and there was a specific storage location inside the tank for 2 days of rations for the five-man crew. Each crew member also had an M1910 canteen mounted near their position. There was a ration box in the right rear sponson, and it could hold either, 30 boxes of “K” rations, 60 cans of “C” rations or 2 or the much larger “D” rations. There was a small 1 burner Coleman stove stored with the rations. You see an awful lot of pictures of Sherman tanks and other AFV with a lot of ration boxes tied on the tank, so the crews appear to have liked to have more than two days food on hand. Of course, rations boxes are not bulletproof, and I bet it wasn’t all that uncommon to find shell splinters or bullets in the ration cans when stored outside.
We are not even close to done here, next up, sighting gear. The tanks were issued with an M13 binocular set; this consisted of the M13 binoculars and the M17 case. These were secured to the turret wall in its own bracket, near the commander’s position. On late model Shermans, there was a box next to the radio that held 2 spare vision blocks for the commanders all around vision cupola. In a box behind the driver, you could find 10 spare bulbs for either the elevation quadrant or azimuth indicator. There was also a case for the Gunners Quadrant M1with its own bracket above the 5-gallon water can installed in the right sponson.
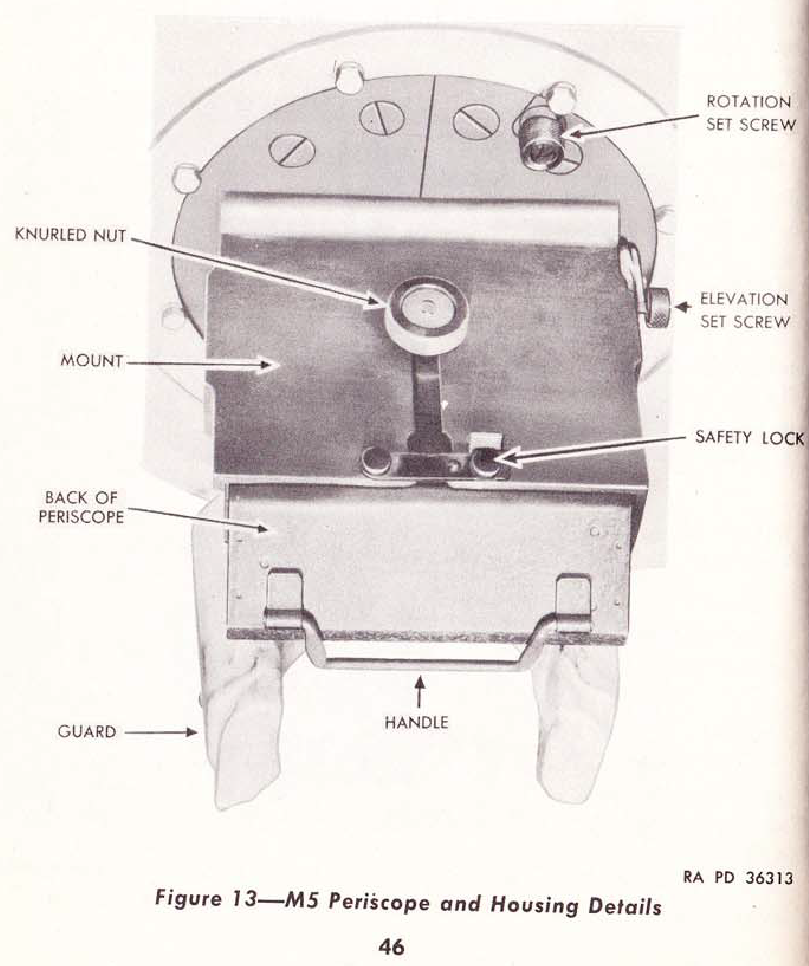
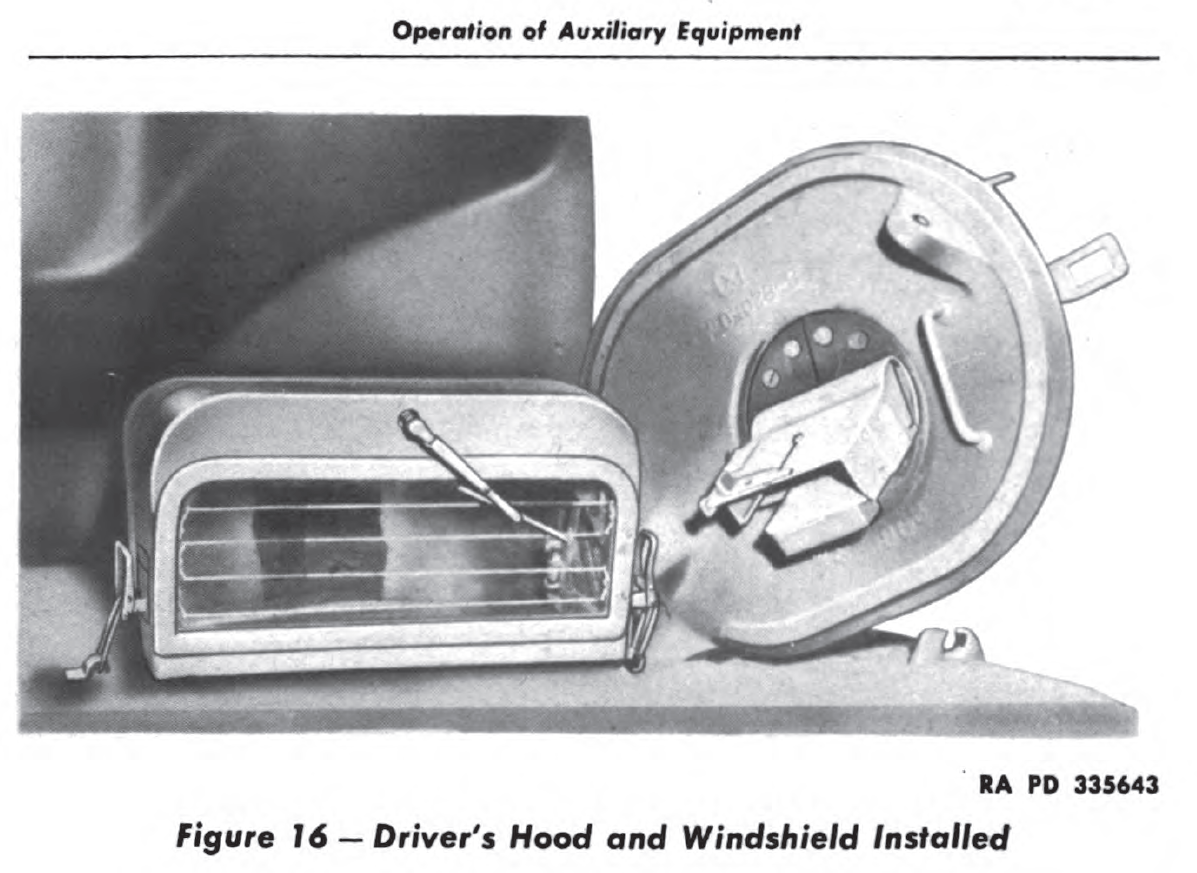
The periscopes and telescopes deserve their own section so here it is. There was a holder for the periscope in the periscope box in the turret, along with 3 periscope heads, for the M6 periscope. There were two hull periscope boxes with the same contents. There were 6 more periscope heads on the bracket for the driver’s hood for a total of 15 spare heads. I’ve read several accounts where both the Germans and Japanese aimed at the periscopes and vision blocks to blind the tanks. In at least one case in the Pacific, the tanks ran out of spare heads during the battle and were blind without opening a hatch. I bet periscope heads were popular as an extra spare on the tank. Now, that was just heads, there were 12, M6 periscopes in each late model Sherman. Six mounted in in various places, one in the driver’s hatch that rotated, and a fixed one in front of him. The co-driver had the same layout, just on the other side, he used the hatch or fixed periscope to aim the bow machine gun. The loader had had a rotating periscope at their station, and the commander had one in his hatch. There were two complete M6 periscopes in brackets on the turret walls, one near the loader, and the other by the commander. The amazing piece of American tank engineering, the driver’s hood holder, stored four complete M6 periscopes, along with all those spare heads and the drivers hood!
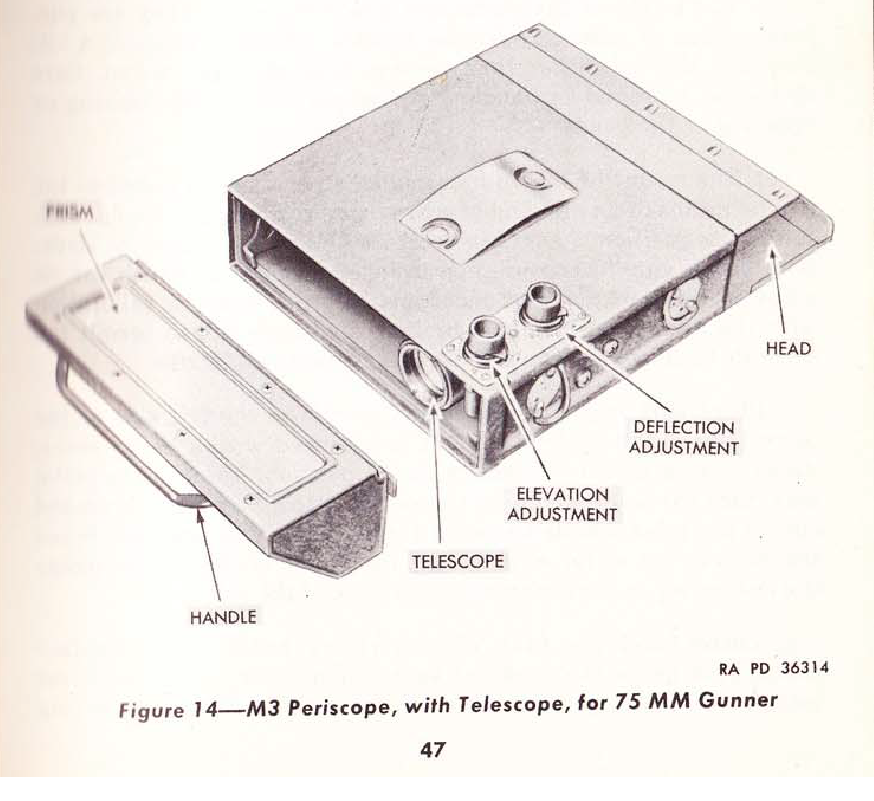
The gunner had his own special set of periscopes. He had an M4A1 periscope with telescope M38A2. On late model Shermans this was the auxiliary sight but allowed the gunner to have a nice wide field of view to find the target, the commander was handing off, mounted in his fixed periscope. He had a complete spare M4A1 periscope in a box on the floor by his feet. They did not give him a spare telescopic sight, in late model Shermans, the M70F was used, and it was mounted on the gun mount. He also had a series of lamps to illuminate the reticles of the M70F and M4A1 sights. He also had lamps for the M1 quadrant, and another for the M9 quadrant.
Oh, we are not even close to done here people, so hang on, it gets even more exciting when we get to the ammo storage and storage changes in a few paragraphs. Anyway, let’s cover some more ‘general equipment’, before getting to ammo storage. Let’s see, the tank had 5 M1936 OD canvas bags to store much of the gear that’s been mentioned, and 1 tool bag for most of the tools listed, stored behind the driver. There were 3 flashlights TL-122 on brackets around the turret, one near the commander, one by the gunner and one by the loader. They carried 12 spare batteries in box C101039. This is the same box all the lamps for the gunner’s sights went. There were also 5 safety belts for the crew’s seats, it may not seem like a vehicle that doesn’t hit 35mph would need them, but off road, I bet they were handy. The tank came with an 18-quart canvas bucket that was stored in the right sponson. There was a special inspection lamp stored in the toolbox. The spare bulb was stored with the other spare bulbs in box C101039. The Home light auxiliary motor had its own accessory kit, it was also stored in the sponson toolbox in the right front sponson. This little kit had a spare spark plug, and the rope and wood pull handle to start the unit if the batteries were dead, plus a set of tools to maintain it.
The Army liked to make sure a tank crew had lots of stuff to read, so they dedicated a small compartment in the right rear sponson for manuals. The manuals ranged from the one for the Homelite generator TM9-1731k, the spare parts list for the tank model, SNL G-104 in the M4A3s case, to manuals for both machine gun types FM23-50, and FM23-65, the manual for whatever main gun the tank had, and the mount it used. There was a manual for the model of the Sherman, TM9-759 for the M4A3, TM9-731B for the M4A2 etc. If there was a system on the tank the crew was expected to maintain, there was a manual available to tell him how to do it. I’m sure in some cases what actually got to the troops with the tank when it was finally issued varied a lot though.
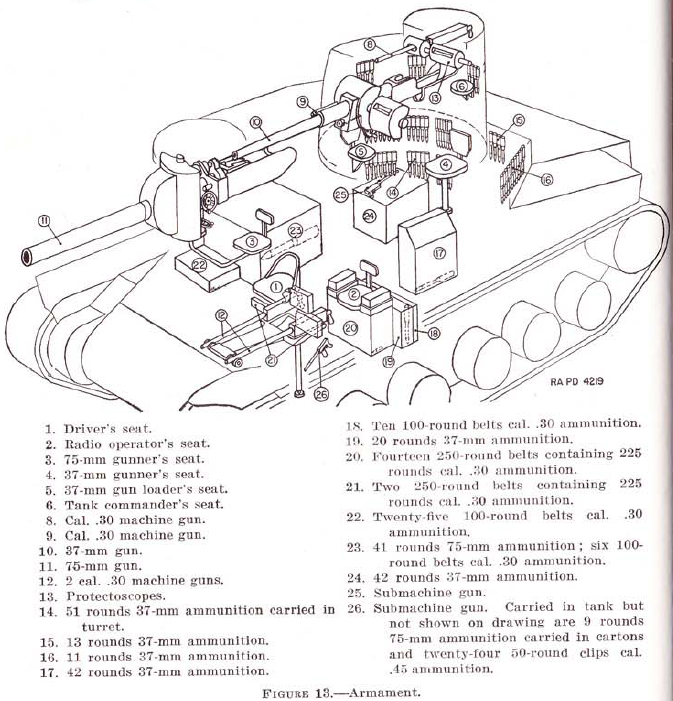
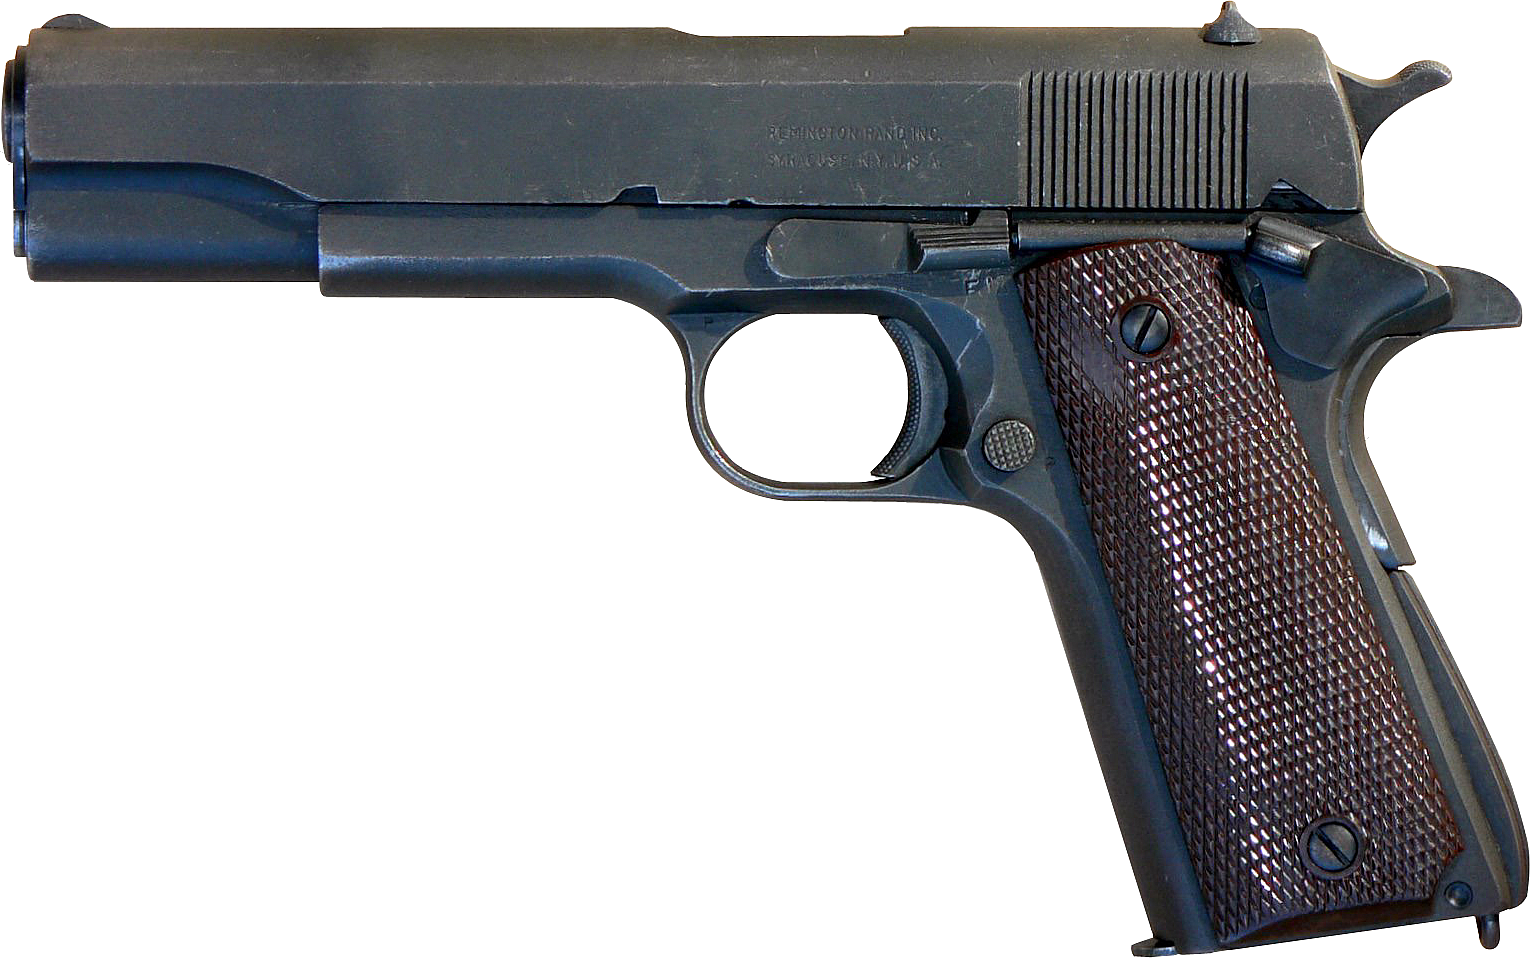
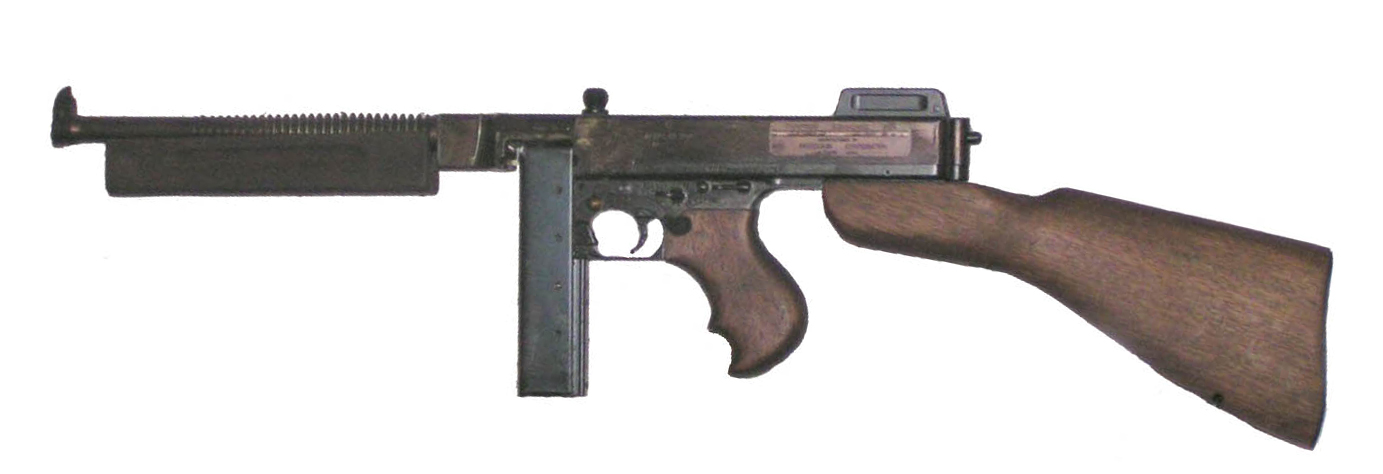
Ok, now for the guns and ammo, as we know, a Sherman could have the M3 75mm gun, the M1A1/A2 76mm gun or the M4 105mm Howitzer. They all also had 2 and in some early models 3, M1919A4 Machine guns and one M2 HB machine gun. On many models, there was a two-inch smoke mortar as well. Then there were the personal weapons of the crew, on late model Shermans, 5 M3 .45ACP submachine guns were supplied, on early Shermans, a single M1928A1. Each crewmember was issued an M1911A1 .45 ACP pistol as well. These weapons, biggest to smallest all had kits to keep them working, and for the machine guns, they carried a lot of spare parts for known parts that wear on Browning machine guns. These spare parts and tools were scattered around in various tool and parts boxes.

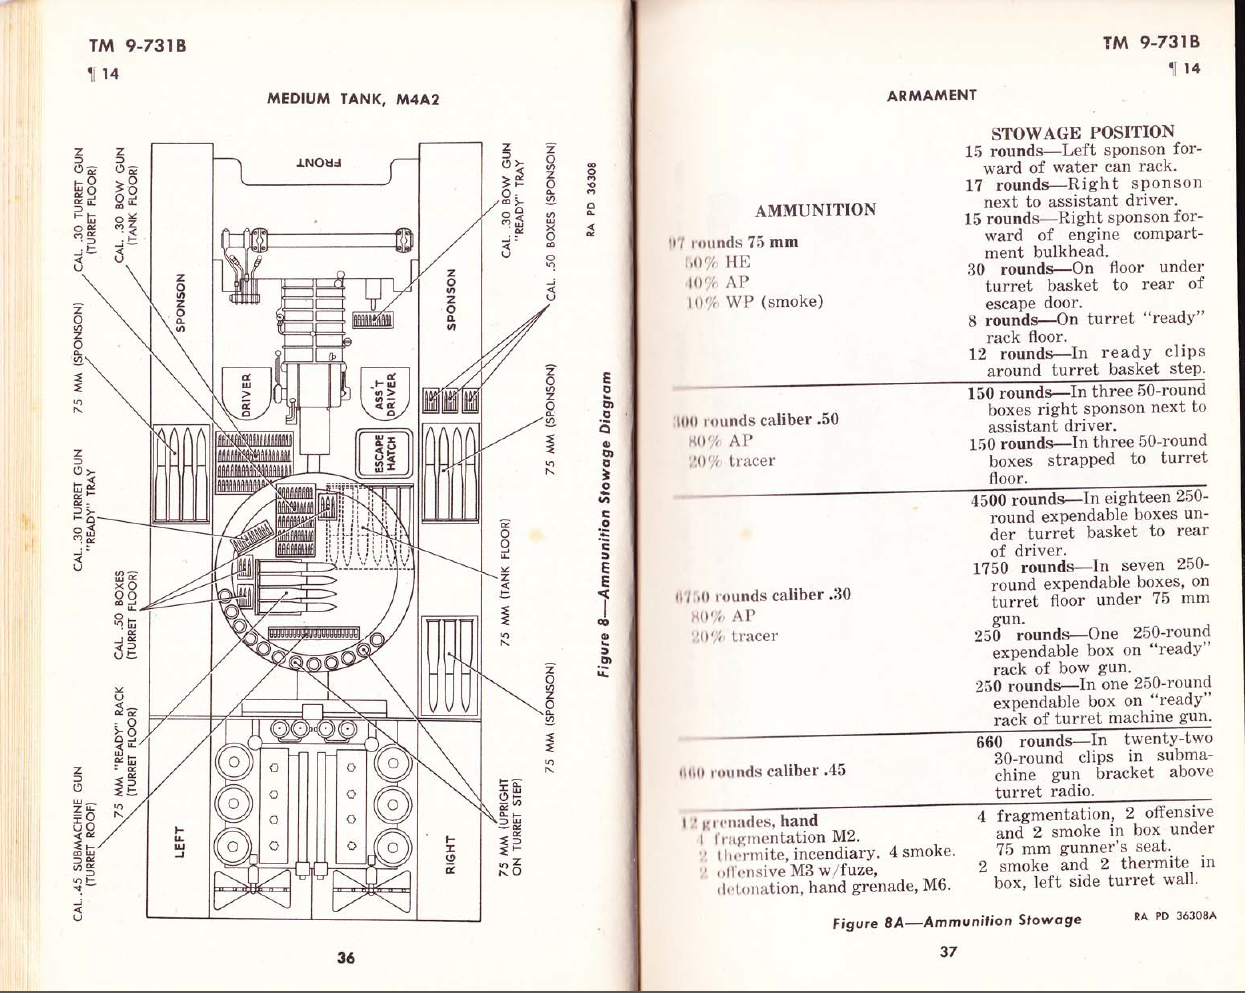
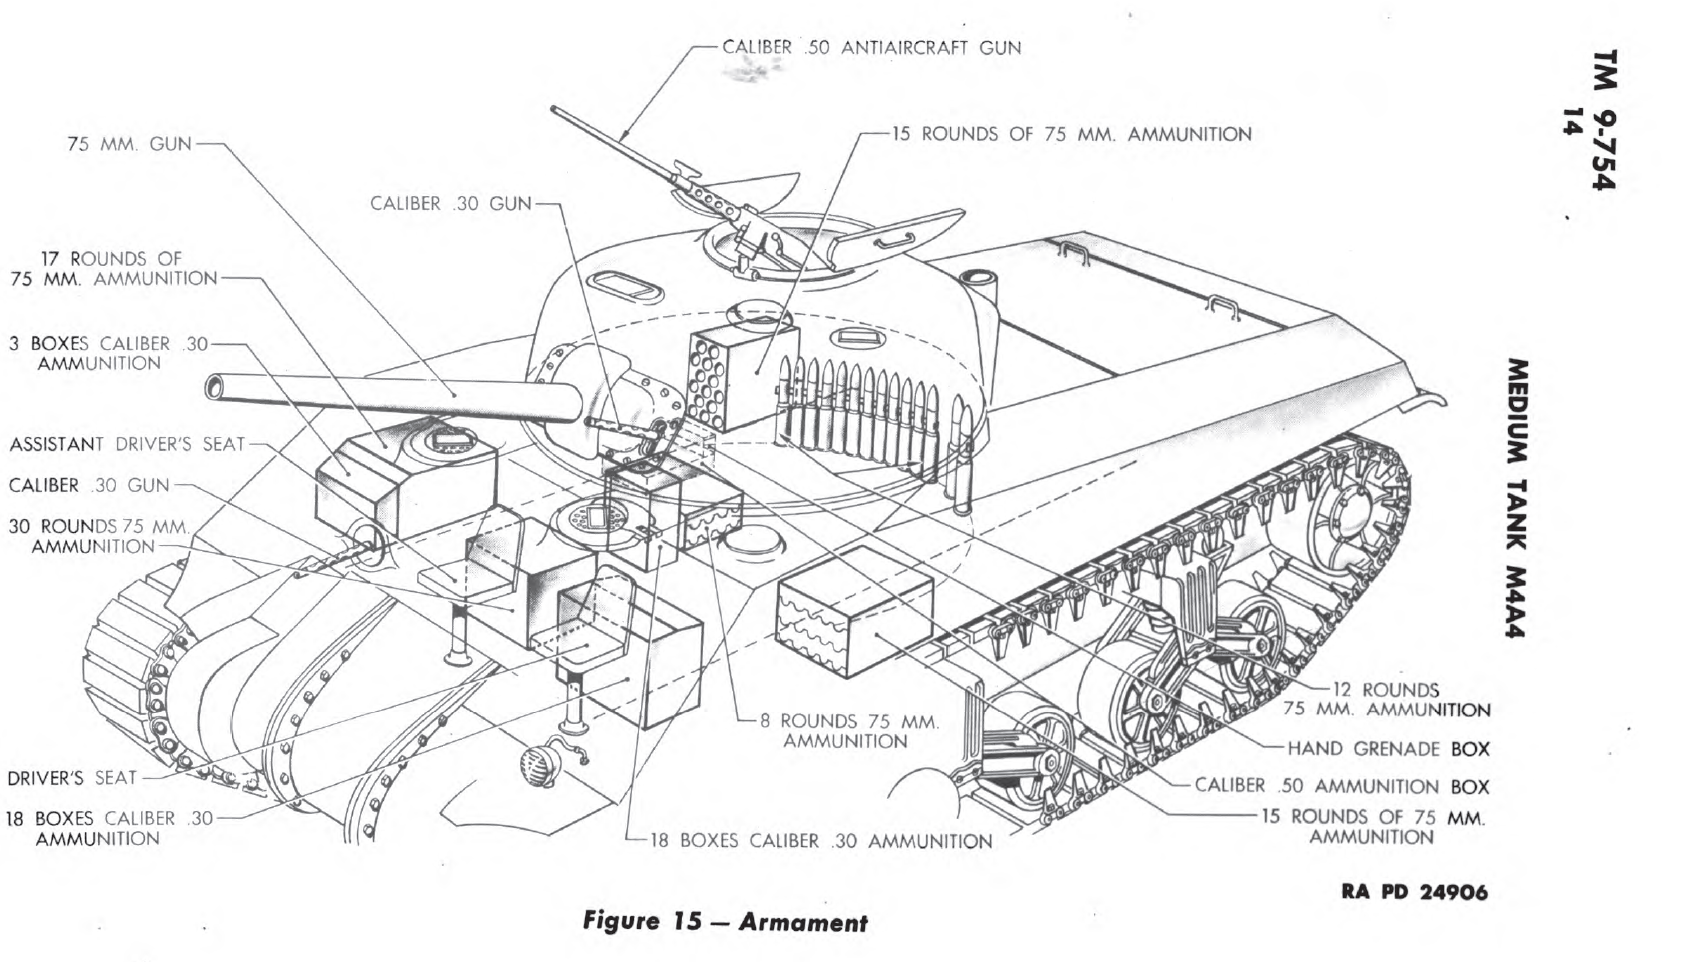
All these weapons needed ammo, and in the main guns case oil! This all had to be stored in the tank. The chart below breaks down the changes in ammo loadout for all the weapons on the Sherman, as the tank went through production changes. The earliest Sherman tanks had ammunition stored all over the vehicle in ammo racks with no additional protection. Ammo was placed in sponson ammo racks, with some around the base of the turret, and in a floor ready rack. More was stored under the floor. These early tanks had a fully floored, and screened in turret basket, with only two sections open to the hull. On these early Shermans, and we could be talking, an M4, M4A1, M4A2 or M4A4 most of the direct vision tanks would fit into this category. These tanks, once the ammo around the base of the turret, and ready rack were used, would have to rotate the turret so the openings I the basket matched up with the hull racks, and or co-driver so he could hand in ammo from the rack near him. The idea behind the full turret basket was to protect the crew from getting their limbs severed by the rotating turret if a crew member stuck it in the wrong place.
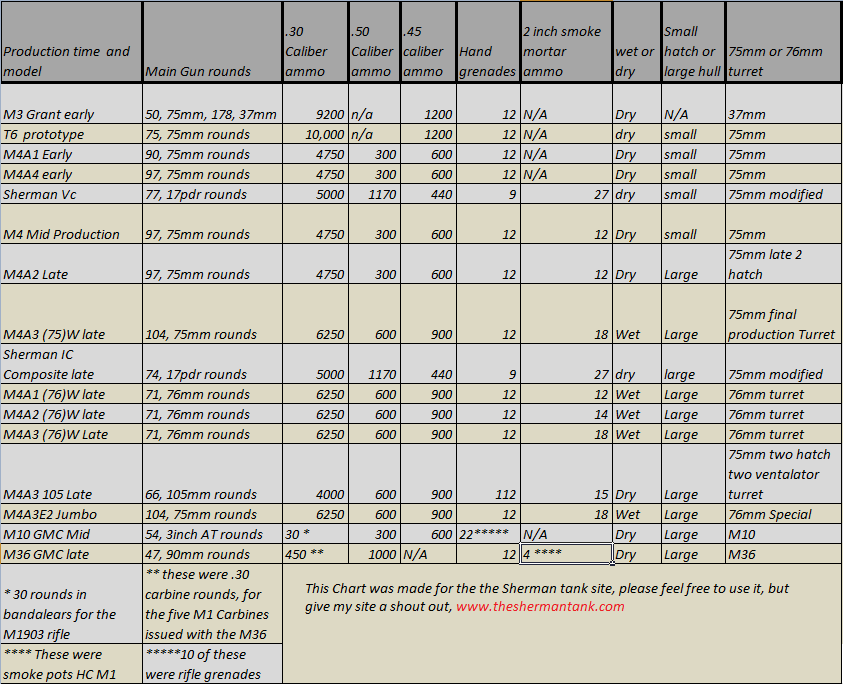
As soon as the Sherman saw extensive combat use, it was clear, they were prone to fire. This was nothing new, every tank was prone to fire, and the Sherman had a tendency to burn catastrophically often launching the turret in the air. When the Army did a study into why this was the case, they found the main gun ammo was the main cause of catastrophic fire losses. When you take a look at the ammo layout chart in the other image, you can see with the ammo stored, in unprotected internal bins all over the crew compartment, an ammo fire was going to be common problem.
The first try at a fix for the problem started pretty fast. The fix was to remove the unarmored ready rounds from around the base of the turret, and reduce the size of the floor ready rack and to make it armored. The hull ammo racks were all covered in armor, and extra armor was added to the outside of the sponson racks on both welded and cast hull Shermans. On late production cast hull tanks, the thicker armor over the sponson racks was just added to the casting. They managed to keep the number of main gun rounds pretty consistent even with these changes. Another aspect of the early fix was the removal of the turret screening around the turret basket. The ammo rack changes along with some other improvements were offered in kit form to US tank units already deployed, and it was eventually incorporated into the production lines, and tank overhaul facilities. Many Shermans in British use did not see these get these improvements.
The real big change in Sherman storage came when the hull changed from the small hatch to large hatch configuration, though all the late model M4A2 tanks with large hatch hulls and 75mm turrets still got the dry ammo storage setup with add-on sponson armor. The other exceptions are the M4 and M4A3 105 tanks, they had their on dry storage setup. The M4 Composite hull tanks with large hatch hulls also kept the dry storage layout. So, the M4A1 (76)W, M4A2 (76)W, the M4A3(75)W, The M4A3 (76)W tanks all had the improved wet ammo racks. This change included moving all main gun ammo into the floor of the hull under the turret. These ammo racks were also surrounded by water filled jackets. Early production wet tanks retained the turret basket, and had hatches that could be opened to access the hull ammo racks, later they only installed a half basket, and eventually removed the basket floor entirely.
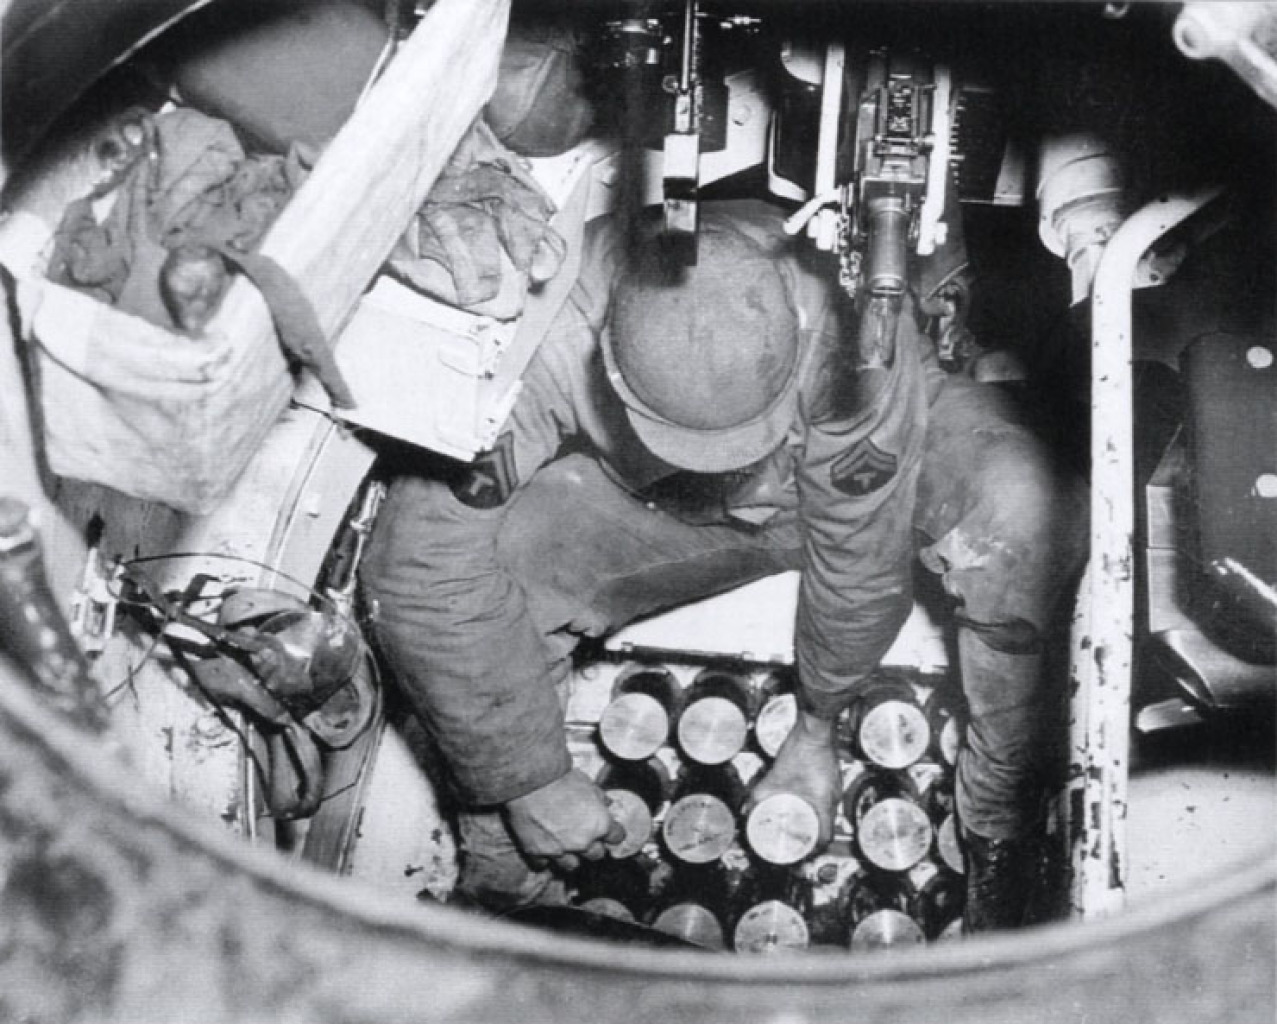
On early Shermans a lot of stuff other than ammo was stored under the turret basket, in the floor, were the ammo was now going. This included the batteries, and a generator setup on some models. Also many of the items listed in the early part of this article were stored in the hull floor. These items including the batteries were moved up into the sponsons. The generator was moved to the rear of the transmission. While making all these changes, they managed to pack even more ammo into the 75mm wet Shermans!
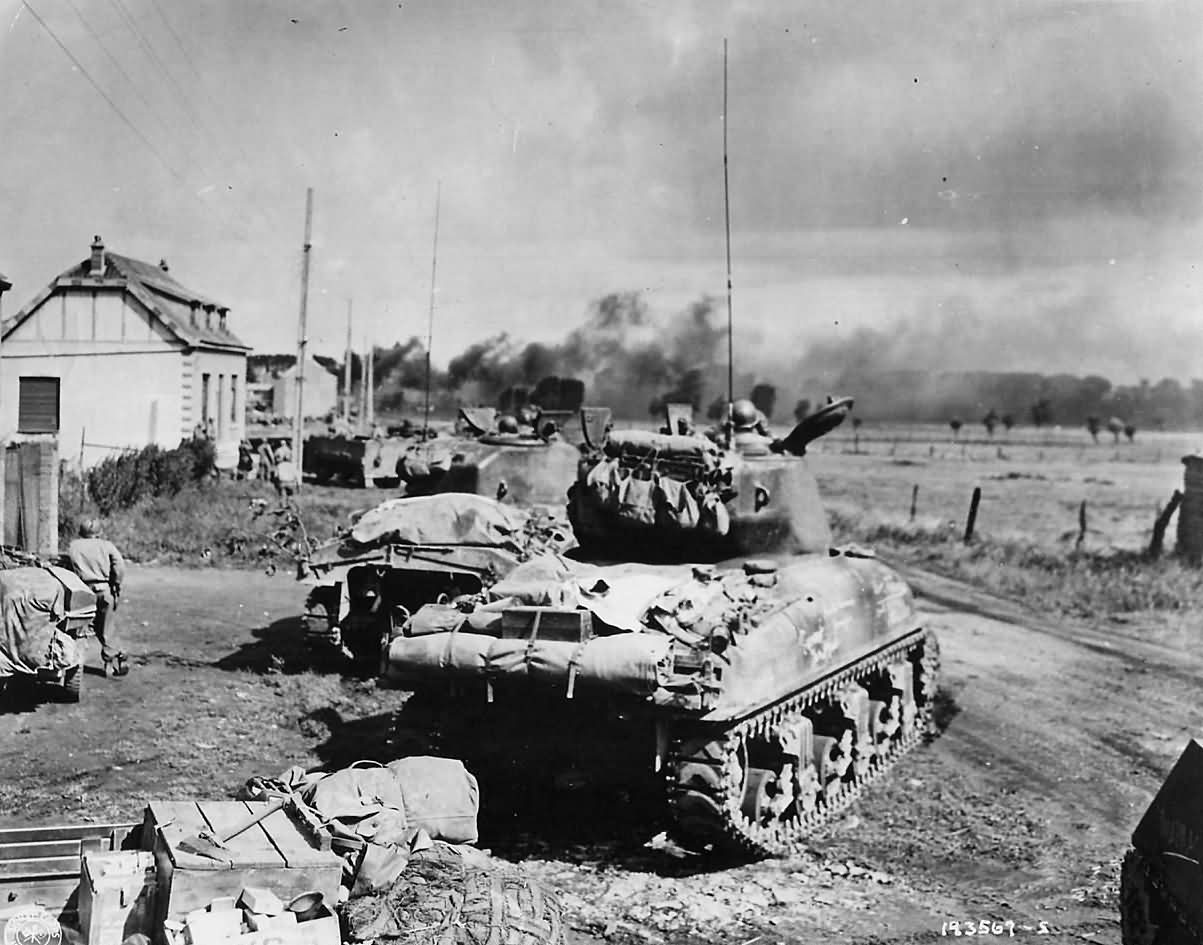
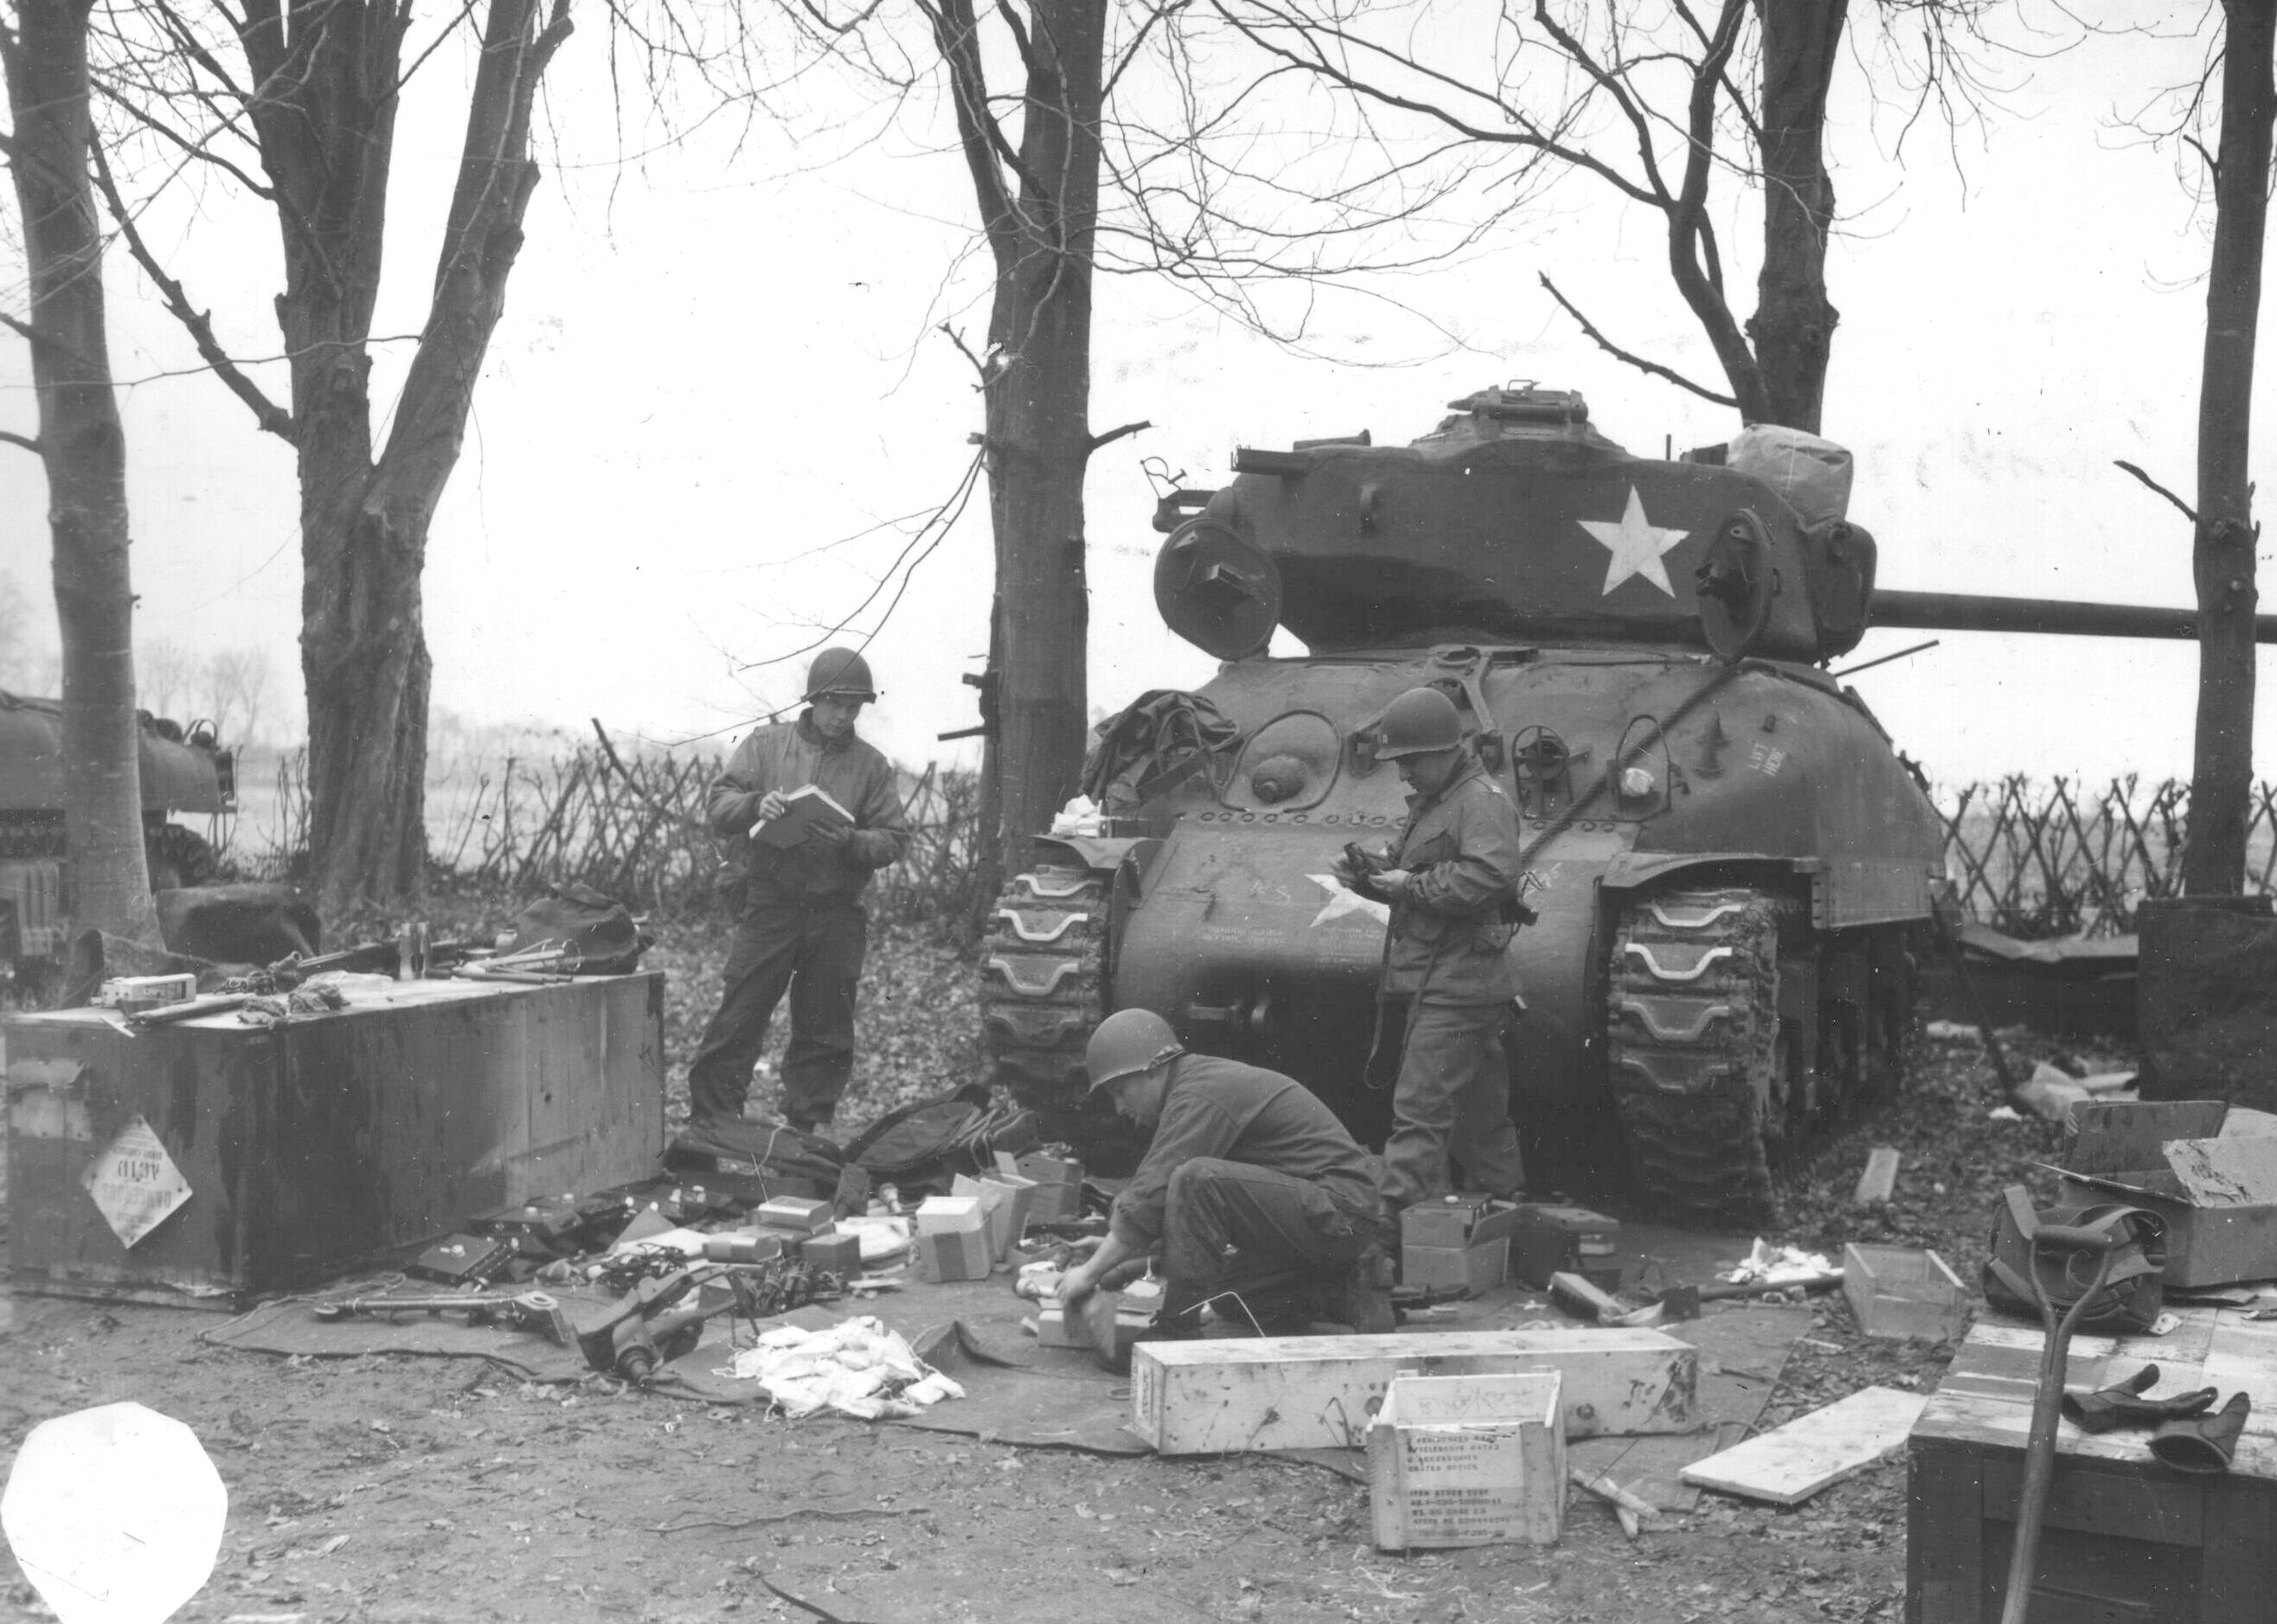
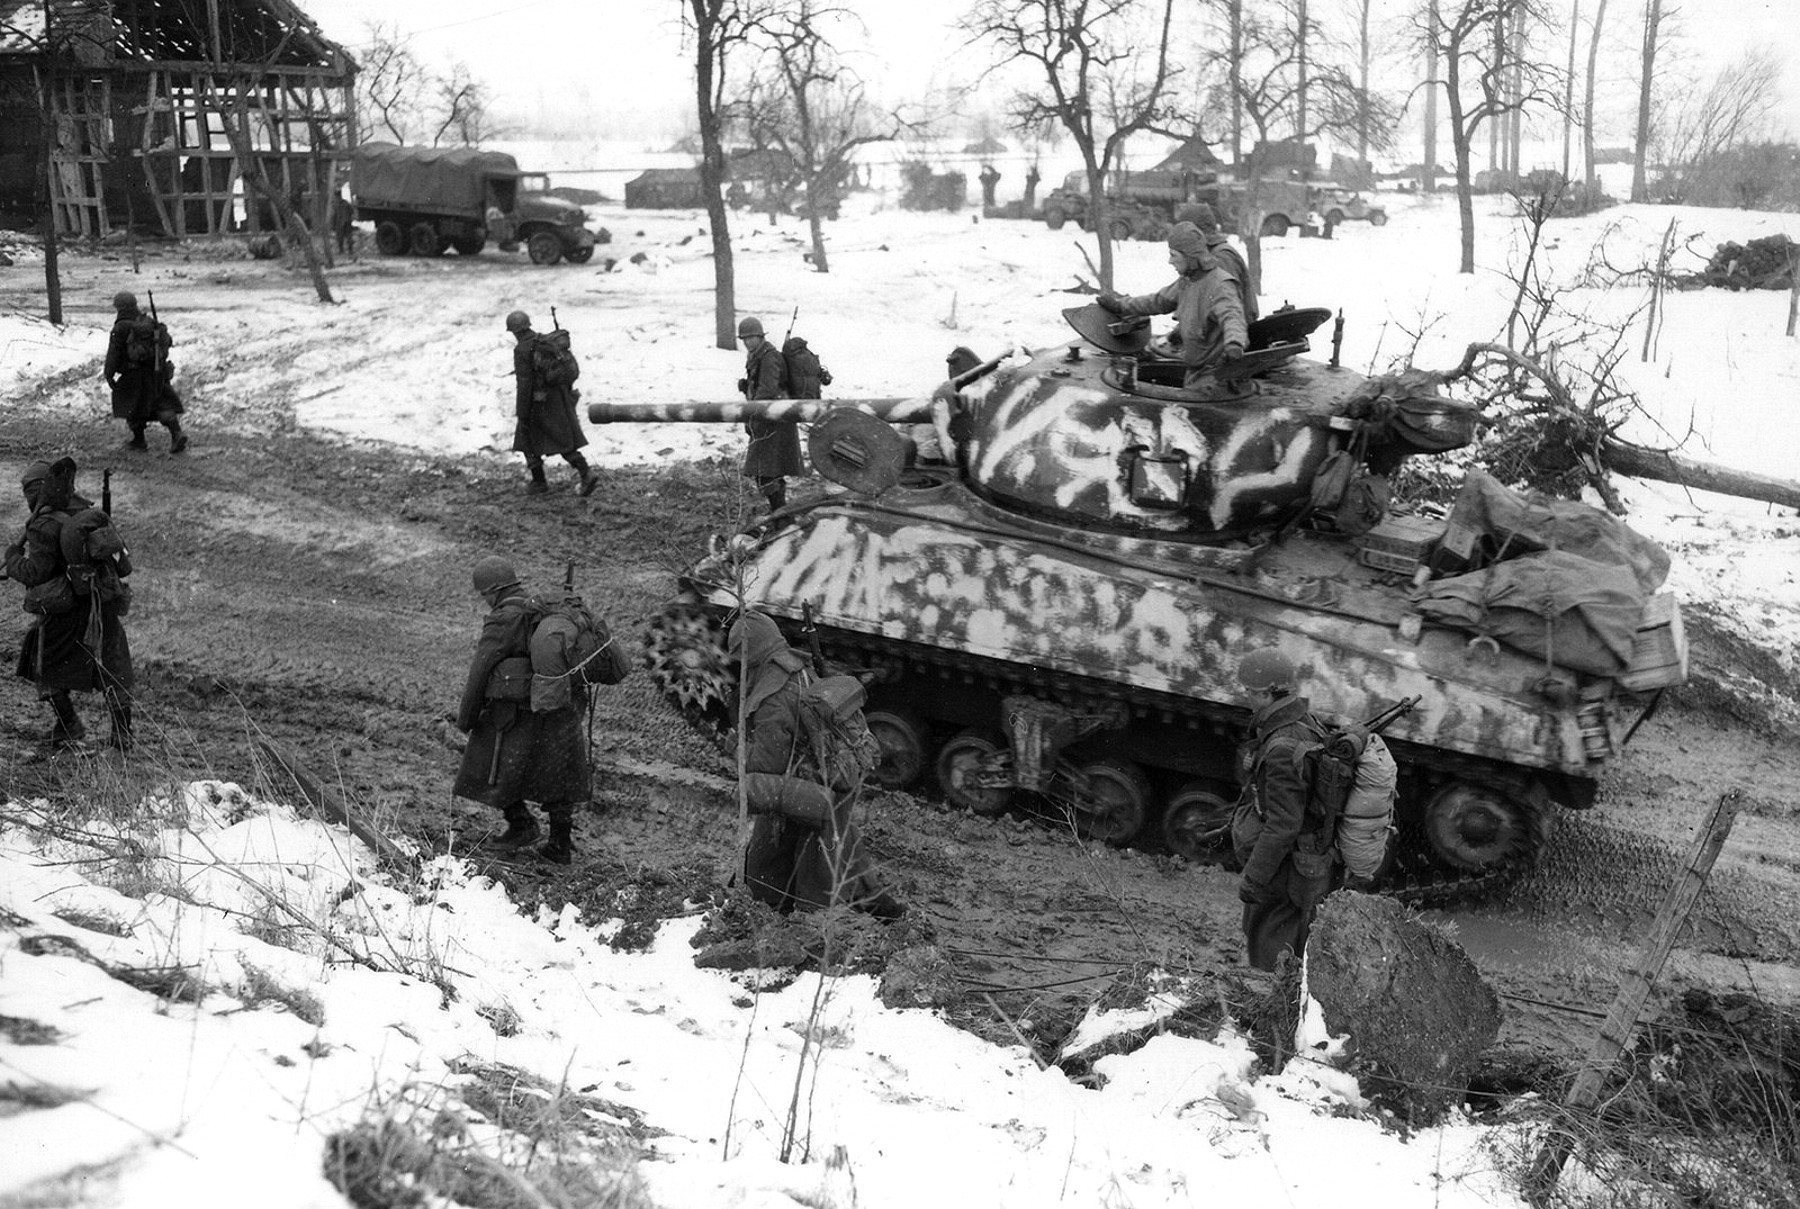
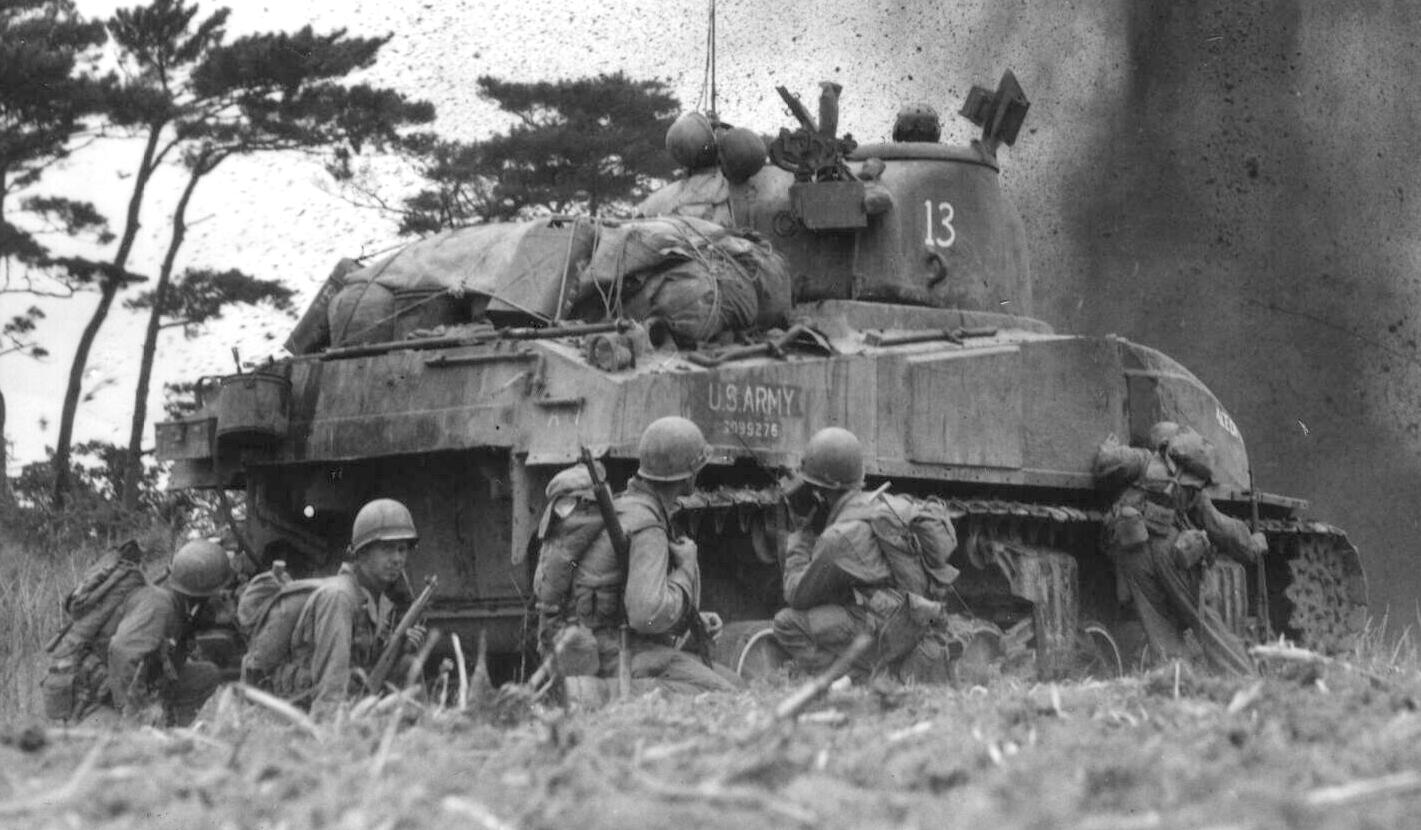
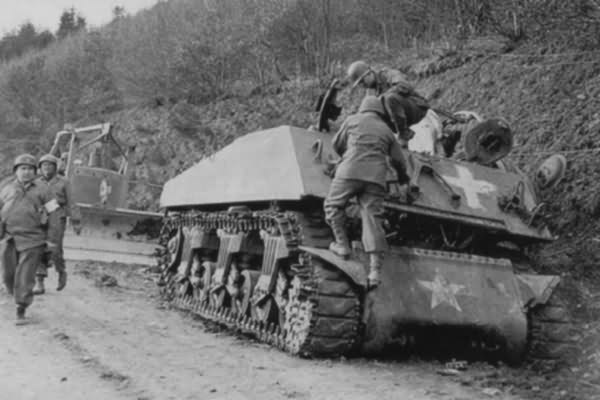
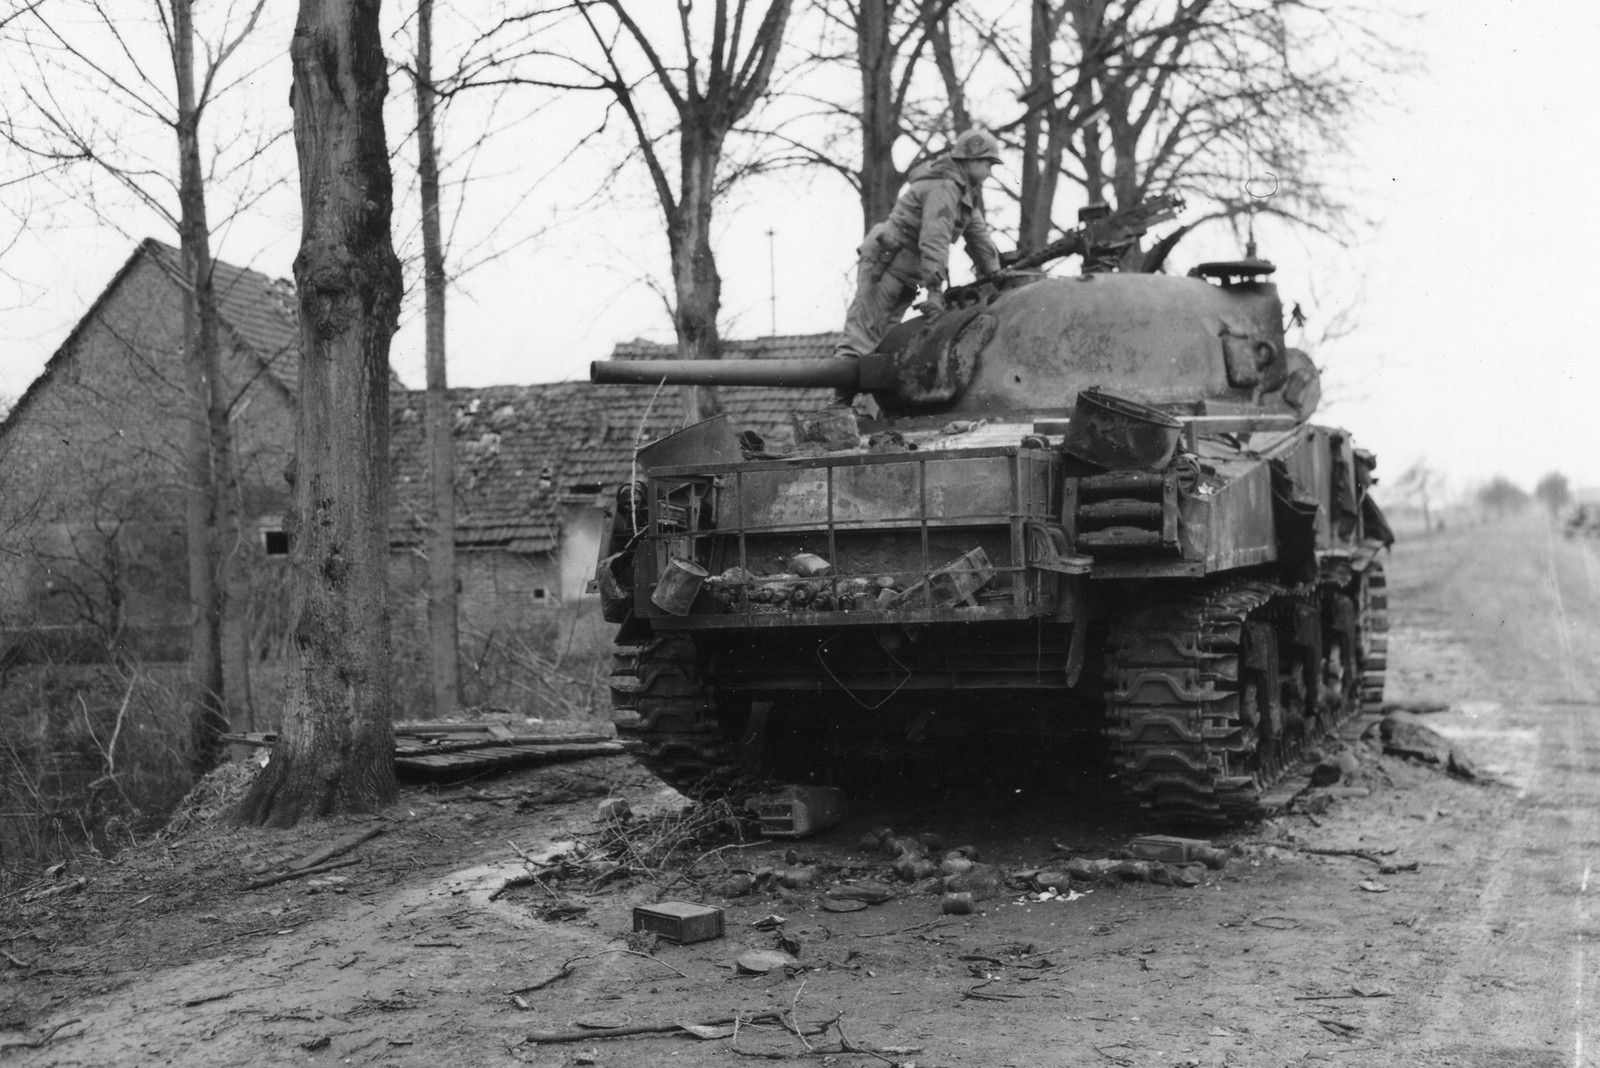
So, when all is said and done, if you take into account each round of ammo, a Sherman has nearly 8600 items packed into or onto it, officially. Granted, 7500 of that number is ammo, that still leaves 1100 items stored in or on the tank the crew had to keep track of and I’m sure I didn’t take some things into account. You also have to think about all the personal gear the crew would have stuff in and on the tank. Anything they didn’t want shot or possible stolen had to be stored inside, even with all the official stuff in the tank, the crew would find places to stuff their most valuable personal things. Less valuable things, like their uniforms and anything they decided to keep that couldn’t fit, was all hung outside. If you look at late war pictures of Shermans, they are covered in stuff tied down on their rear decks. It’s no secret US troops were fond of taking souvenirs, and it got pretty rampant once they got into Germany.
Sources: Hunnicutt’s Sherman, TM9-752, TM9-731G, TM9-759, TM9-731B, TM9-754, TM9-750, TM9-748, TM9-745


