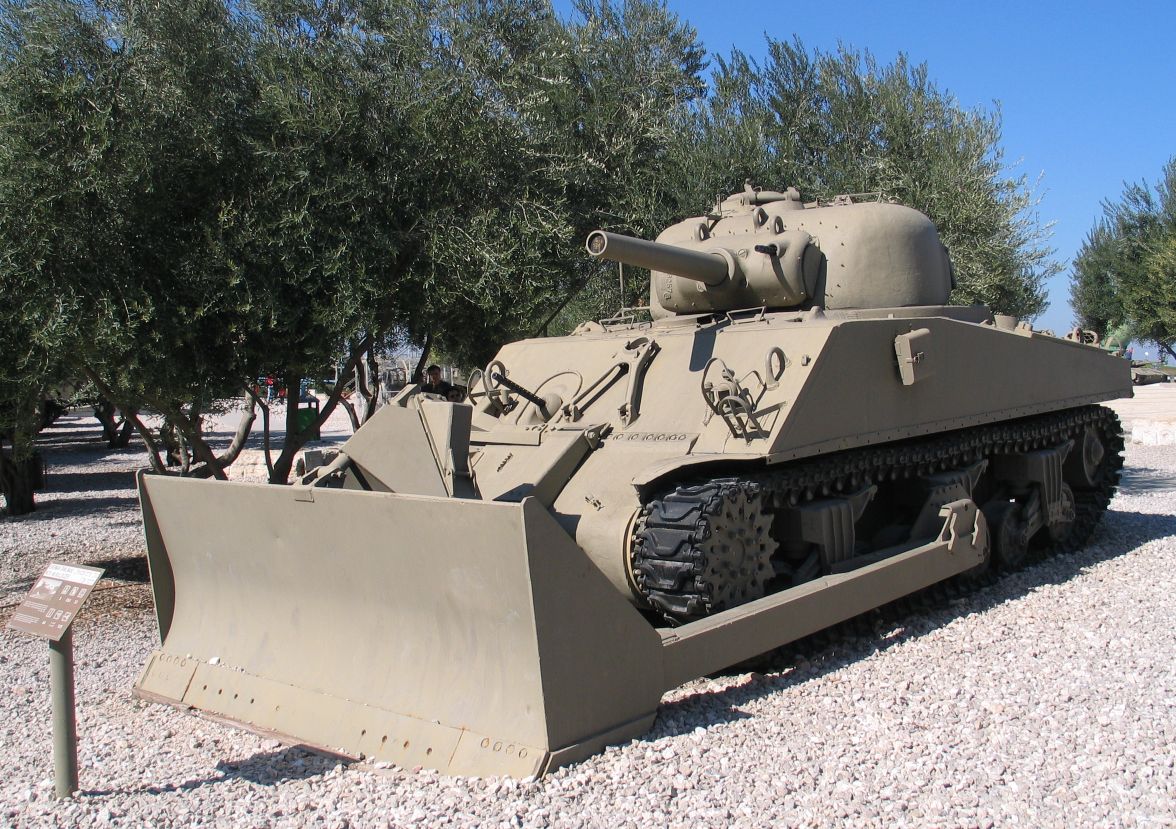
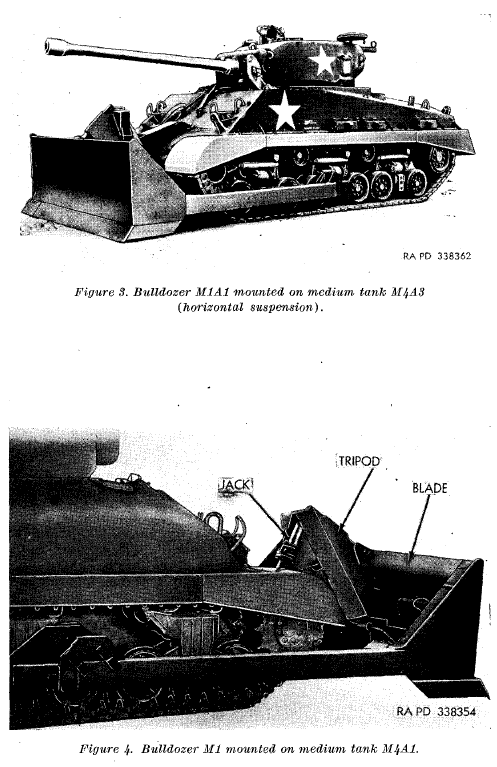
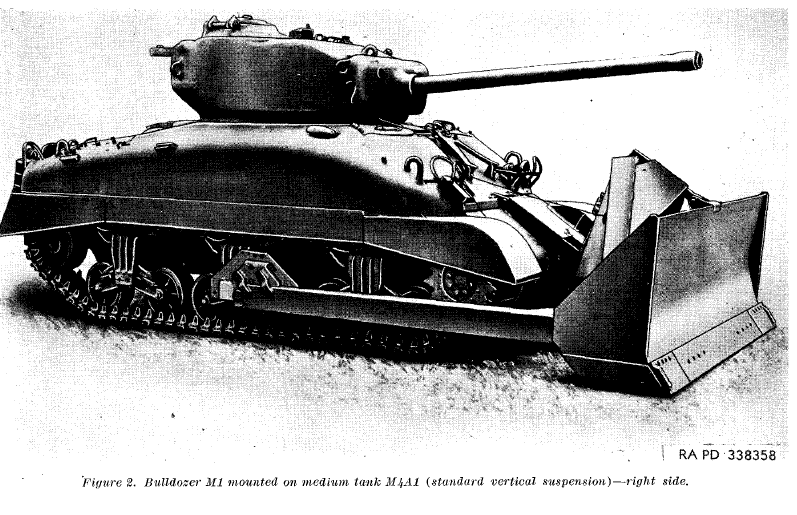
Dozers: Turn Your Tank Into A Bulldozer!
This dozer blade came in kit form and could be installed on any Sherman. They came two to a crate, an M1 and an M1A1 each per crate. The difference between a M1 and an M1A1 Dozer blade was pretty minor, and an M1A1 dozer blade was universal, but the M1 blade only worked on Shermans with VVSS. This is because the M1A1 blade was wider. Here is some data on the blades. The reason the wider blade worked on the narrower VVSS tanks was because the kit came with spacers to fill the gap left by the wider A1 blade when used on a VVSS tank.
Blade Data
Blade Height: —————————————————————————————-48 inches
Overall width M1:———————————————————————————124 inches
Overall width M1A1:——————————————————————————138 inches
Added weight to tank M1:————————————————————————-7100 lbs.
Added weight to tank M1A1:———————————————————————-7400 lbs.
Lift height of blade M1:———————————————————————18 to 30 inches
Lift height of blade M1A1:——————————————————————18 to 42 inches
Lift Load, M1:——————————————————————————————- 4000lbs
Lift Load M1A1:—————————————————————————————–5000lbs
The TM for the kit makes it sound like it was installed on tanks at the Depot Level and then the tank was issued to a unit with the blade kit installed and ready to go. After reading through the tech manual, it could be done by the tank crew without to much trouble, though a small crane would be nice for the installation of the hydraulic cylinder, but that seems like it would be a rare occurrence. If the kit had a drawback, it was that the blade blocked the bow Machine gun.
 –
–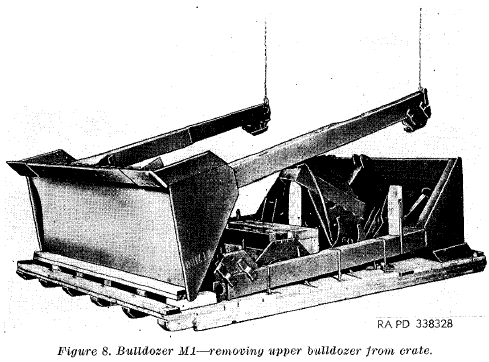
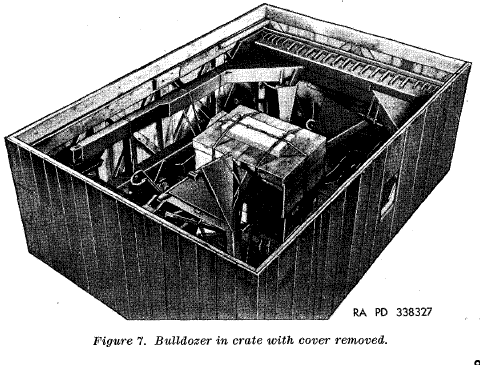
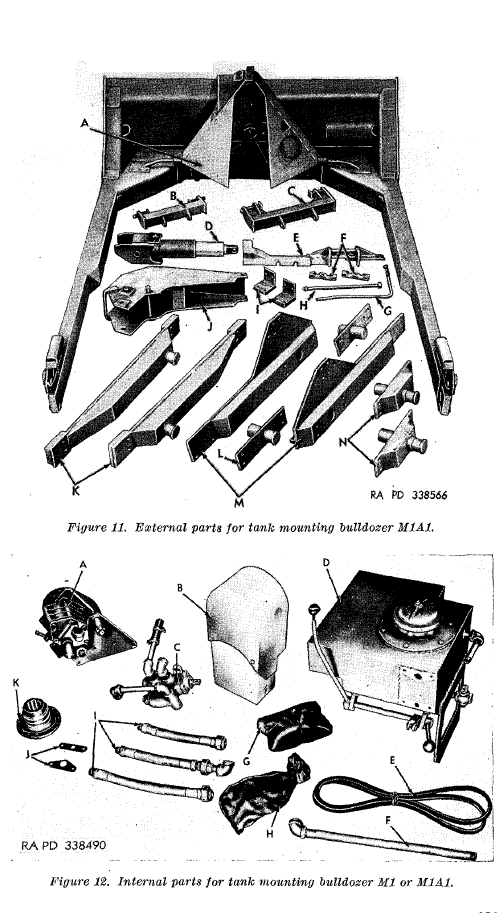
The kit broke down into several major parts groups.
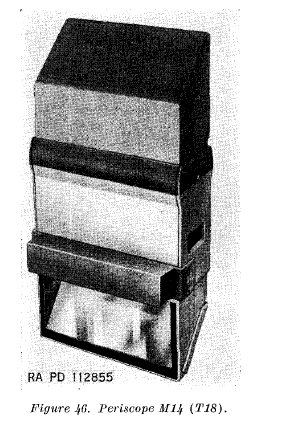
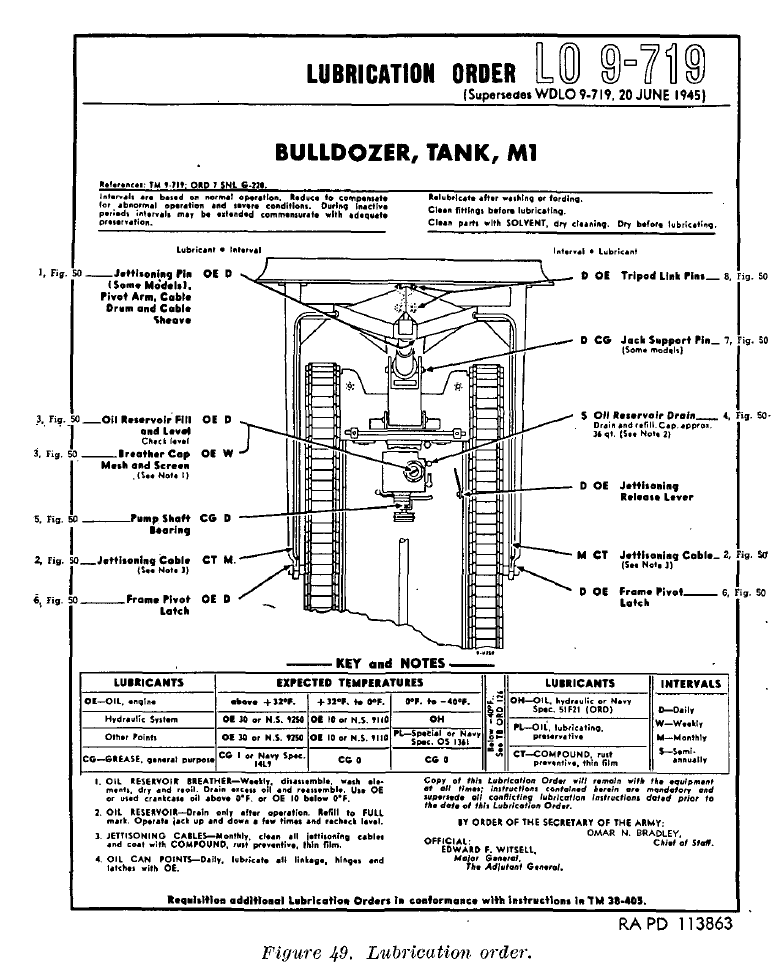
Hydraulic Group: Was made up from external and internal parts that were a part of the Hydraulic system including the pump, an oil reservoir, and all the brackets to install these parts. There were also hoses and fasteners of various types. It also included a special wide angle periscope for the driver. Once
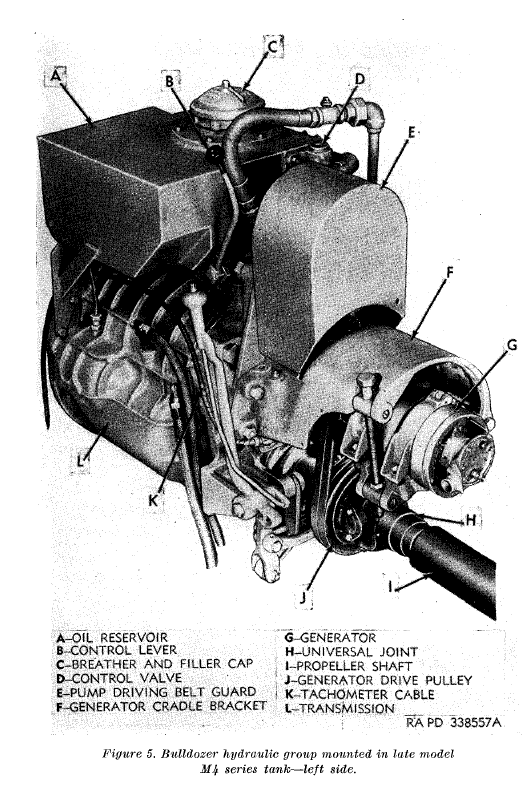
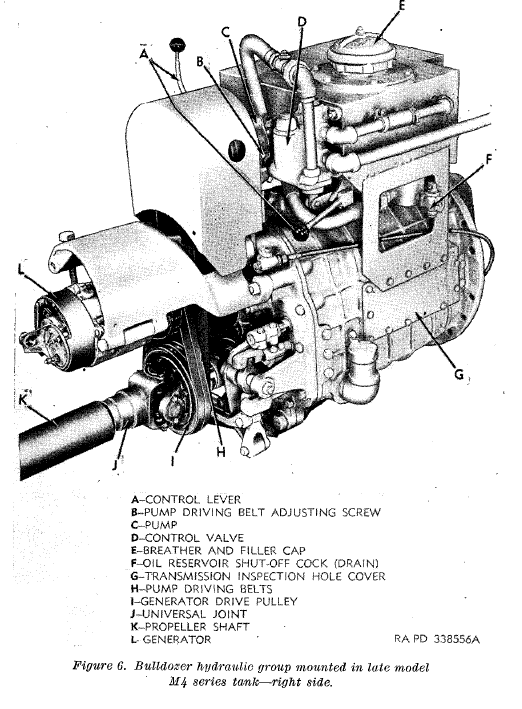

To install these parts a few things had to be removed from the interior. As this pictures show, the pump and tank assembly was fairly large. Essentially the tray for the spare periscope head box and the box had to be removed. The several brackets and guards had to be removed, and then the generator itself and its mount had to be pulled. It also involves disconnecting the transmission side of the propeller shaft, and installing a new pulley on it to run the hydraulic pump from. Once everything was installed, it did not impede the crew any more than when it wasn’t there since nothing took up the space right above the transmission.
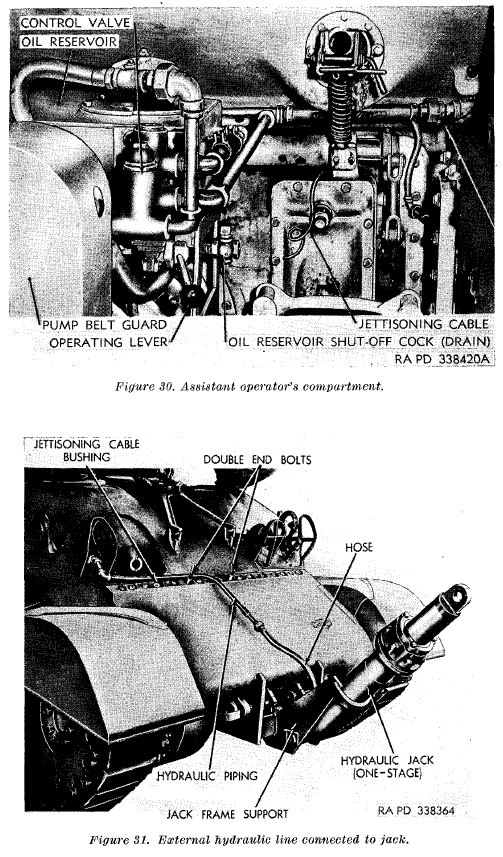
A few parts from the hydraulic group did get installed outside the tank, the hydraulic hose, run through the left headlight mount. A guard for the hose and a cable running from a handle on the inside, used to jettison the blade in an emergency. All these parts are universal to all models of Sherman, though a few brackets could require a little modification for everything to fit right do to the way some hoses and belts were run.
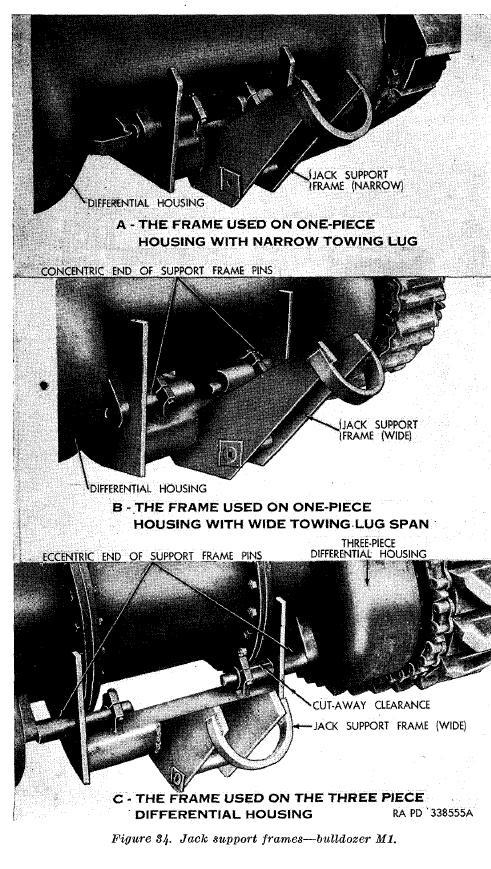
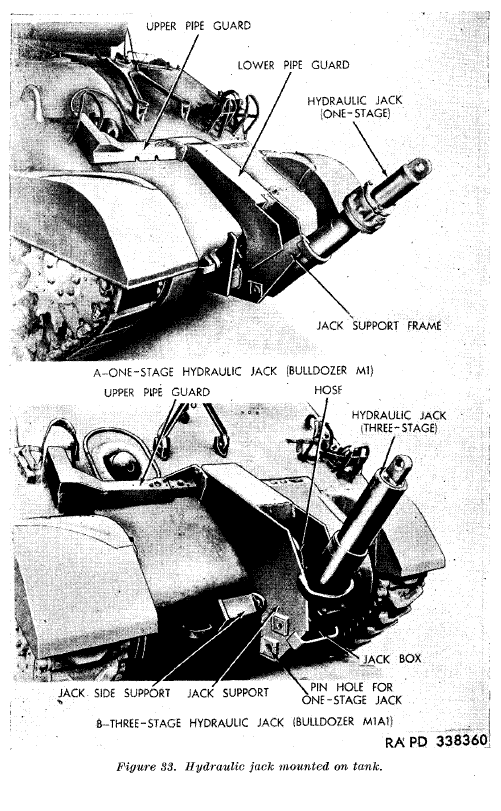
The hydraulic jack and the framework attacking it to the tanks tow points on the front of the tank are also in the hydraulic group. There were several bracket sets for use with the different kinds of differential housing the tanks could have. There was a cover assembly/bracket to protect the mount, and hoses, and help position the jack
 –
–
Suspension Mounting Bracket Group: This group used already existing bolt holes in the suspension to make installation easier. Each kit came with brackets to make it work with VVSS or HVSS. The VVSS bracket could be adapted to work with either the M1 or M1A1 blades, the HVSS Brackets could only be used with M1A1 blades, because the M1A1 blade was wider to accommodate the wider HVSS. This bracket and had the pivot points for the blade.
The VVSS mounts used a replacement suspension cap built onto the blade mounting bracket, and another replacement cap with bolt holes. Another part of the vertical suspension mounting bracket bolted to the unused return roller holes on the middle boggie assembly, the same one that used the built in replacement caps. The replacement cap with extra bolt holes replaced the cap in the front boggie assembly.
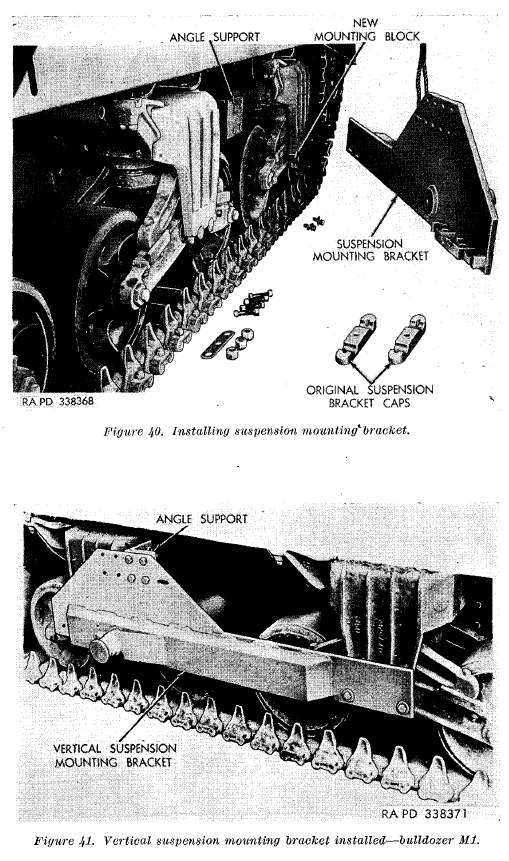
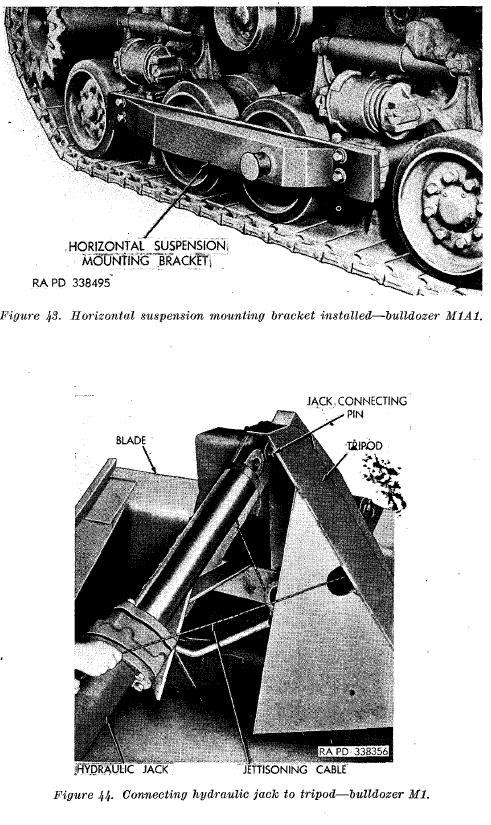
The HVSS mounts were simpler. You just removed four bolts in the first and second suspension arm supports and install the horizontal suspension mounting bracket with longer bolts and lock washers. This is a much easier install than the VVSS mounts, but neither seems overly hard.
Once you have the mounting brackets on, you get to move onto the…
Bulldozer Blade Group: This group is basically the blade and it arms that mount to the pivot points on the suspension brackets. This part of the job is where you could really lose fingers or toes. You need a nice flat area, the area you stated in hopefully, and then you drive the tank up to the blade, careful to keep it centered. The tank stops to feet from contact with the blade, and the driver raises the jack piston to the same as the connecting pin on the Blade group.
This is a multi-person Job, since the co-driver has to hold the quick release cable, in the release position, while the tank is driven into the Jack arms pivot points, and then let the pin close on the eye on the Jack head. The co-driver, while doing this is also guiding the tank into place on the blade arms. At this point the latches on the pivot points can be locked down, a large hammer may be needed and the quick disconnect cable fed into place and loosely connected in the interior of the tank. When it’s pulled the whole assemble will come lose and can be backed out of. You can see some of this in a video in the Shermans in motion section.
The final step would be installing the M14 periscope in the drivers position, filling the system with fluids and testing it out. The system was easy to use, and had dual controls, so the co-driver could operate the blade if the driver really needed both hands. The controls were a simple lever used to raise and lower the blade, raising it by hydraulic pressure, lowering it by cutting the hydro pressure and letting the weight of the blade bring it down. Removing the blade was as simple as pulling the quick release cable. If you planted the blade in the ground just right before release, so it wouldn’t move, you could drive the tank right back up to it, hammer the pivot point latches in place, put the pin in the jack and go.
I have to say this is a very impressive kit. It did make the tank a bit front heavy and probably shortened the life of the front springs, it was not a problem in any real way or the Army would have had modifications made to solve these problems. This kit saw prolific use with the US Army and Marines, and since it worked on any Sherman model, probably everyone else who used Shermans and could get their hands on it. This dozer kit was the most effective way of punching through hedgerows as well, working much better than the dedicated hedge row cutters. A tank company would get one dozer blade equipped tank into the HQ platoon, if there were enough kits to go around. There might be another one in the Battalion HQ platoon.
This report covers all the armored funnies, or specialty vehicles from Hedgerow cutters, DD tanks, and Crab modifications. Our interest from this article is the feedback on the Dozer blade setup.
This was the feedback on its combat use:
The tank dozer was employed extensively for numerous purposes commencing immediately after D-Day. Some of the missions for which the tank dozer was employed in the European Theater are outlined below:
(1) Shortly after D-Day a platoon of four tank dozers of the 741st Tank Battalion operating on the beaches under intense fire, removed beach obstacles, opened roads and pushed off beached landing vehicles.4
(2) The tank dozer was used to break through hedgerows, broaden existing gaps and gaps blown with explosive charges; and thereby facilitated the use of other than normal entrances through hedgerows.5
(3) Tank and gun emplacements were prepared.
(4) Roadblocks were cleared; and in addition, rubble, wrecked vehicles, and snow were removed, and craters filled. It was found necessary in many instances to provide a tank dozer for these purposes to work in conjunction with the roller type mine exploders in sweeping roads and shoulders.
(5) In connection with the Roer and Rhine River operations, bridge approaches were built, launching sites for LCM’s and LCVP’s and crane sites were prepared, and cuts dozed in the river dikes.
The Tank Dozer has the following merits and deficiencies:
(1) Merits:
(a) The tank dozer provides armored units with a standard vehicle that can be readily employed to reduce obstacles and assist in the advance of units or to assist in the preparation of defensive positions.
(b) Armor protection is provided for the crew.
(c) The tank dozer can also be employed as a fighter tank.
(d) The tank dozer installation is simple, reliable, and its maintenance demands are negligible.
(2) Deficiencies:
(a) The tank dozer installation overloads the front of the tank suspension system and increases bogie tire failures and suspension maintenance demands.
(b) The tank dozer installation materially limits the driver’s field of vision.
(c) There is insufficient clearance between the track and dozer blade arm to ensure safe operation with the addition of the standard 3-5/8 inch track extended end connectors.
(d) Sufficient dozer blade accessories were not available so that dozer blades salvaged from burned tanks could be readily reinstalled on other tanks.
I found this very interesting, please check out the Lone Sentry Web site, it’s a very informative place.
The source for this post was almost exclusively Tech Manual 9-719 Tank Mounting Bulldozer (M1 and M1A1). The TM can be found in our download section and the report on the lone Sentry.
Here’s a video from the army on how to install this dozer blade kit.
https://drive.google.com/open?id=0B5k30qNybbcZbm1HLTkwU1FUOWs